BuckyDrop
BuckyDrop Guide: Automate Shopify & WooCommerce Dropshipping
Tutorial for Shopify &
WooCommerce Sellers
Hey, cross-border e-commerce sellers! Want to achieve more with less effort and increase efficiency? Don't hesitate, start using BuckyDrop now to effortlessly manage and expand your business! BuckyDrop has prepared a user-friendly guide that provides detailed step-by-step instructions on how to connect your Shopify or WooCommerce store with BuckyDrop, select products, push products, link product sources, fulfill orders, and customize settings. By following this guide, you will master all the necessary operational skills.
Take action now and let your store thrive for even greater success!
1. Connecting Shopify Store
By connecting your Shopify store to BuckyDrop, you can fully leverage the functionalities and service advantages of BuckyDrop. This seamless integration allows you to effortlessly manage and handle various critical business processes within your store, including product management, order processing, and automation settings. By tightly connecting your store with BuckyDrop, you can liberate yourself from tedious tasks and focus wholeheartedly on the successful operation of your store.
In the BuckyDrop admin, go to Stores > Shopify and click "Connect Store".

Go to the Shopify App Store and click "Install" to install the BuckyDrop app.
![[object Object] 0](https://cdn.buckydrop.com/starit-buckydrop/media/beginner-guide/shopify-woocommerce/en/connect-shopify/02.png)
Go to the Shopify admin and click "Install app" to complete the installation process.

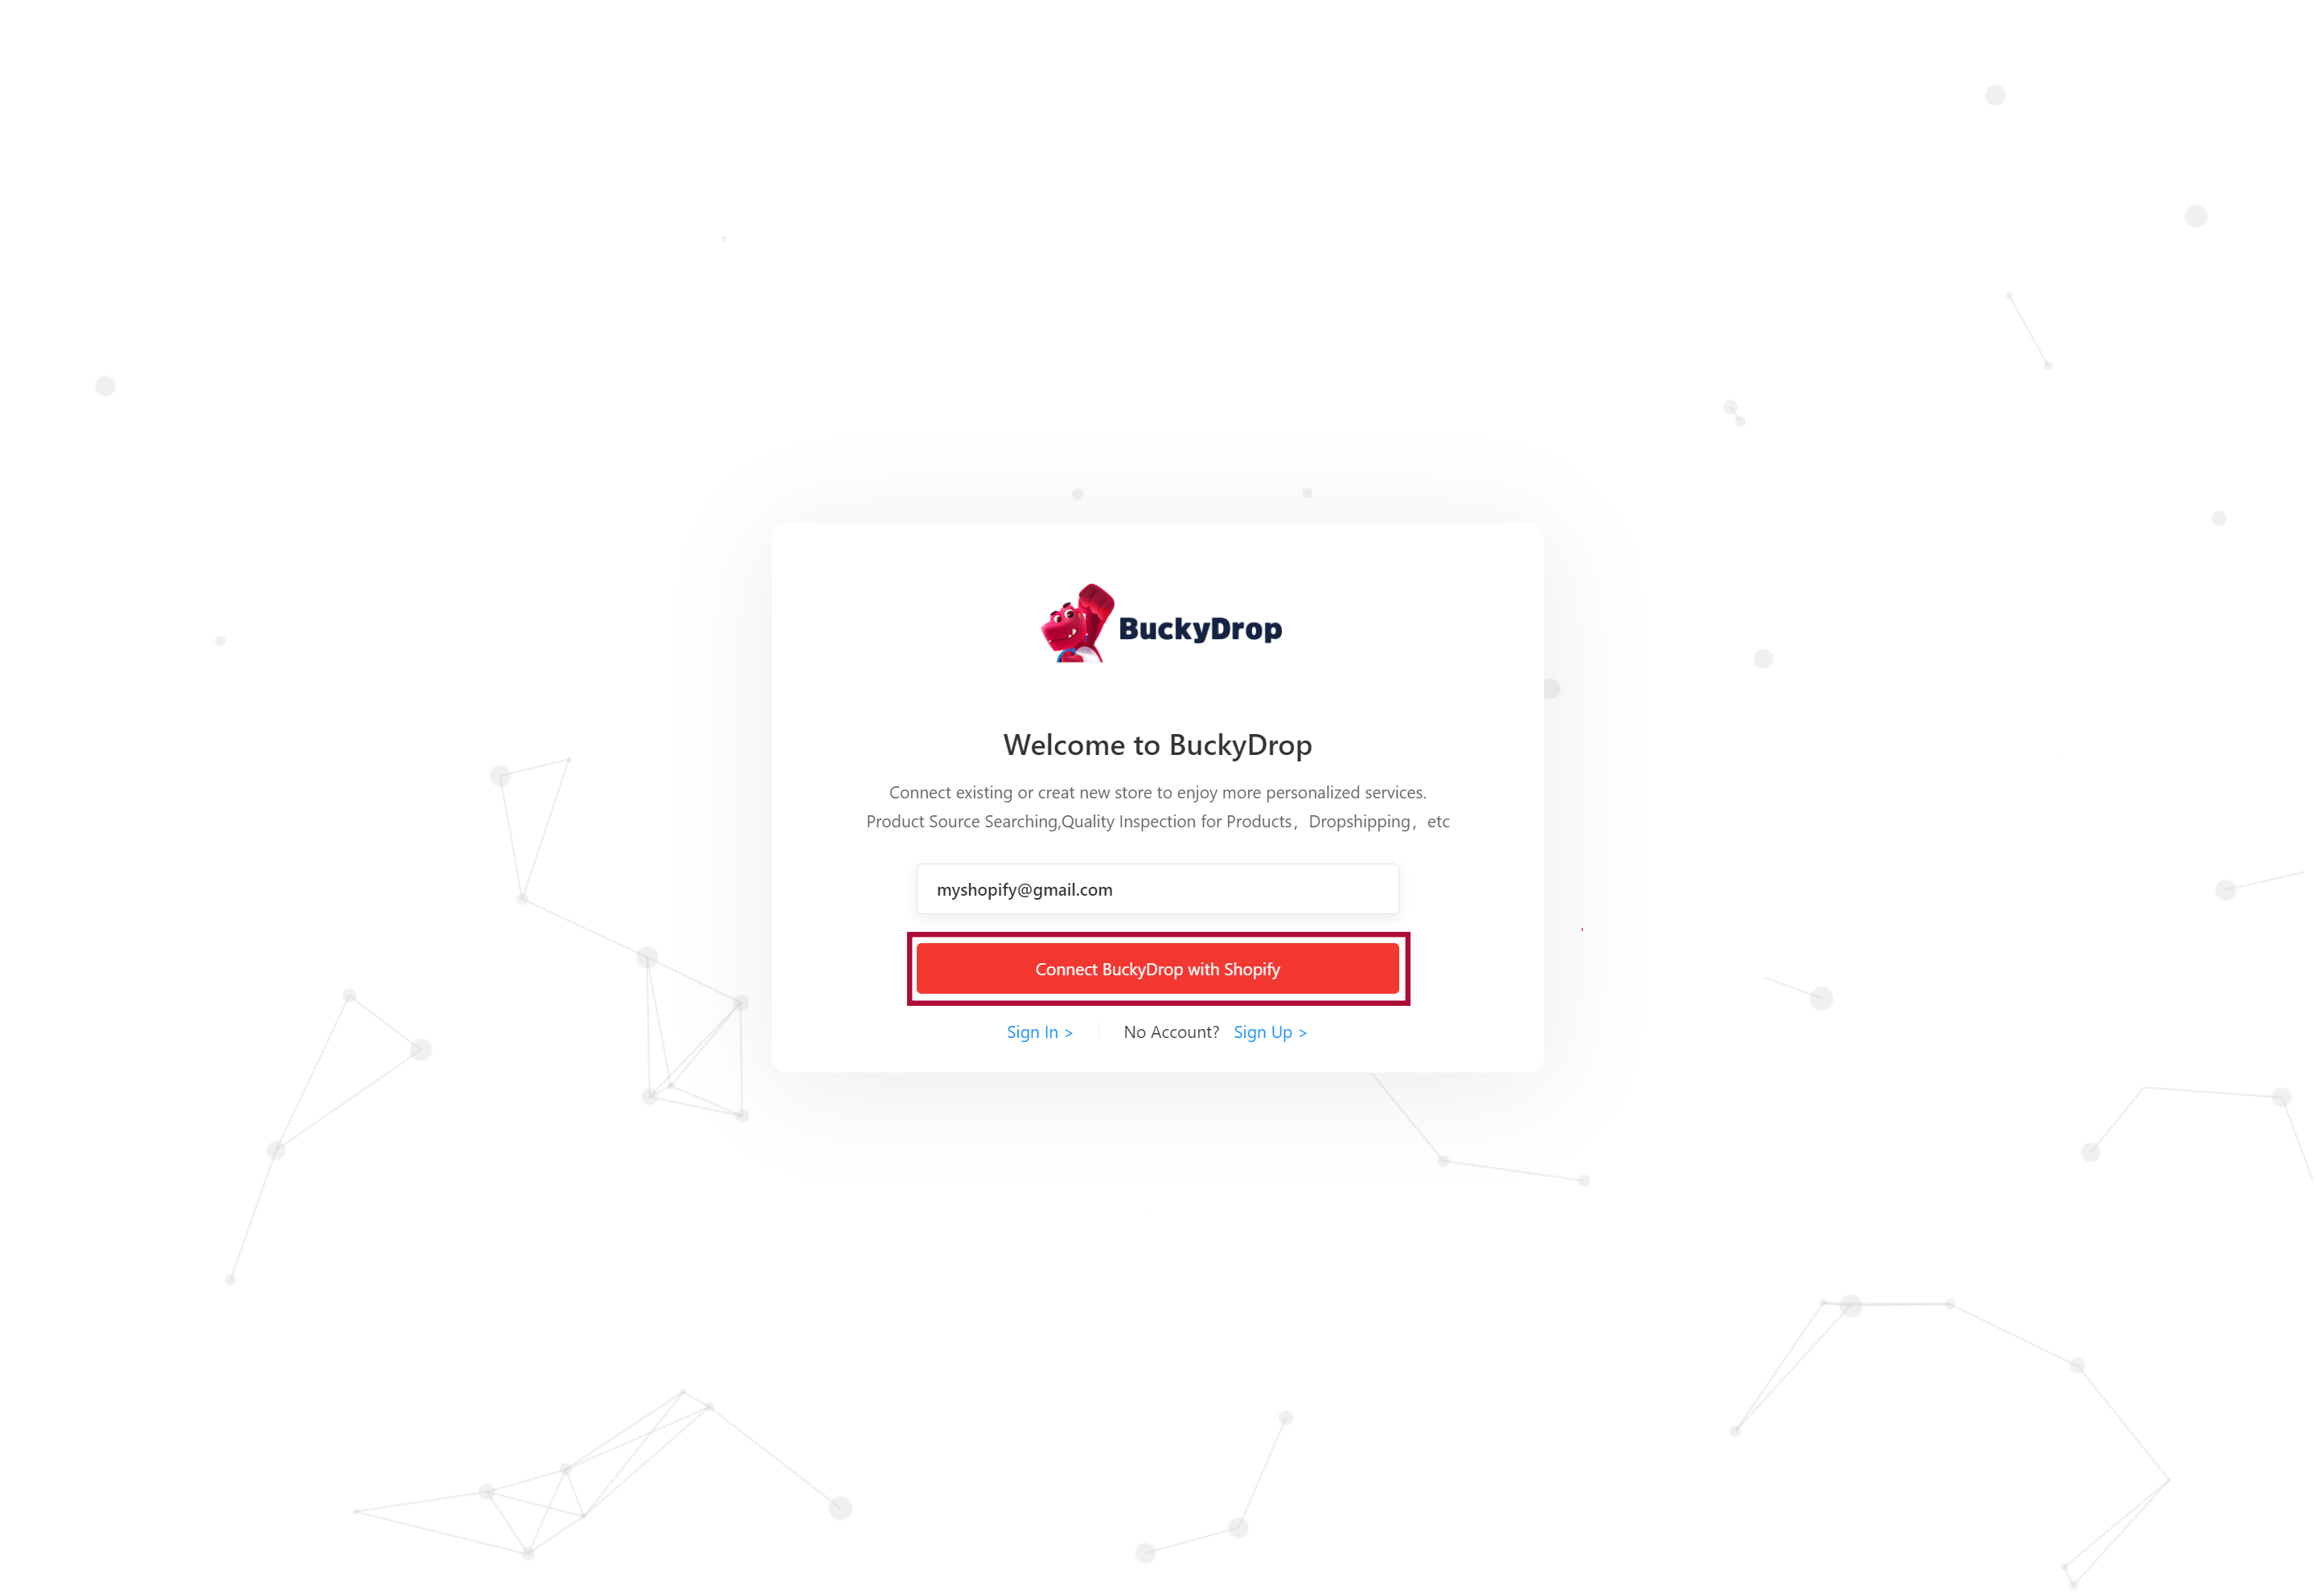
Enter your BuckyDrop account details and click "Connect BuckyDrop with Shopify".
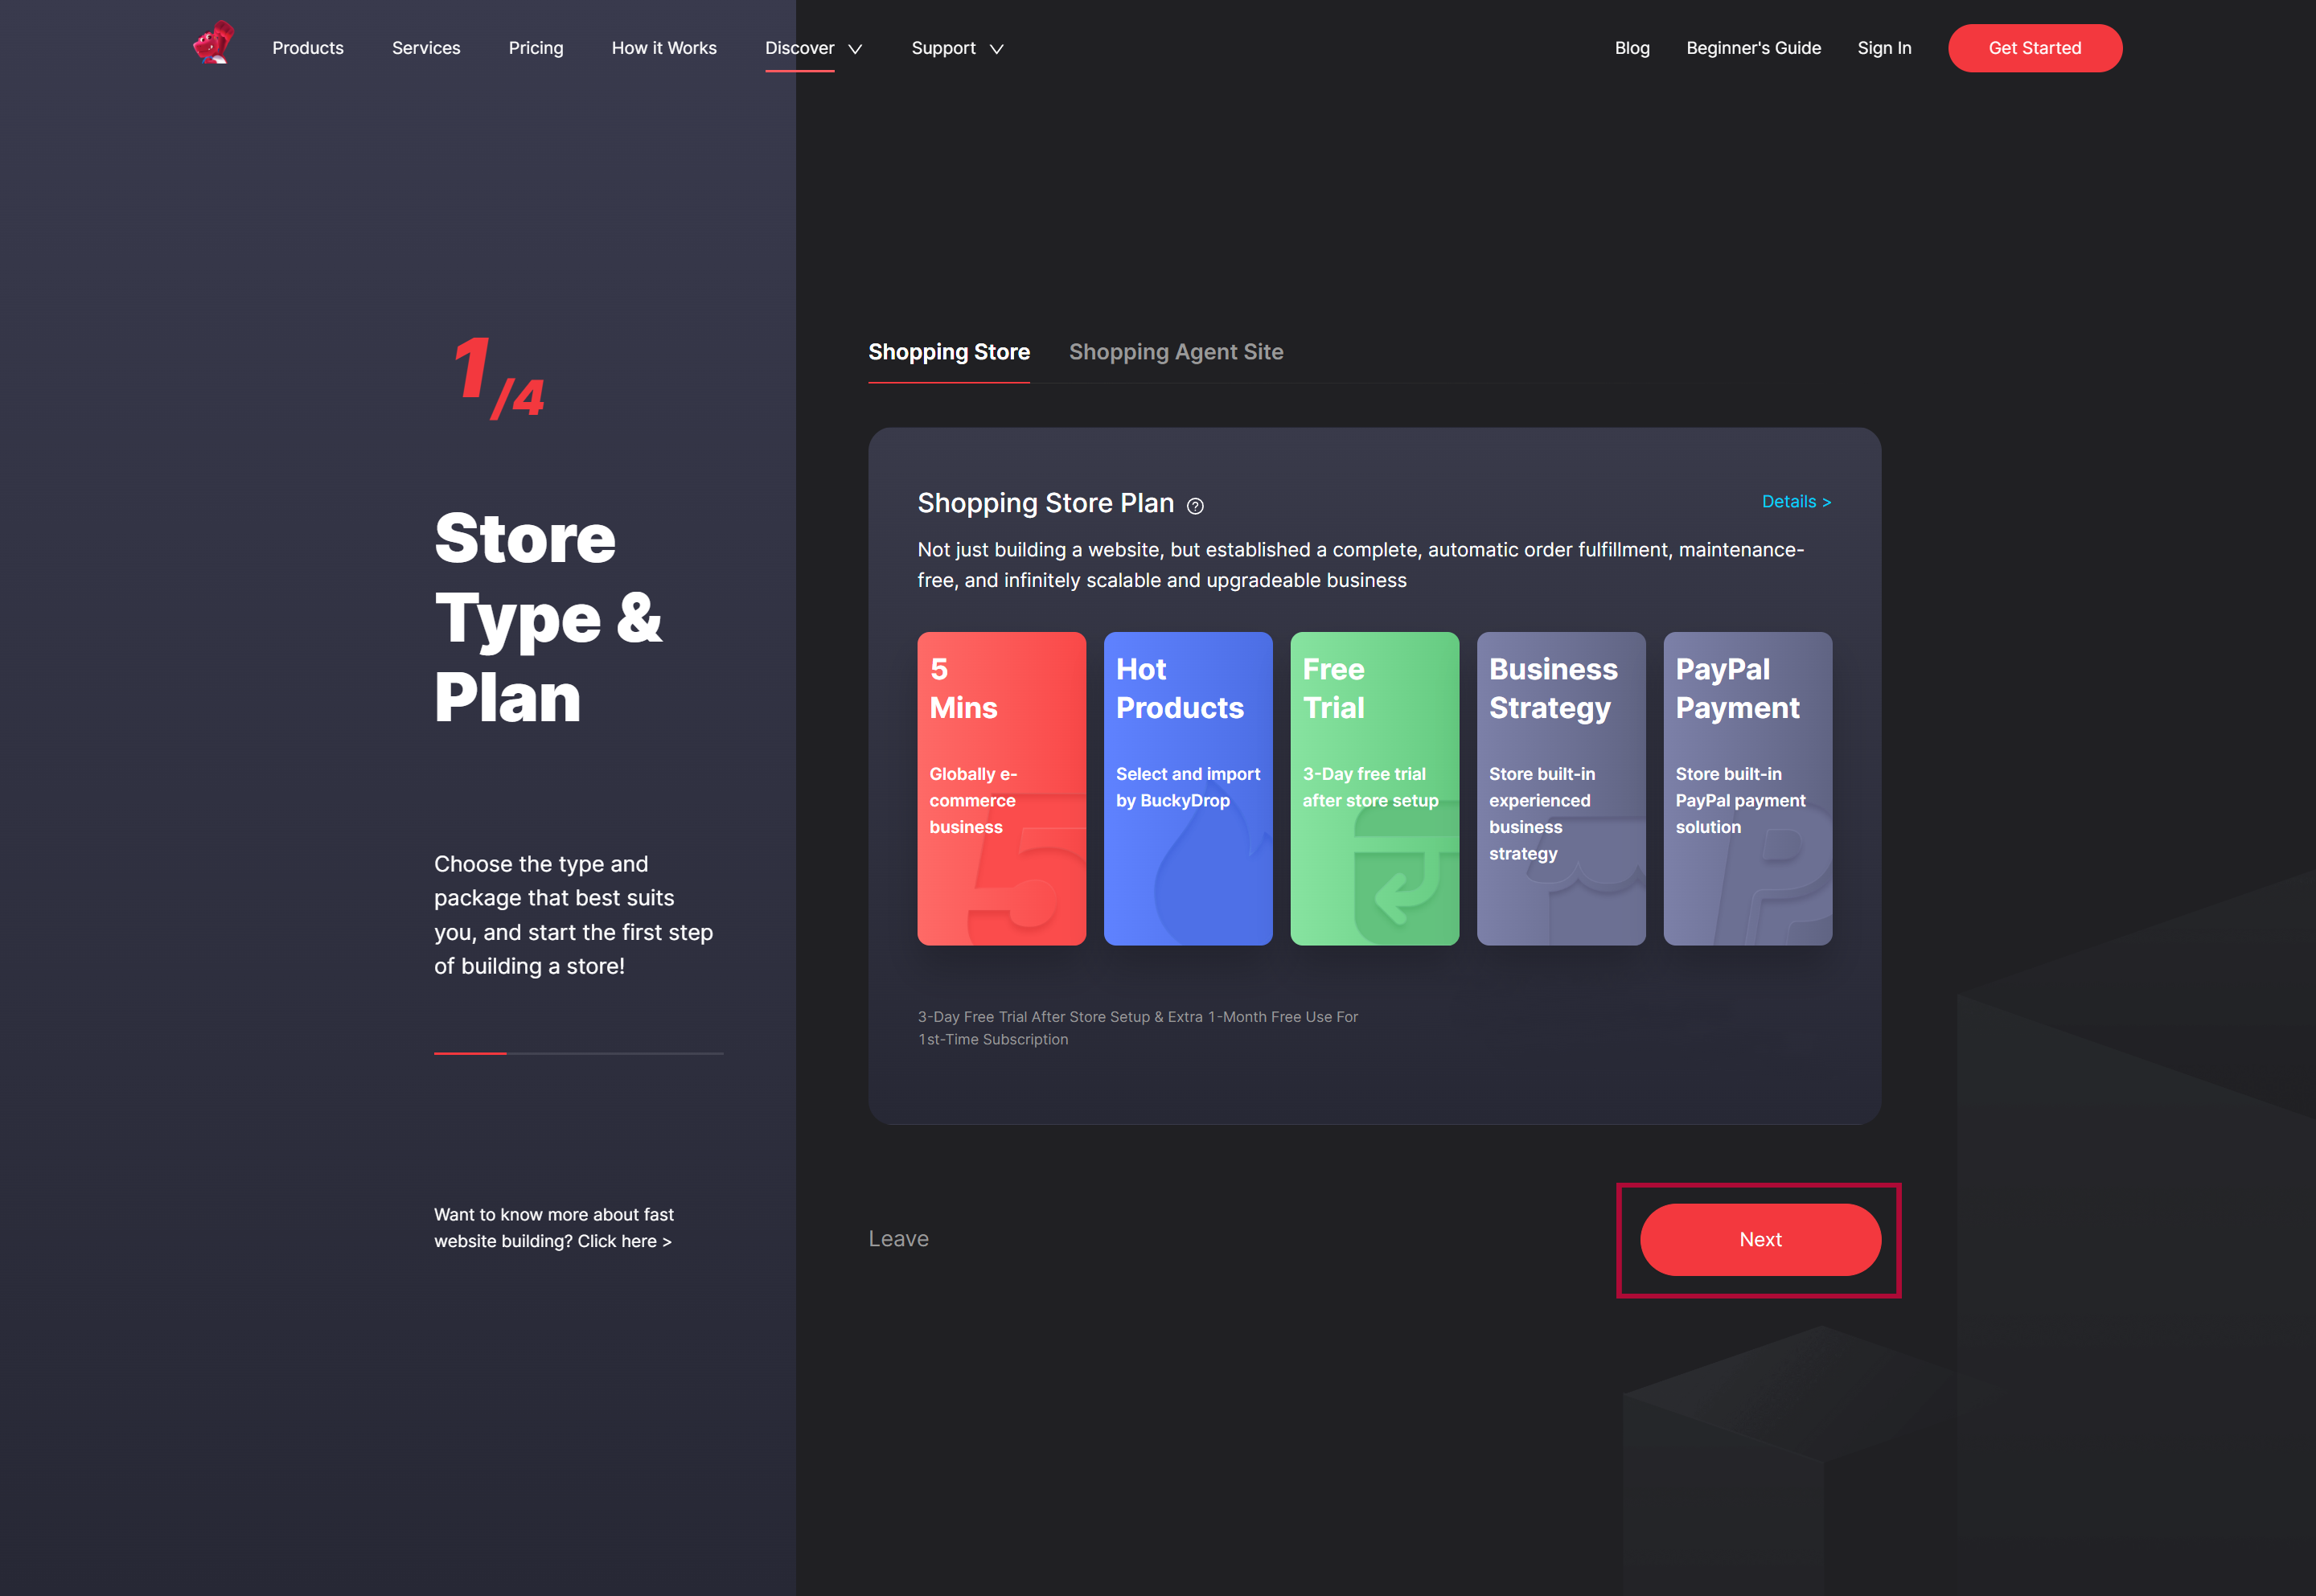
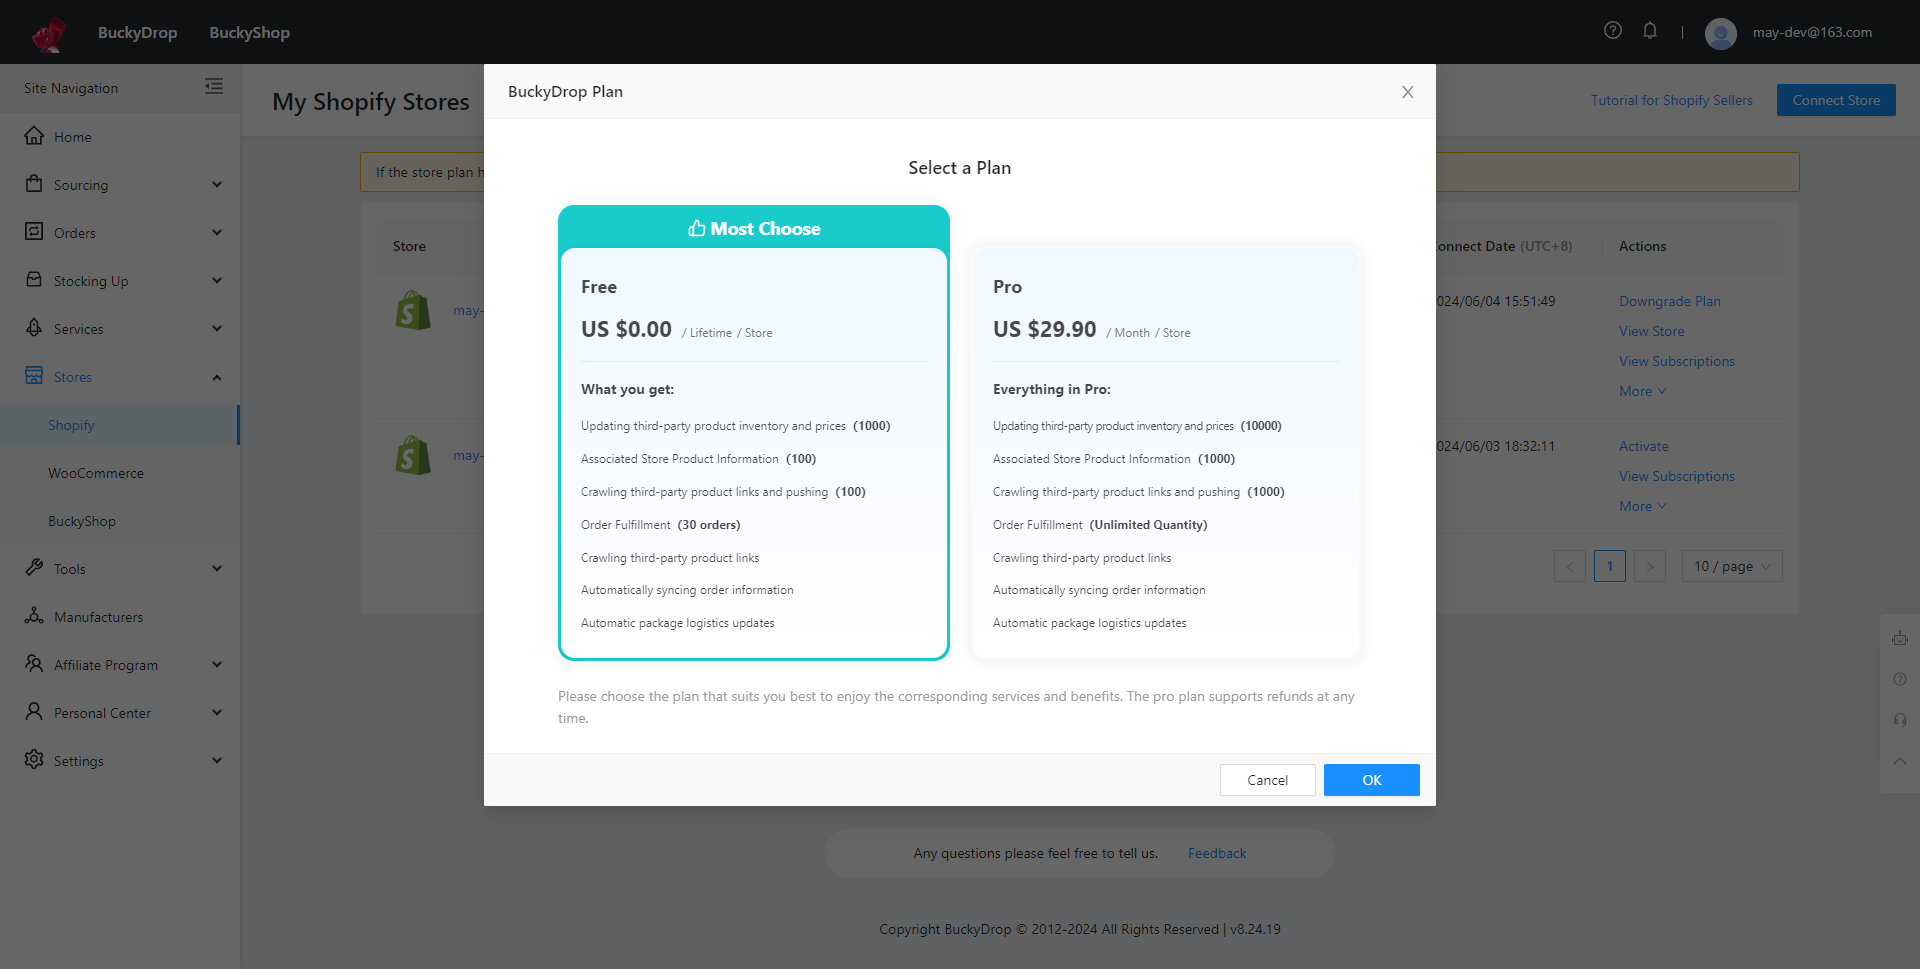
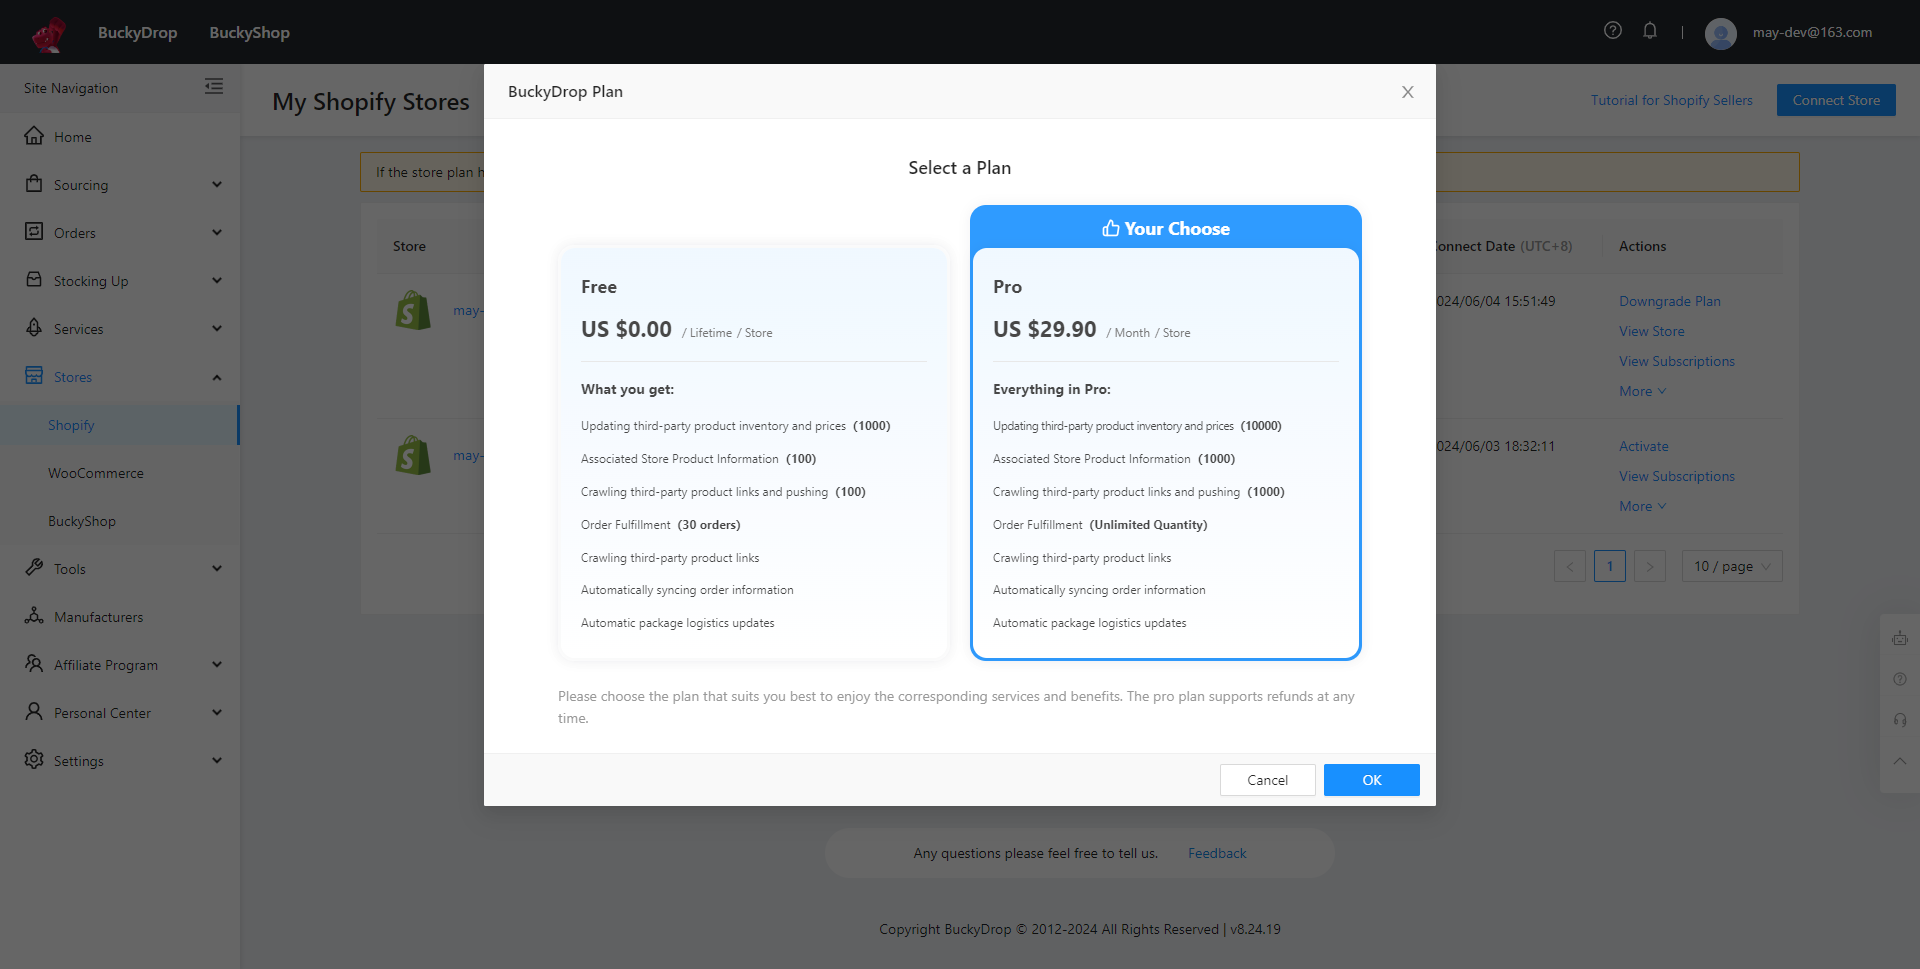
Choose the BuckyDrop plan that suits you.
If you choose the Pro Plan, you will need to go to the Shopify "Approve Subscription" page, confirm the subscription plan details, select a payment method, and click "Approve" after verifying the bill.

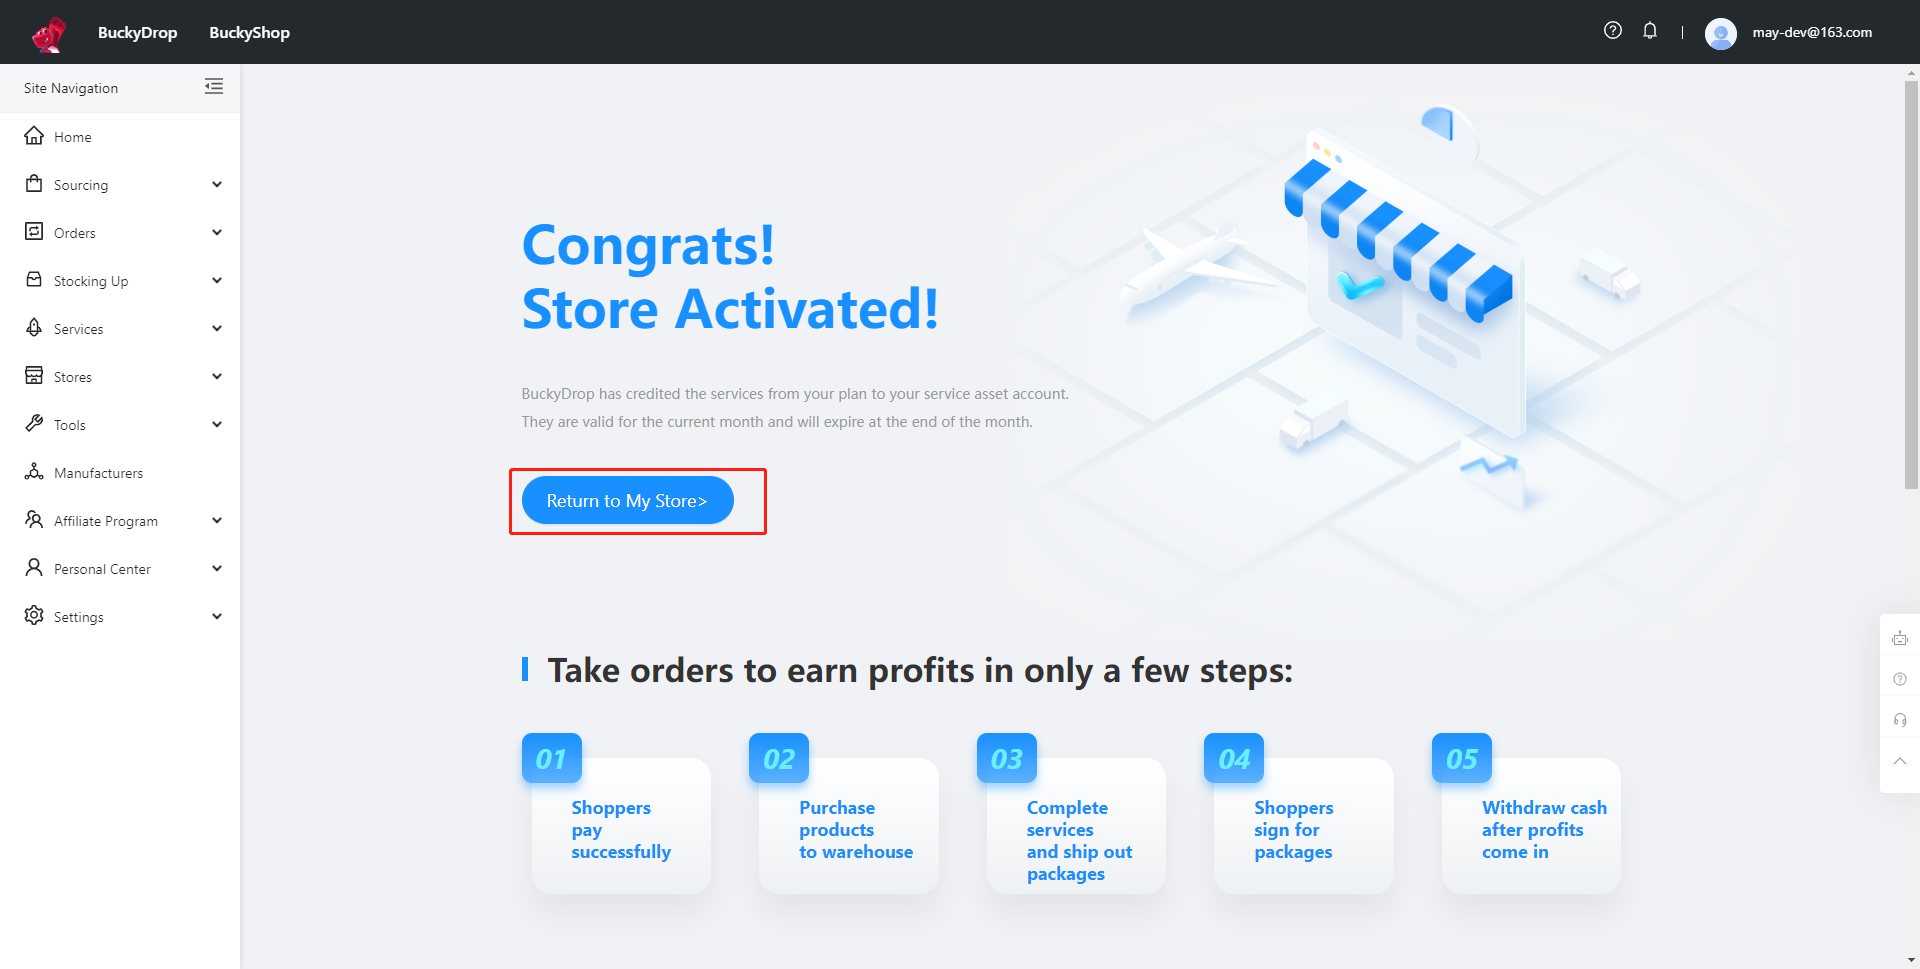
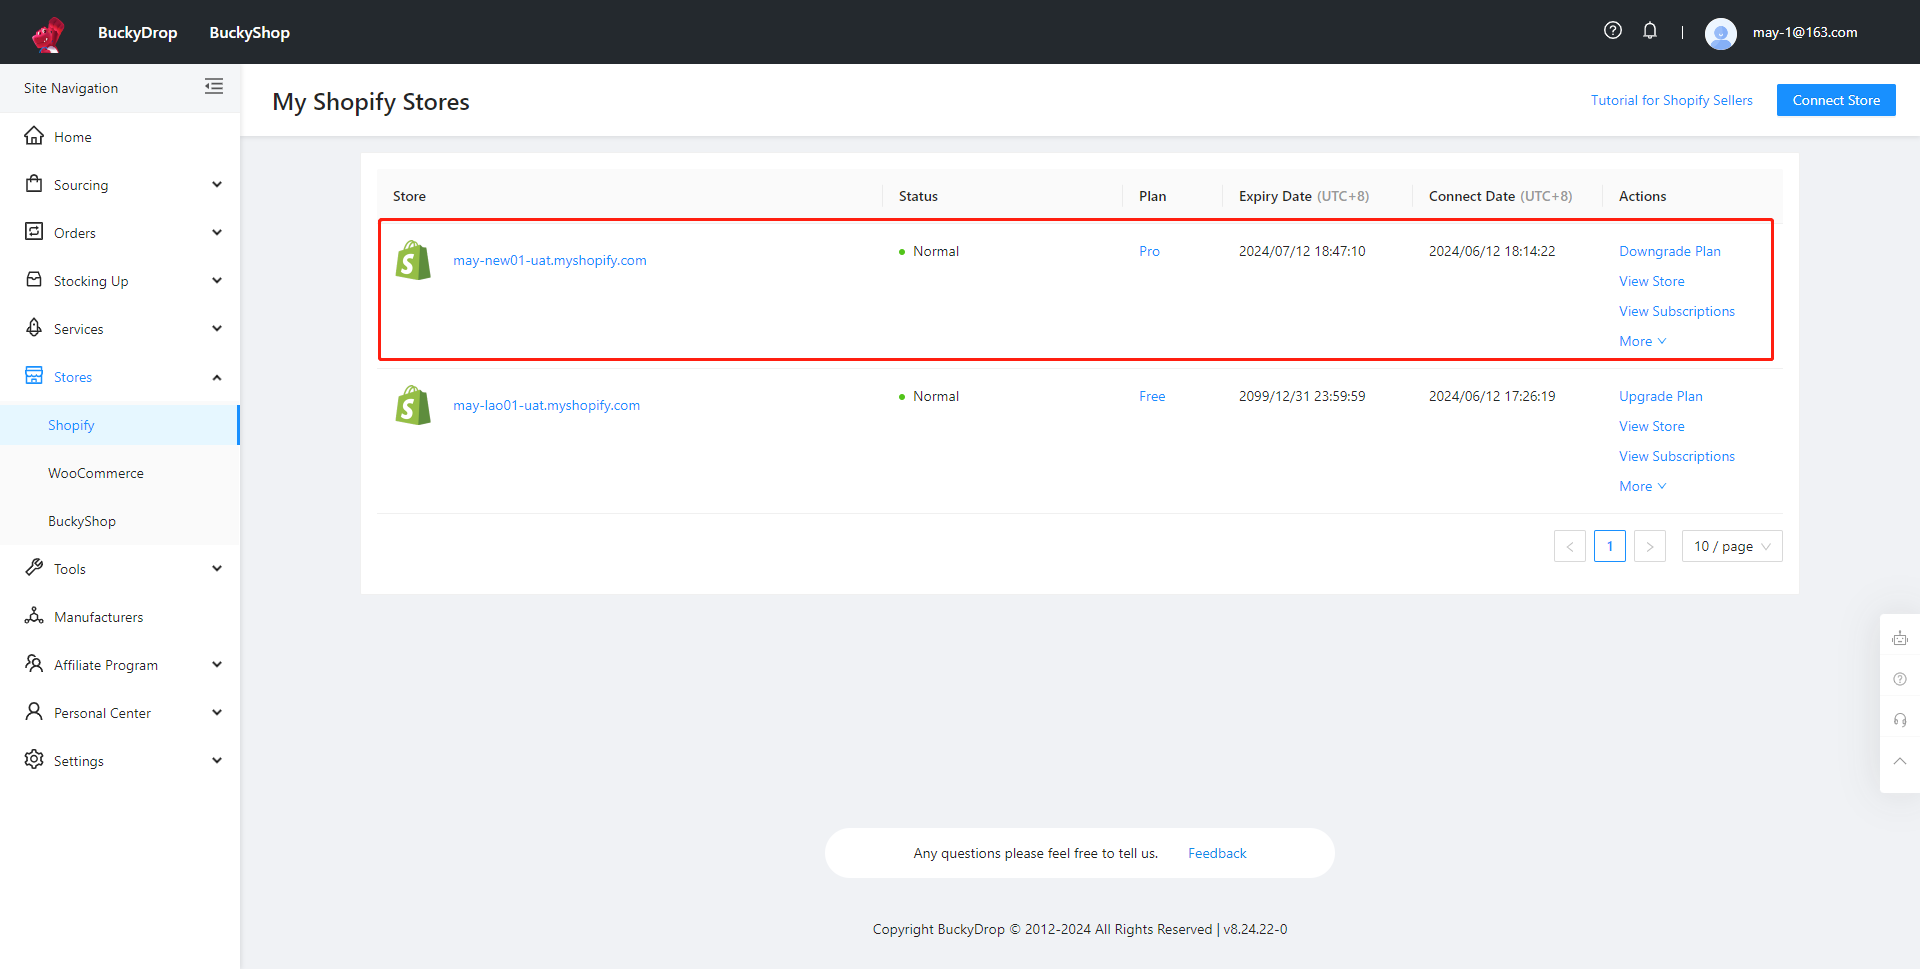
Return to the BuckyDrop admin and click "Return to My Store", and you can see the store you've Activated.
By connecting your Shopify store to BuckyDrop, you can fully leverage the functionalities and service advantages of BuckyDrop. This seamless integration allows you to effortlessly manage and handle various critical business processes within your store, including product management, order processing, and automation settings. By tightly connecting your store with BuckyDrop, you can liberate yourself from tedious tasks and focus wholeheartedly on the successful operation of your store.
In the BuckyDrop admin, go to Stores > Shopify and click "Connect Store".
Go to the Shopify App Store and click "Install" to install the BuckyDrop app.
Go to the Shopify admin and click "Install app" to complete the installation process.
Enter your BuckyDrop account details and click "Connect BuckyDrop with Shopify".
Choose the BuckyDrop plan that suits you.
If you choose the Pro Plan, you will need to go to the Shopify "Approve Subscription" page, confirm the subscription plan details, select a payment method, and click "Approve" after verifying the bill.
Return to the BuckyDrop admin and click "Return to My Store", and you can see the store you've Activated.
2. Connecting WooCommerce Store
By connecting your WooCommerce store to BuckyDrop, you can fully leverage the functionalities and service advantages of BuckyDrop. This seamless integration allows for effortless management and handling of various critical business processes within your store, including product management, order processing, and automation settings. It's like building an efficient bridge that tightly connects your store with BuckyDrop, creating a highly productive and streamlined operating environment for you.
In the BuckyDrop admin, go to Stores > WooCommerce and click "Connect Store".

Enter the URL of your WooCommerce store and click "Next".

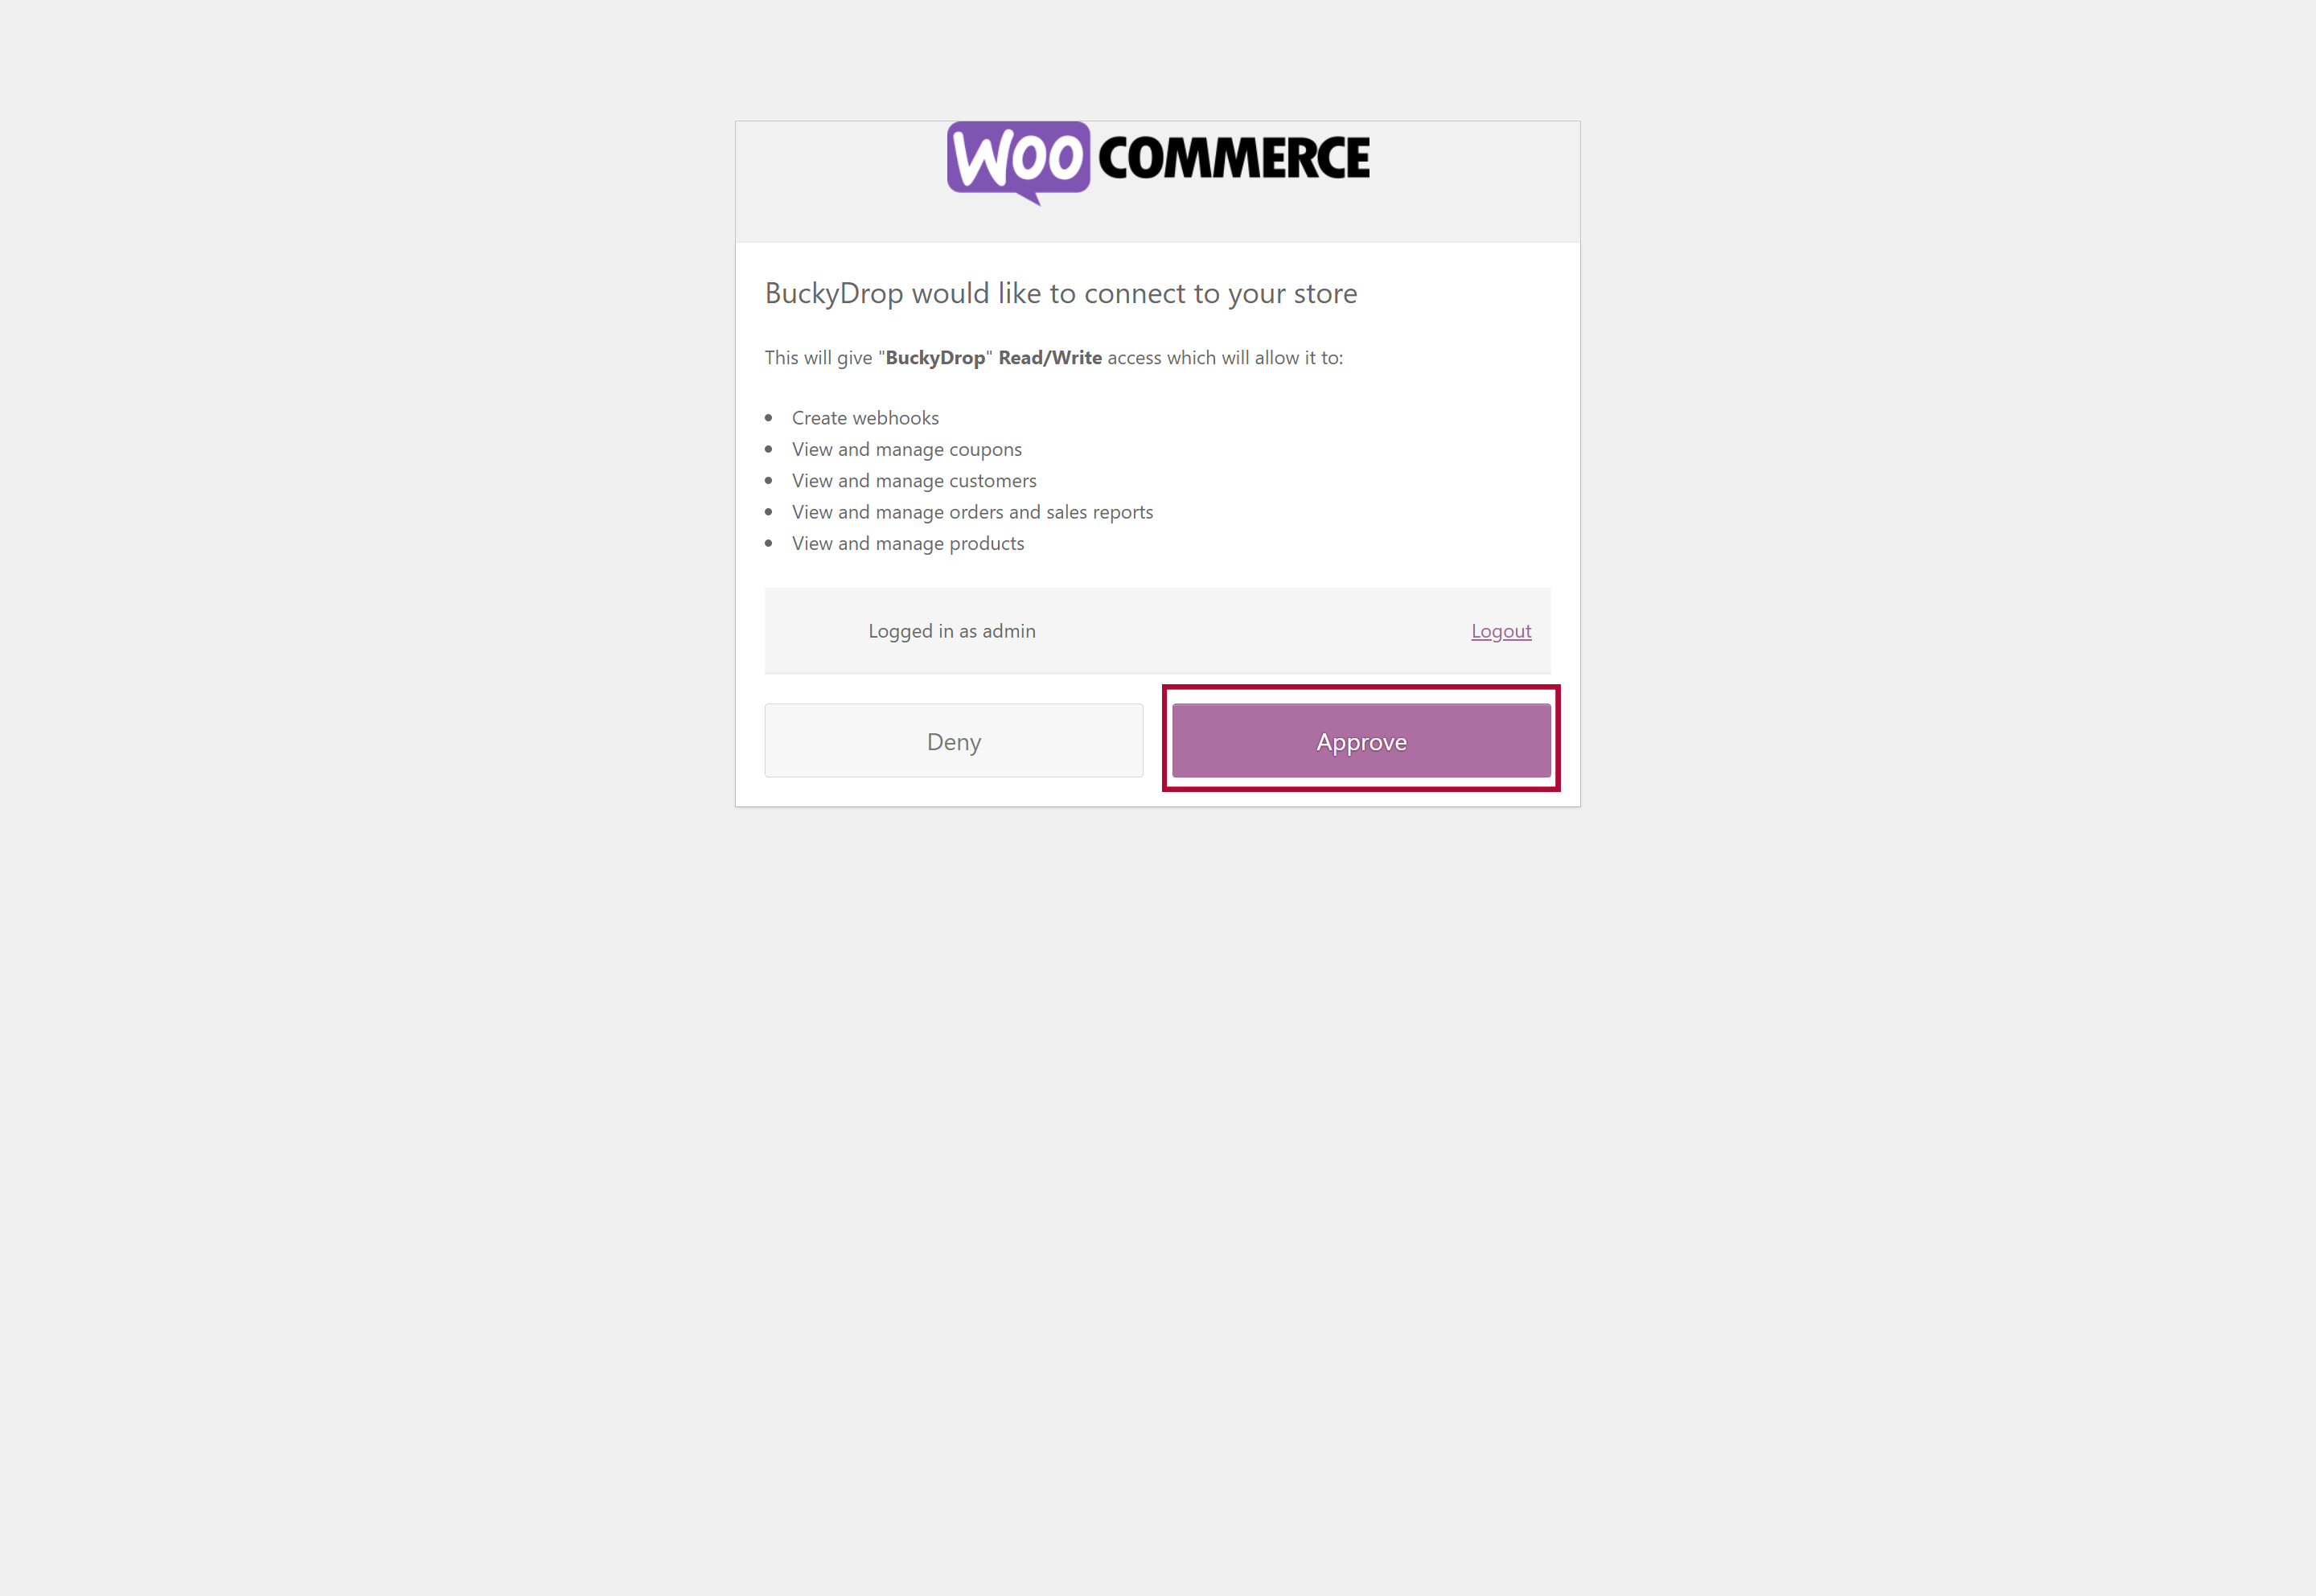
Click "Approve".
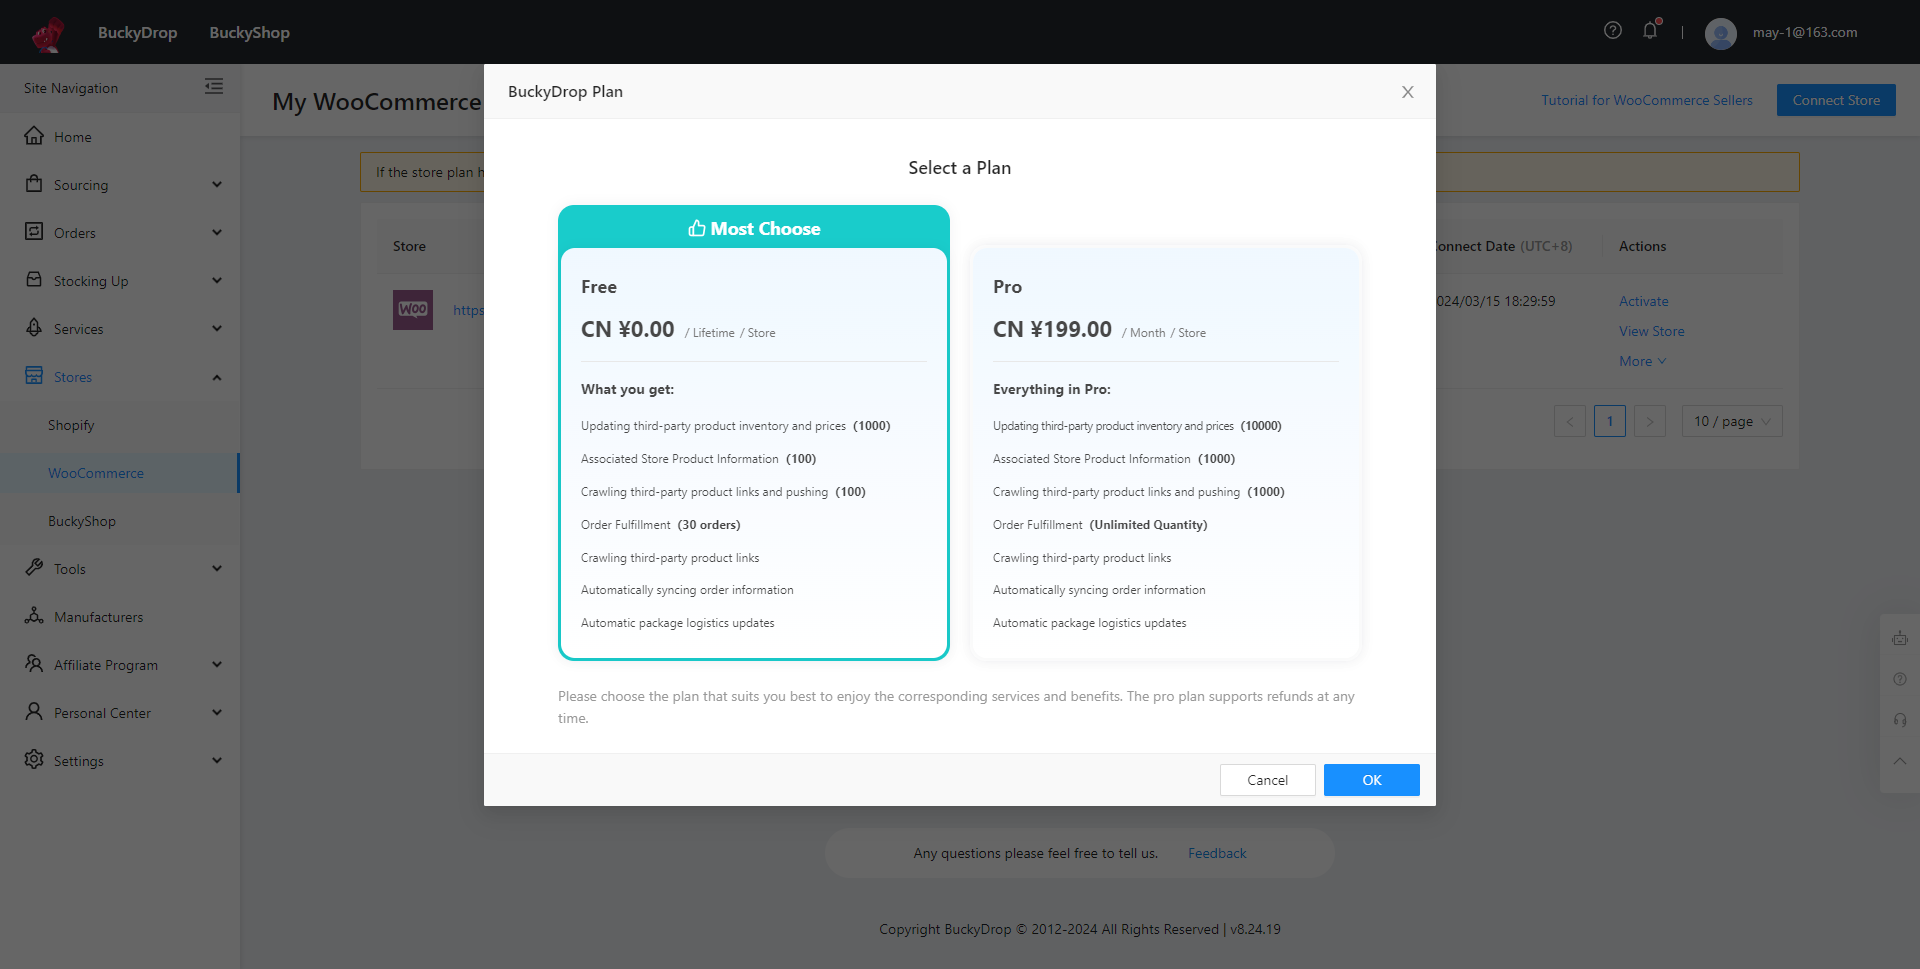
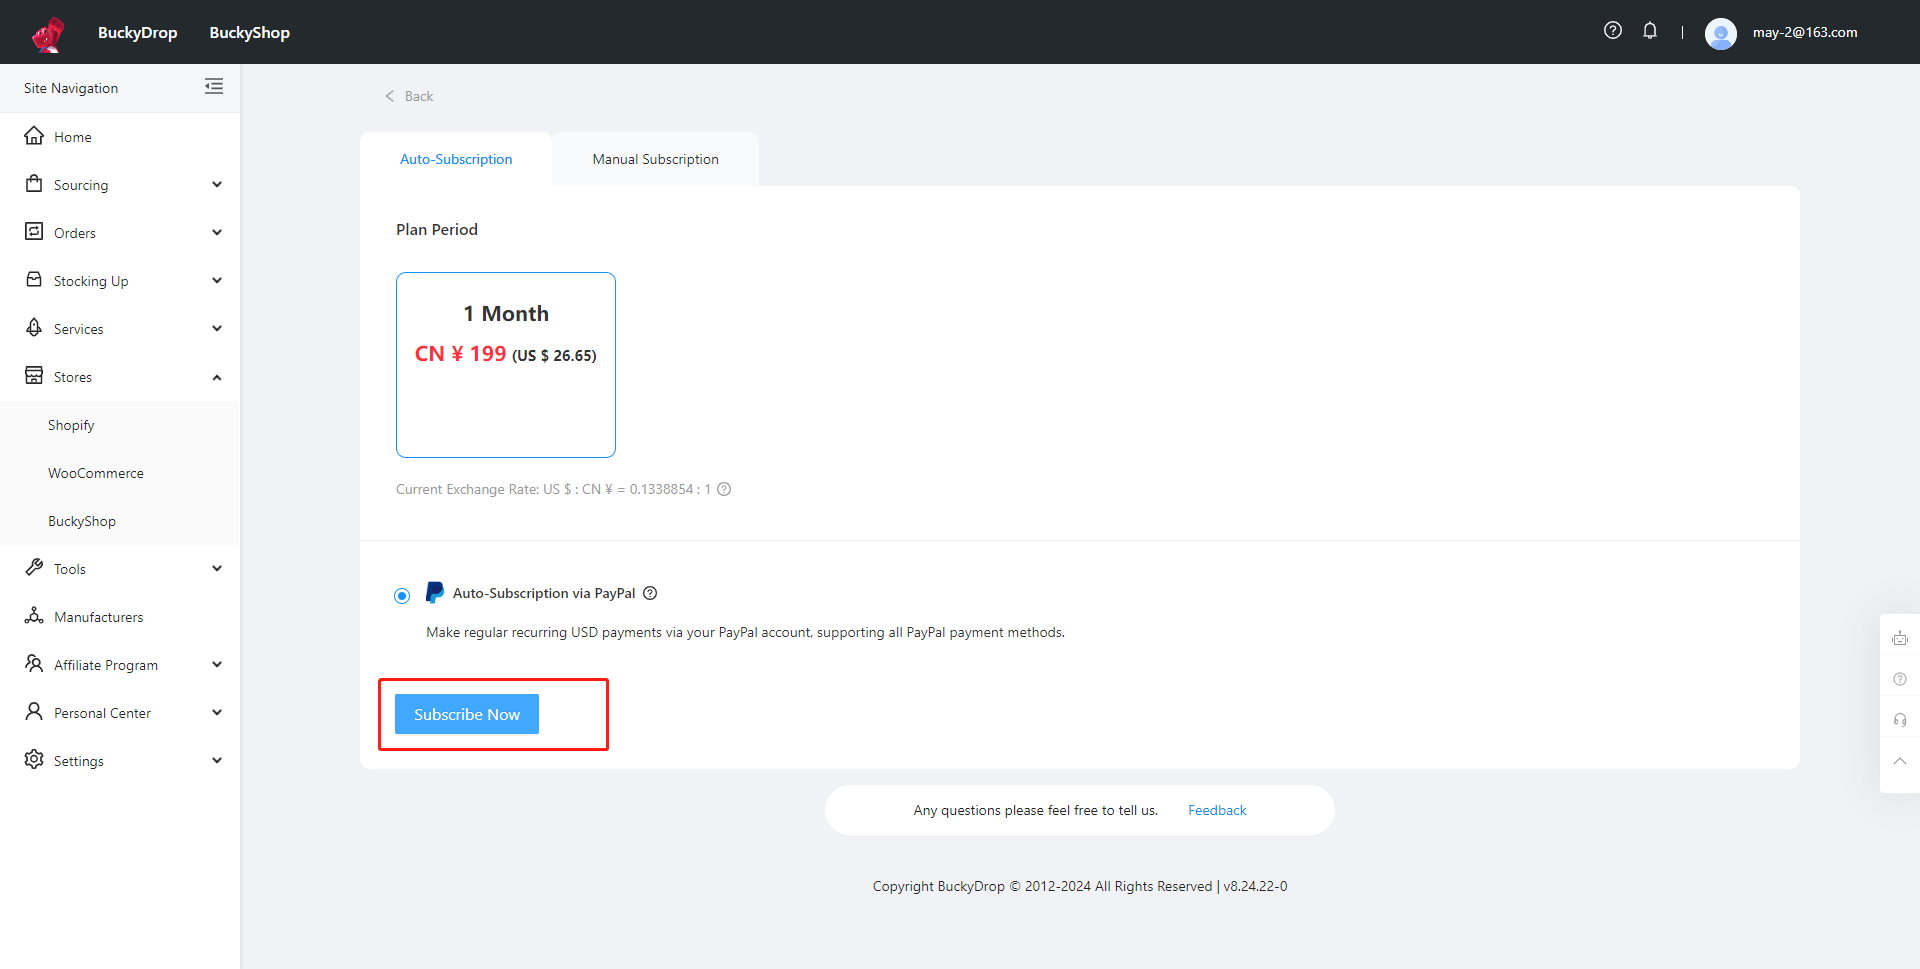
Choose the BuckyDrop plan that suits you.
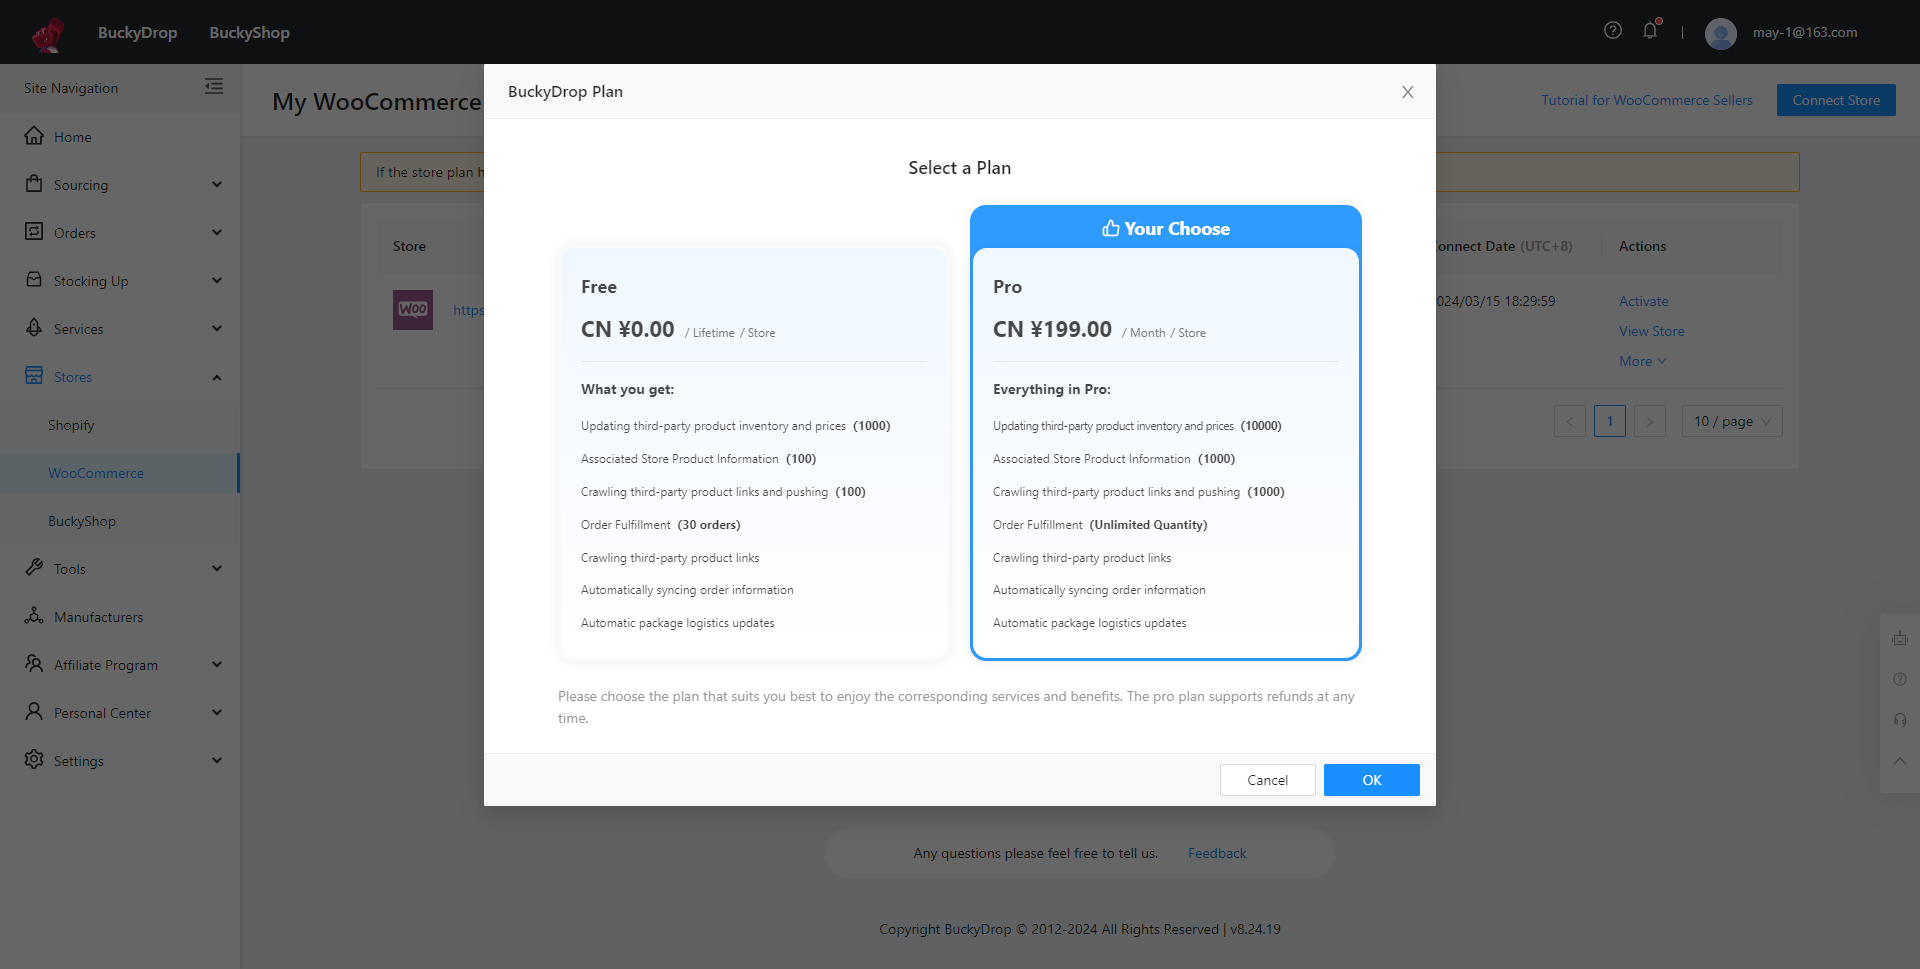
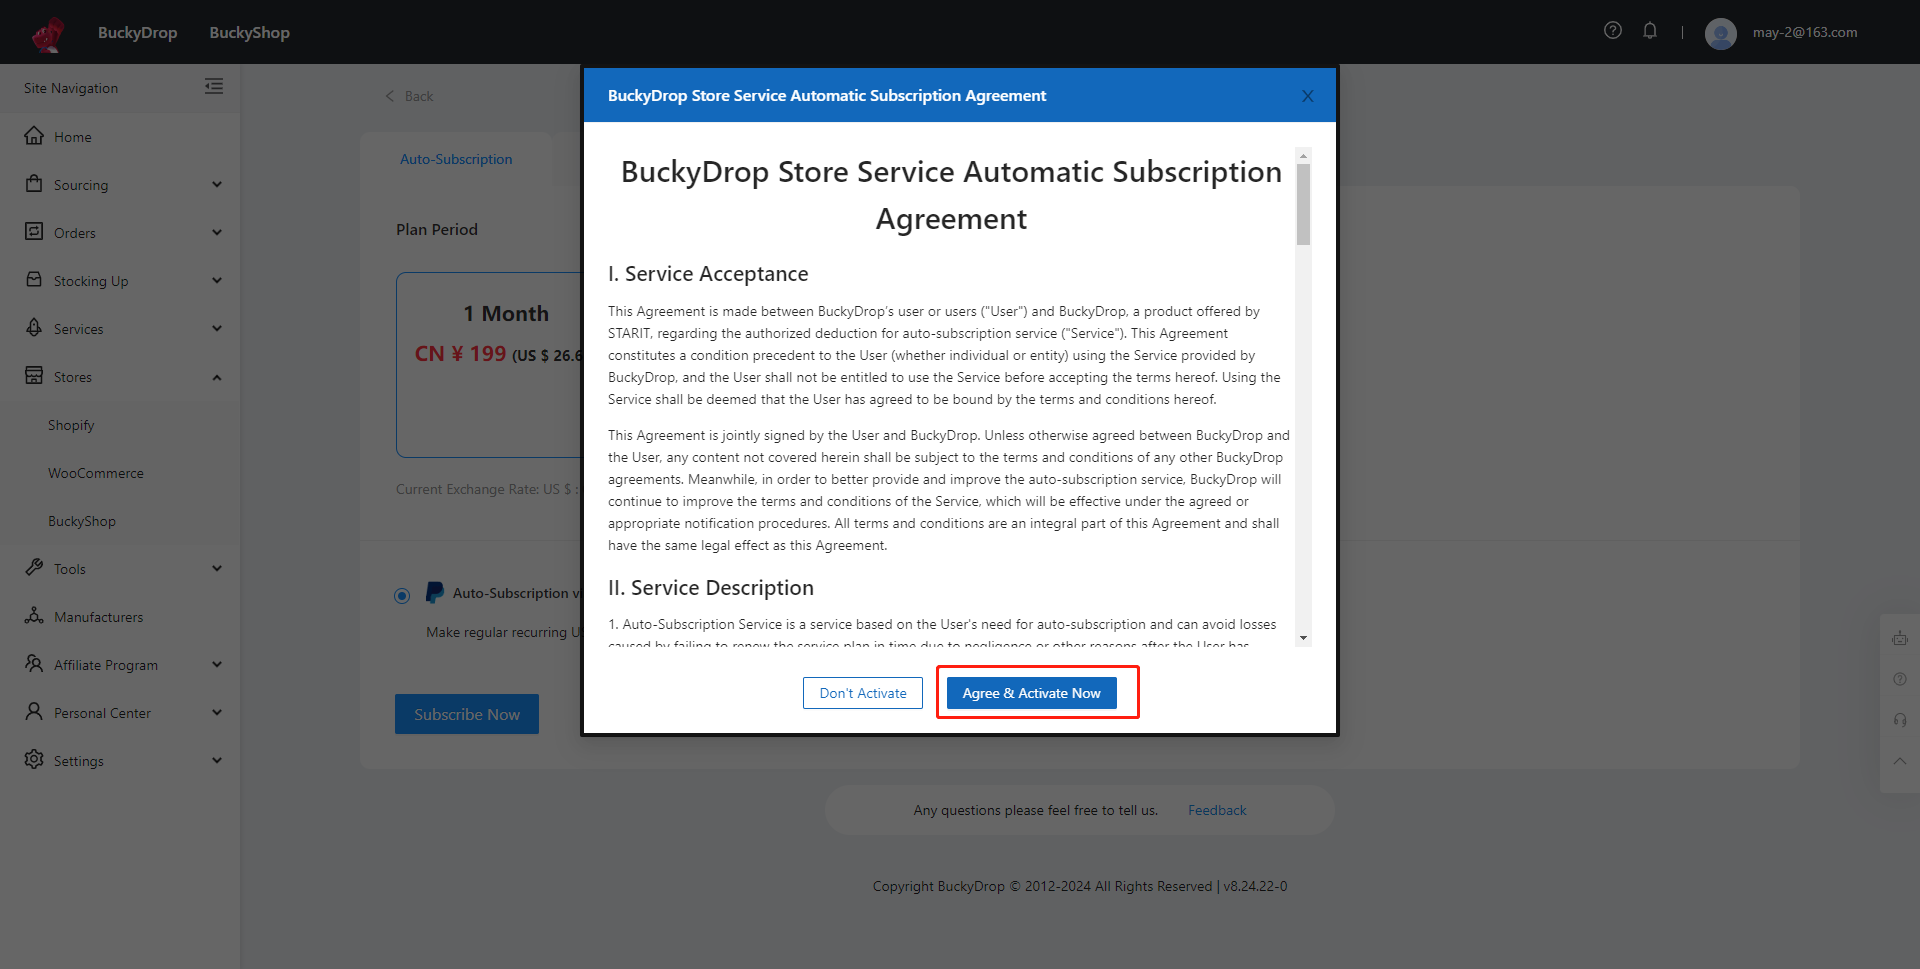
If you choose the Pro Plan, you will need to confirm the subscription plan details, select a payment method, and click "Approve" after verifying the bill.
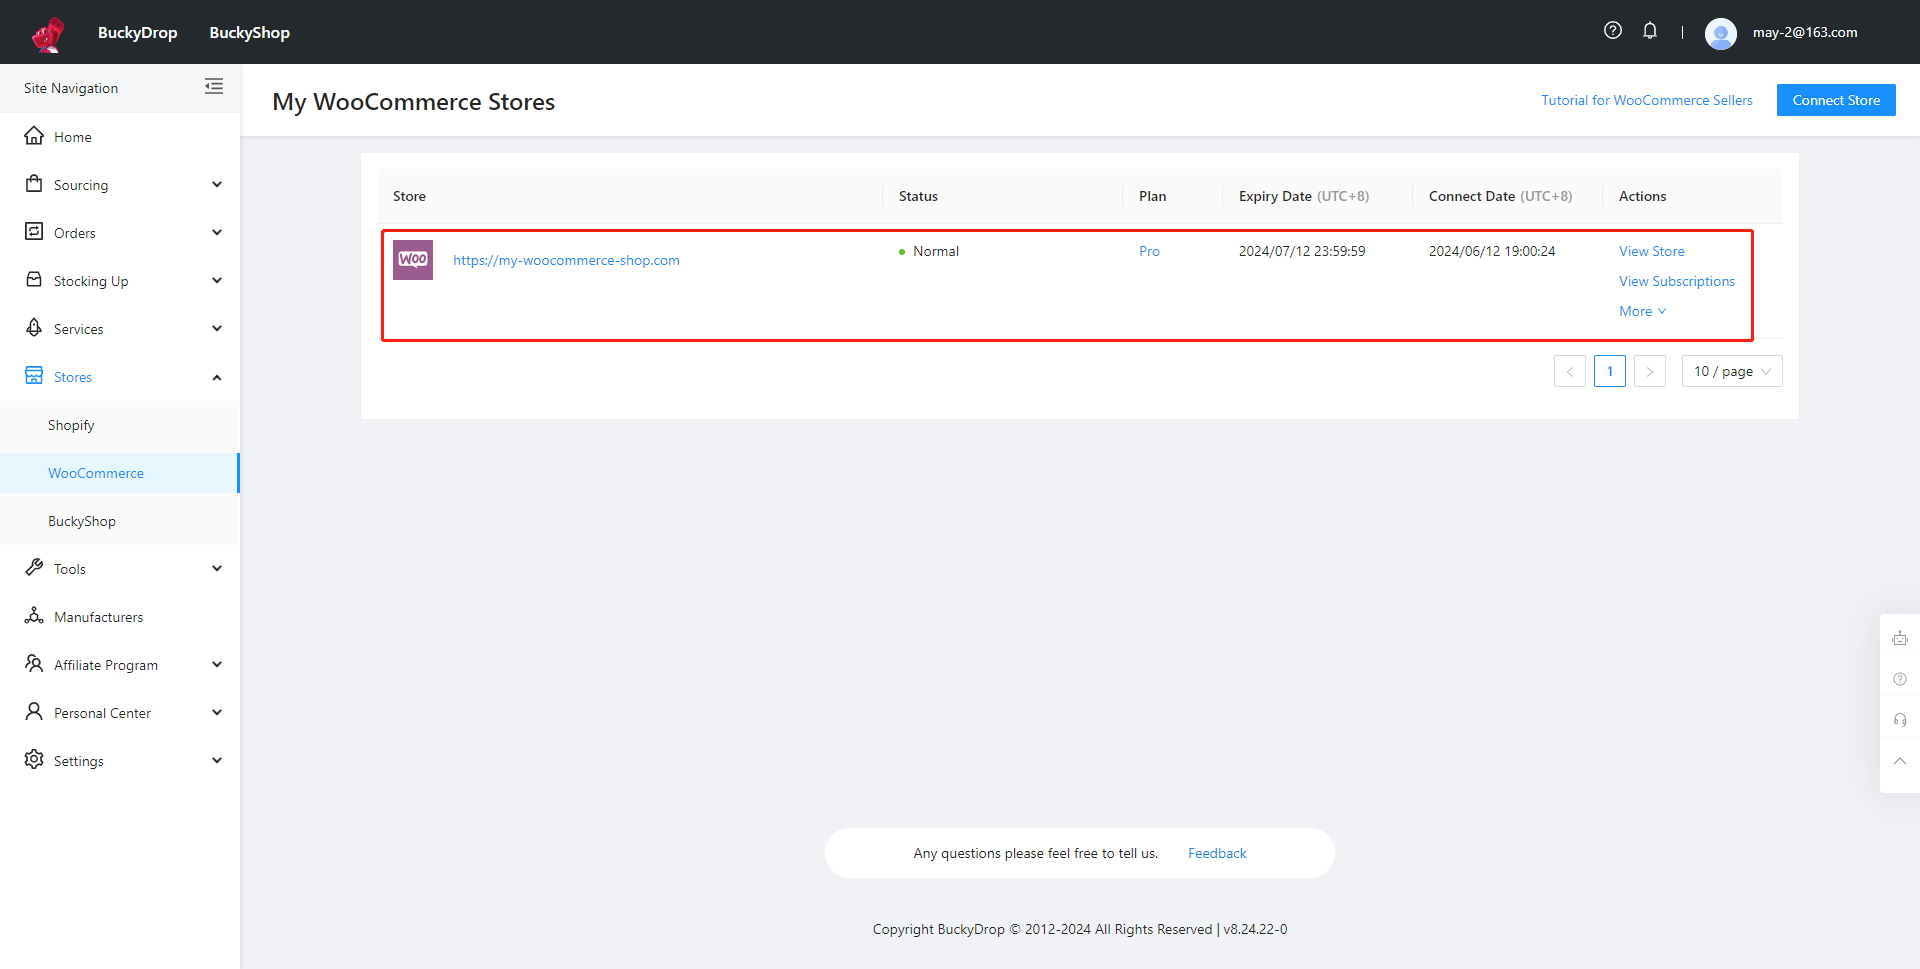
Return to the BuckyDrop admin and click "Return to My Store", and you can see the store you've Activated.

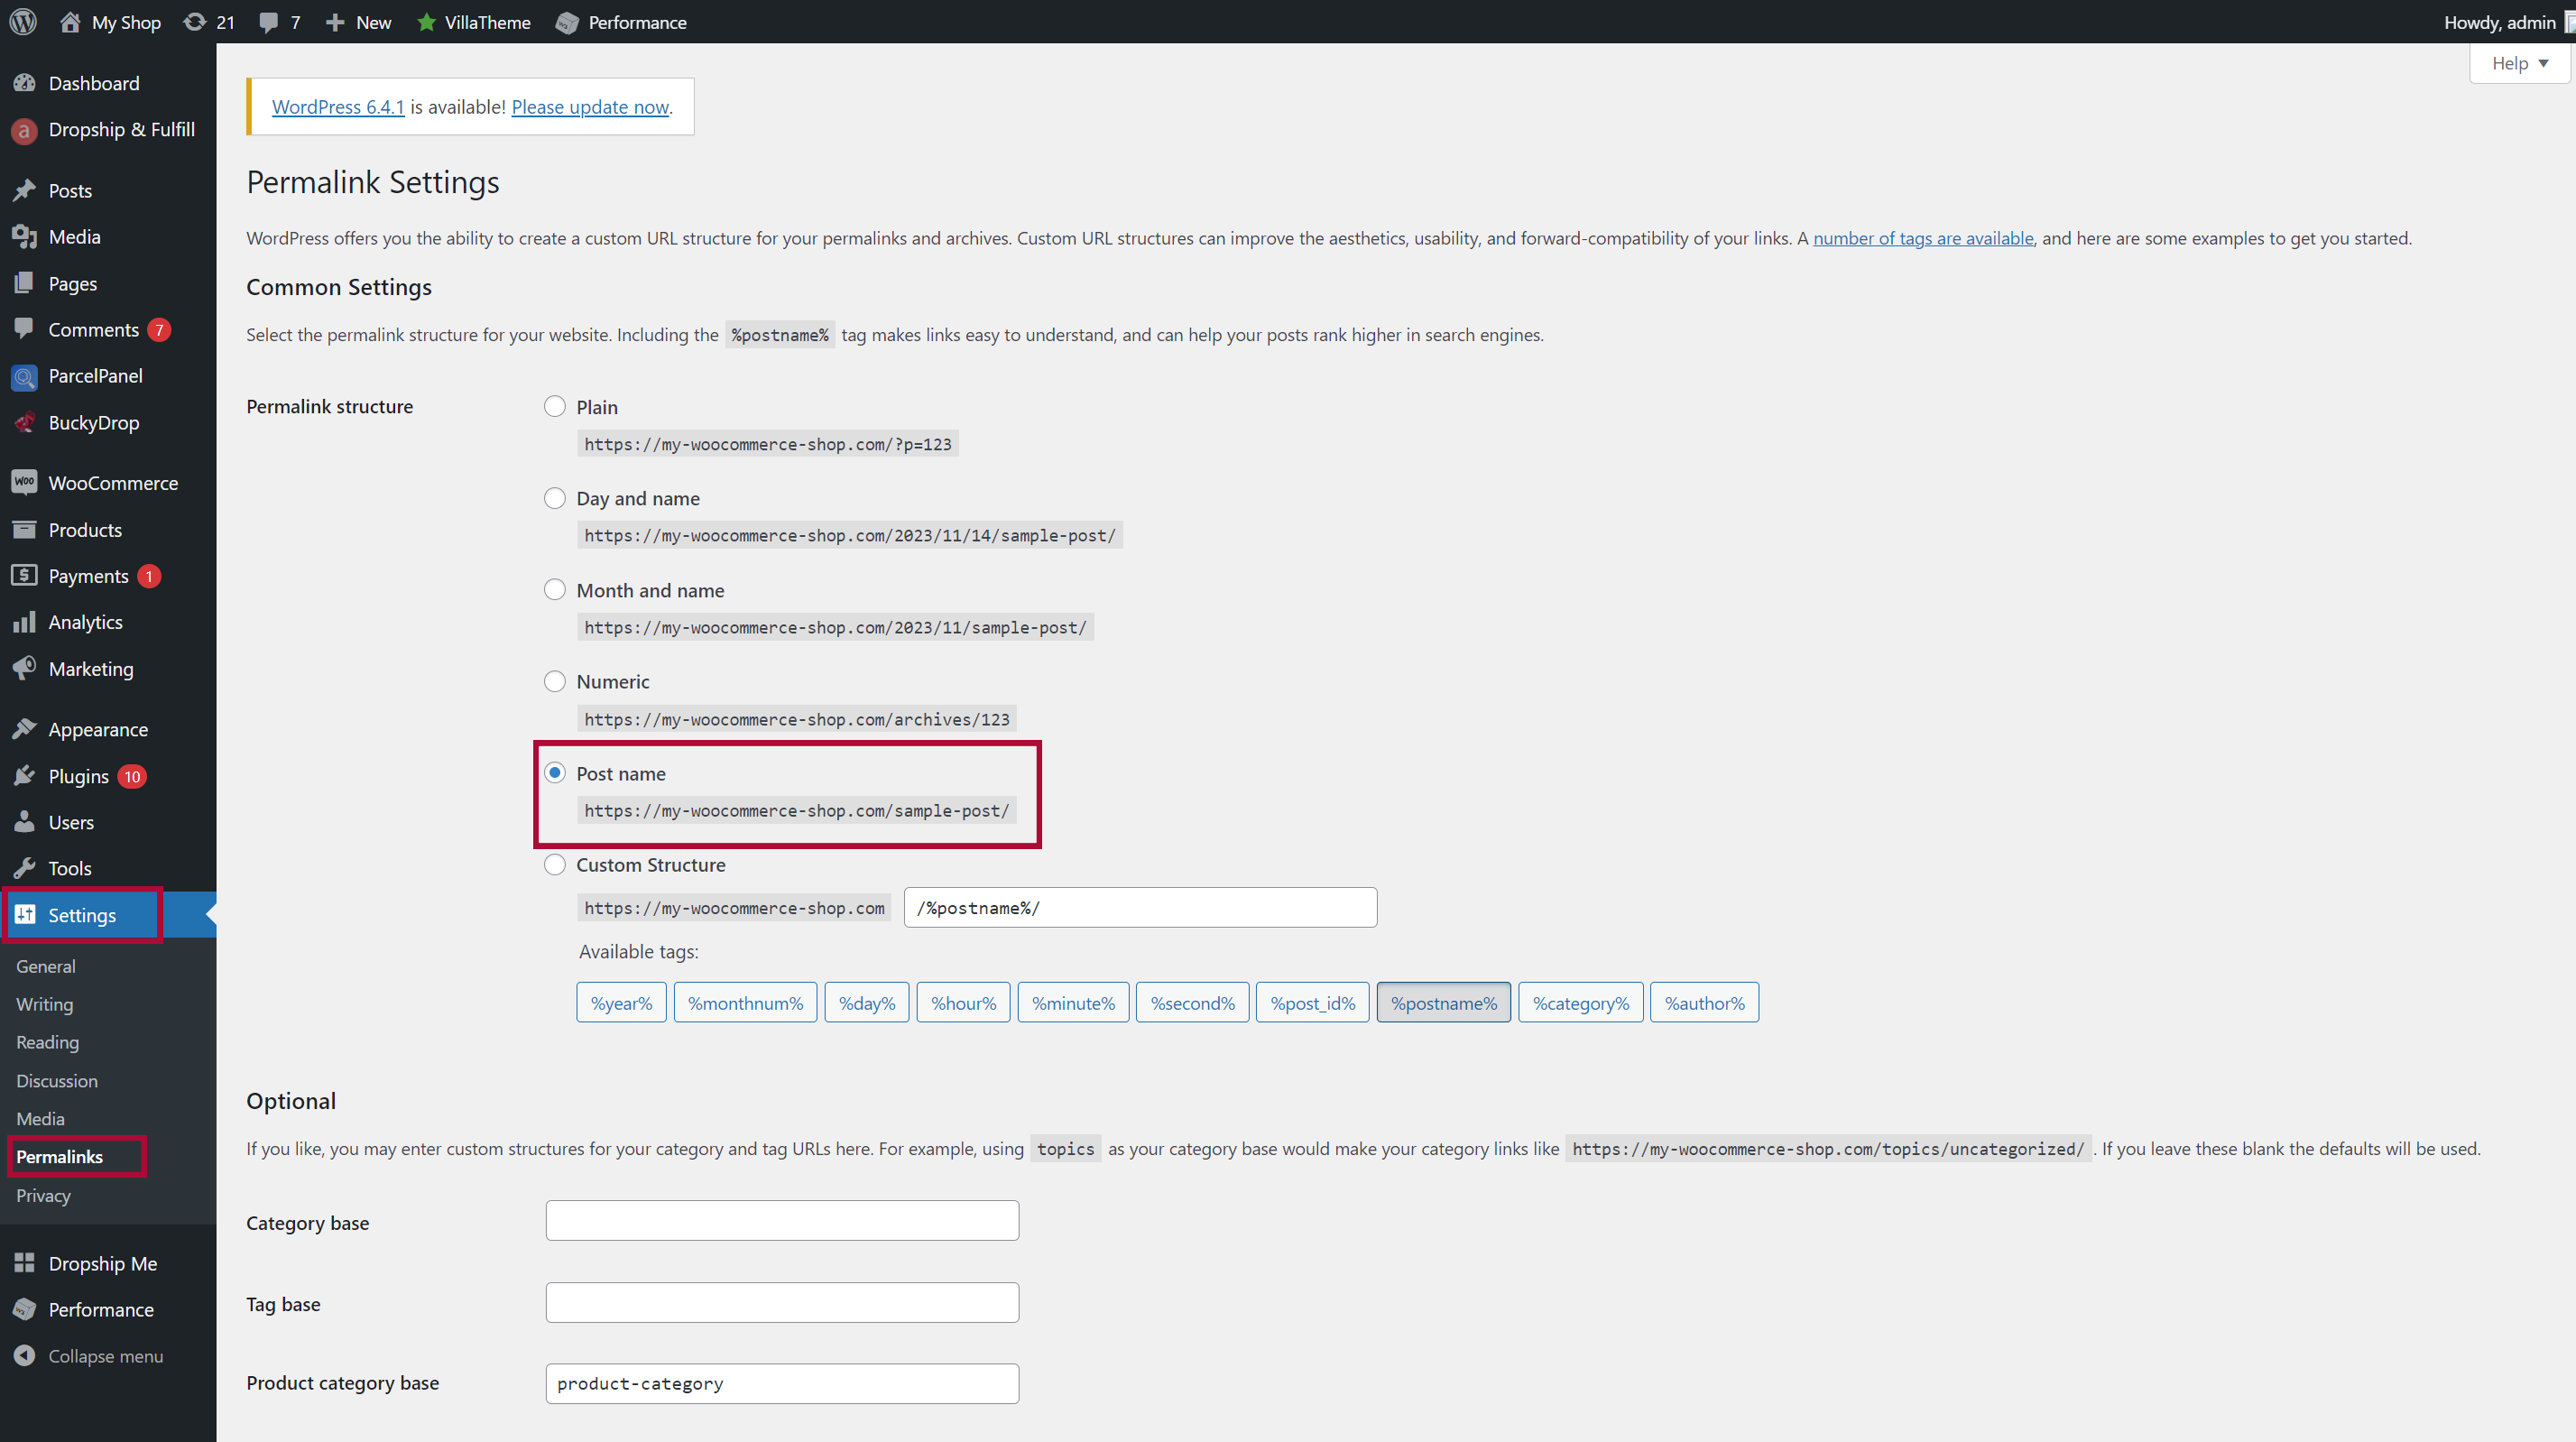
Log in to the WordPress admin, go to Settings > Permalinks and select "Post name" as the permalink structure.
3. Product Selection
If your Shopify or WooCommerce store doesn't have any products yet or if you want to offer a wider variety of products, you can choose from a range of options on BuckyDrop. BuckyDrop provides seamless access to all major e-commerce platforms in China and has a vast database of product information. This means that unlike traditional dropshipping platforms, you can consider all Chinese e-commerce platforms as your source of suppliers. Whether it's Taobao, JD, Tmall, or other e-commerce platforms, you can easily source their popular and high-quality products and seamlessly add them to your store. With BuckyDrop, you can meet the diverse needs of customers, expand your business reach, achieve significant sales growth, and unlock endless possibilities for products.
In the BuckyDrop admin, go to Products > Product Selection.

You can enter product keywords to search for specific items, or you can copy and paste the product link from Chinese e-commerce platforms into the search box to find the products you desire.


Select the desired product, click to enter the product details page, and then click "Add to Product List" to add the product to Product List.

Return to the Product List, and you will see the selected and saved products.

4. Pushing Products
Once you have found your ideal products, you can enhance their appeal by editing the product information. Choose captivating product images, write detailed descriptions, and set attractive prices. Ensure that you provide accurate and complete product information, including size, color, material, and other key details. Next, push these products to your Shopify or WooCommerce store, allowing customers to browse and make purchases.
In the BuckyDrop admin,go to Products > Product List. For the products you want to push, click "Edit".

Edit and optimize the product name.

Modify the product attributes such as color, size, price (the price displayed to customers), compare-at price (the market price of the product), international shipping fee, weight unit, and inventory.

Adjust the product detail page images.

Click "Translate" to translate the product information into the desired language for display in your store. Supported languages for translating product information include Chinese, English, Japanese, Korean, Arabic, French, Portuguese, Spanish, Russian, German, Vietnamese, Thai, and Mongolian Cyrillic.


Click "Save and Push to Store" to complete the product pushing.

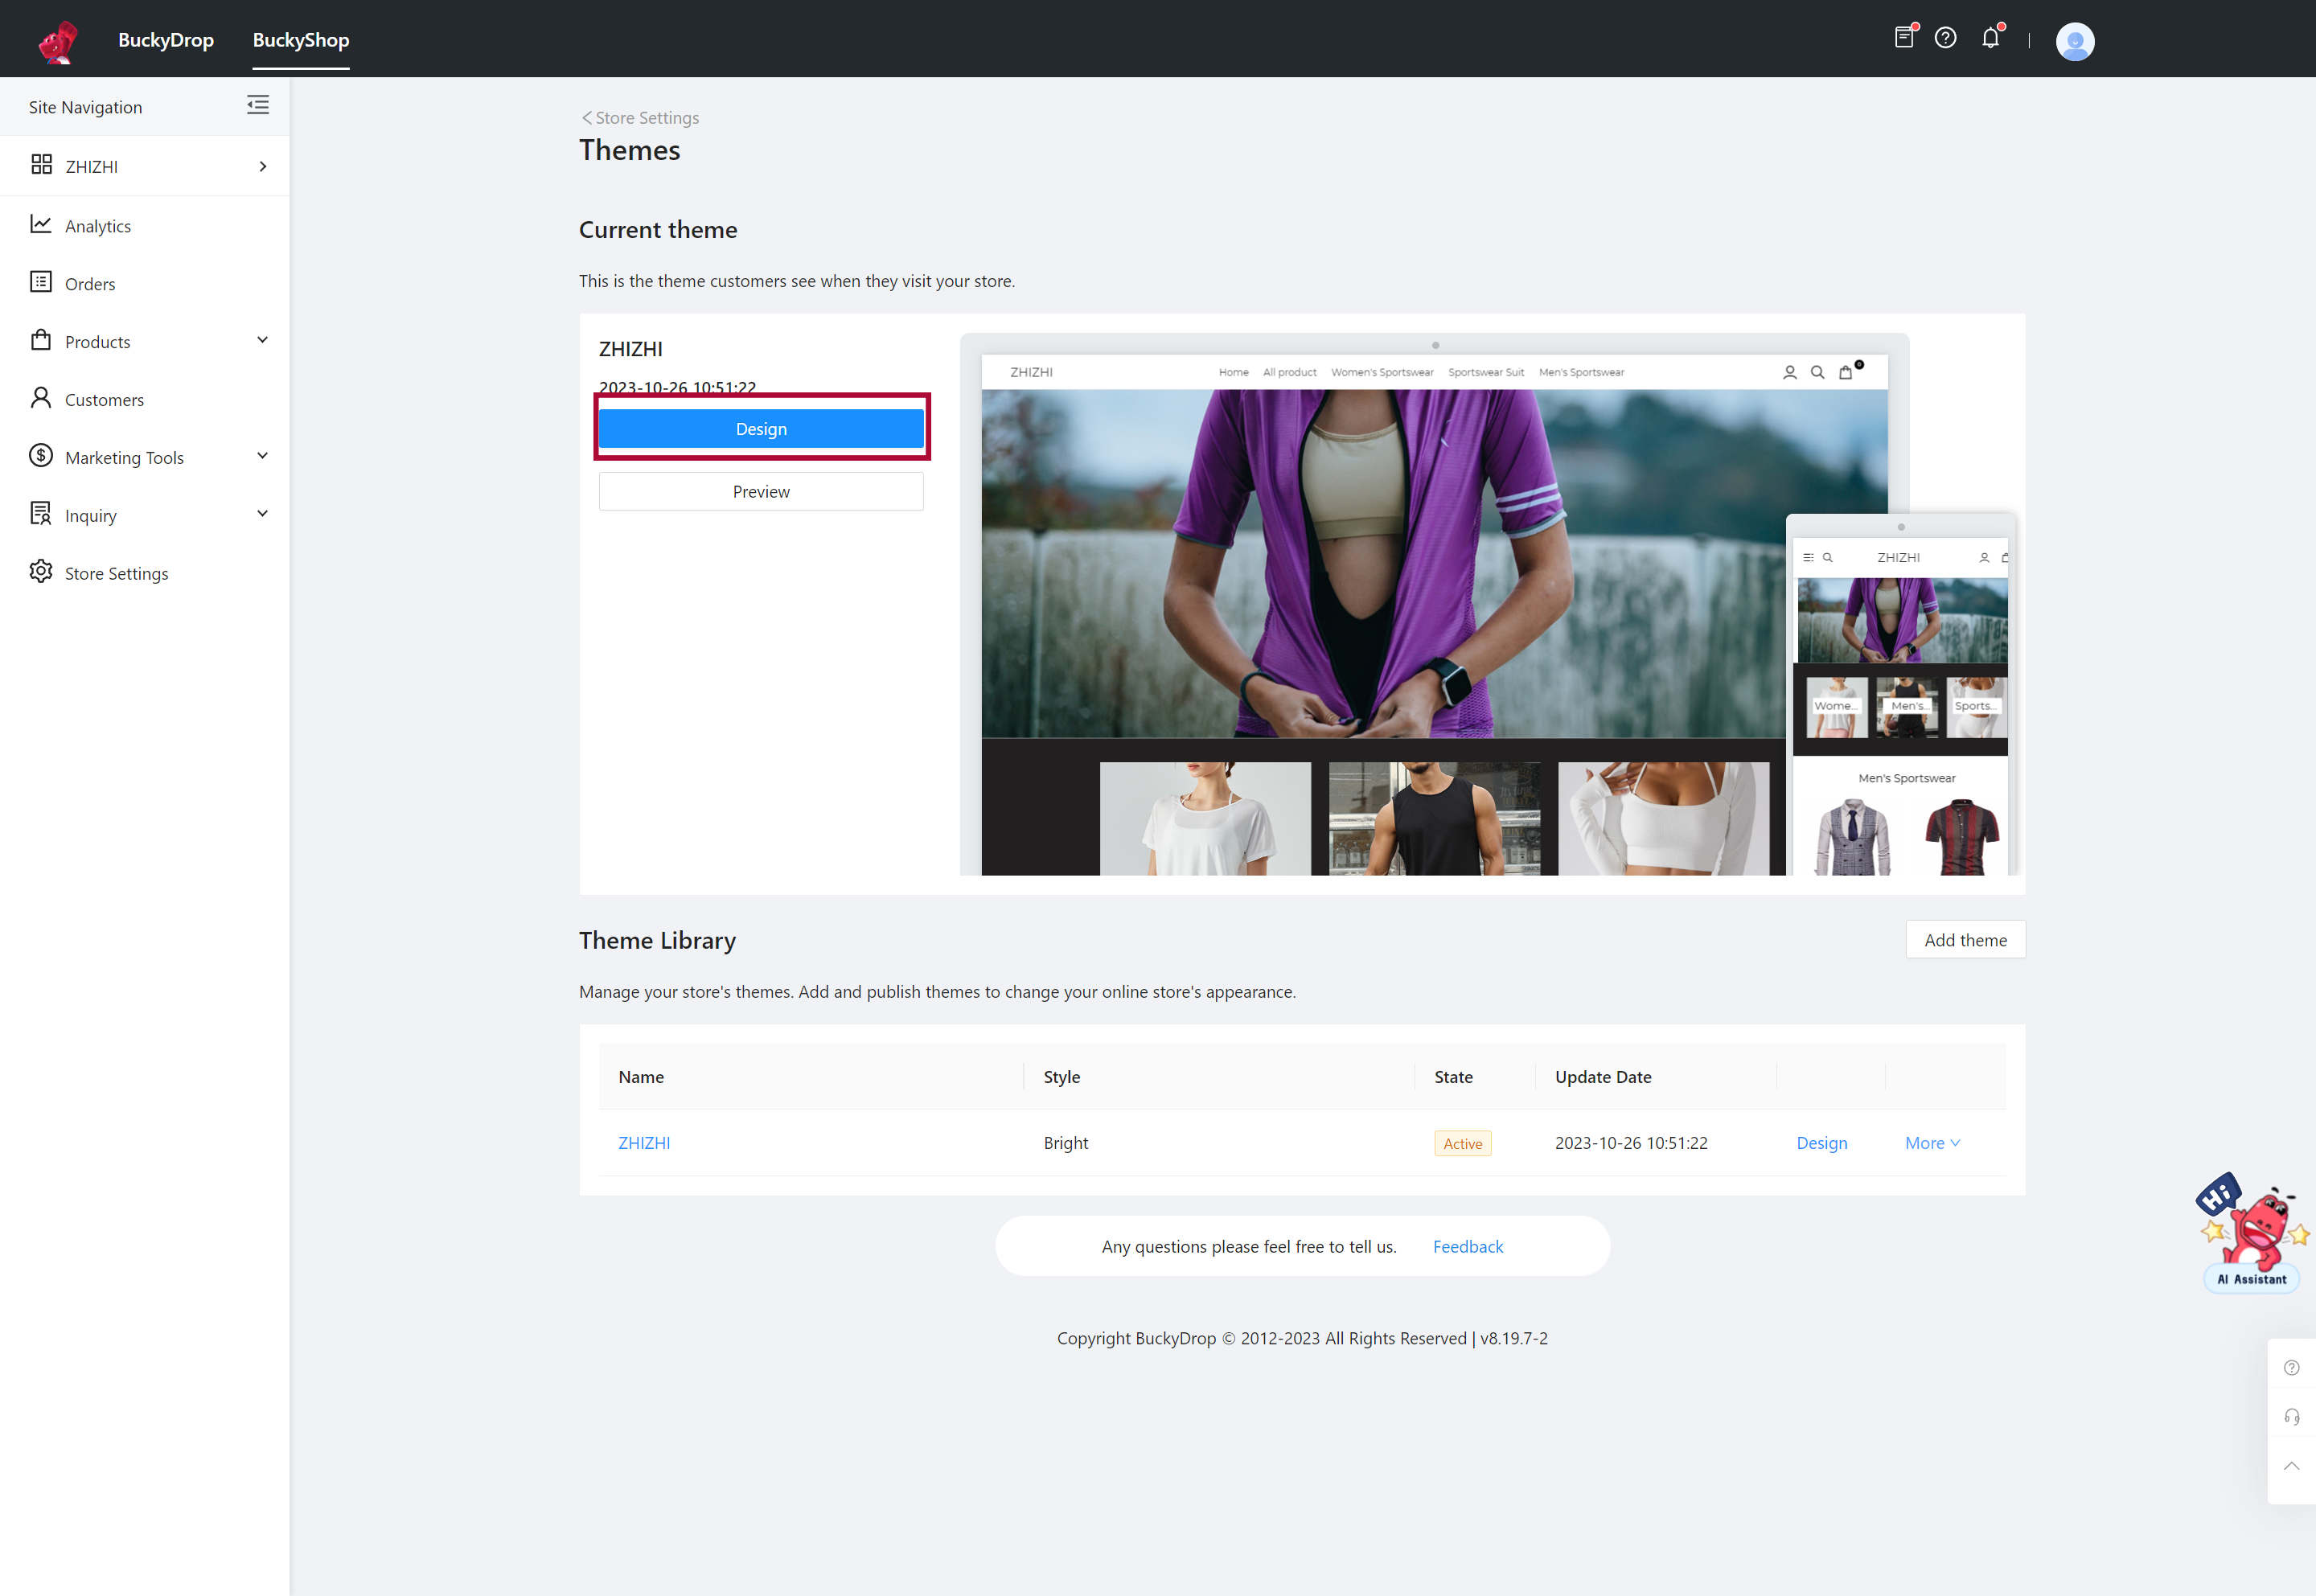
After completing the product pushing, you can view the pushed products in the "My Store Products". You can also find the pushed product in your Shopify or WooCommerce store and admin. Additionally, you can enable the automatic updating feature for store products in this section. However, please note that you also need to navigate to the "Settings" page to enable the product update functionality. This ensures that the product information in your store remains accurate and up to date at all times.


5. Connecting Product Source
If you are already selling products on your Shopify or WooCommerce store and wish to fulfill orders through BuckyDrop, you can bind suppliers for these products. By binding suppliers, you can leverage the diverse product selection and price advantages of Chinese goods, freeing yourself from reliance on limited sourcing channels and enjoying higher profit returns.
In the BuckyDrop admin, go to Products > My Store Products. Find the product you want to bind a supplier for and click "Connect Source".

Select the desired source of goods from major e-commerce platforms in China. Copy and paste the link into the "Product Link" field. Fill in the supplier and product title, then click on "Connect and Variants Mapping".


Select the corresponding source variants on the right side of the shop product for the linking operation. Once all variants are linked, click "Save" to complete the operation.

Once the product's supplier source linking is complete, you can see the association status of that product as "Linked" in "My Store Products." Additionally, you can enable the automatic updating feature for store products in this section. However, please ensure that the master switch for automatic product updates is turned on.


You can start selling the product in your store.

6. Order Fulfillment
Once your Shopify or WooCommerce store generates an order, all orders will automatically sync to BuckyDrop and can be fully automated. This means that processes such as procurement, quality inspection, warehousing, packaging, and shipping will be handled automatically, as if you have a smart assistant taking care of everything for you. This makes managing your business effortless and maximizes efficiency.
In the BuckyDrop admin, go to Orders > Orders. Here, you can track the entire procurement process after an order is placed. This includes product purchasing, supplier shipping, warehouse receiving, quality inspection, warehousing, and package submission. You can view the status and amount of each order and utilize value-added services for orders. We have enabled automatic submission of orders and packages for you by default, eliminating the need for manual operations. To avoid any delays in the procurement process, it is crucial to pre-fund your account and ensure sufficient balance to promptly cover the required expenses.


Go to Orders > Returns and Refunds. Here, you can track the resolution of issues related to purchased products and view all return/exchange order details and progress.

Go to Orders > Shipping Records. Here, you can track the entire shipping process of your packages. You can view the status and logistics information of each package, handle any exceptional packages, and utilize value-added services for packages. To avoid any delays in the shipping process, it is crucial to pre-fund your account and ensure sufficient balance to promptly cover the required expenses.


7. Value-added Services
BuckyDrop offers a wide range of value-added services aimed at meeting personalized business and branding needs. These services cover various aspects such as procurement, product management, quality inspection, warehousing, dropshipping, and logistics, spanning the entire e-commerce operation process. They help you create customized solutions and stand out in the competitive e-commerce market.
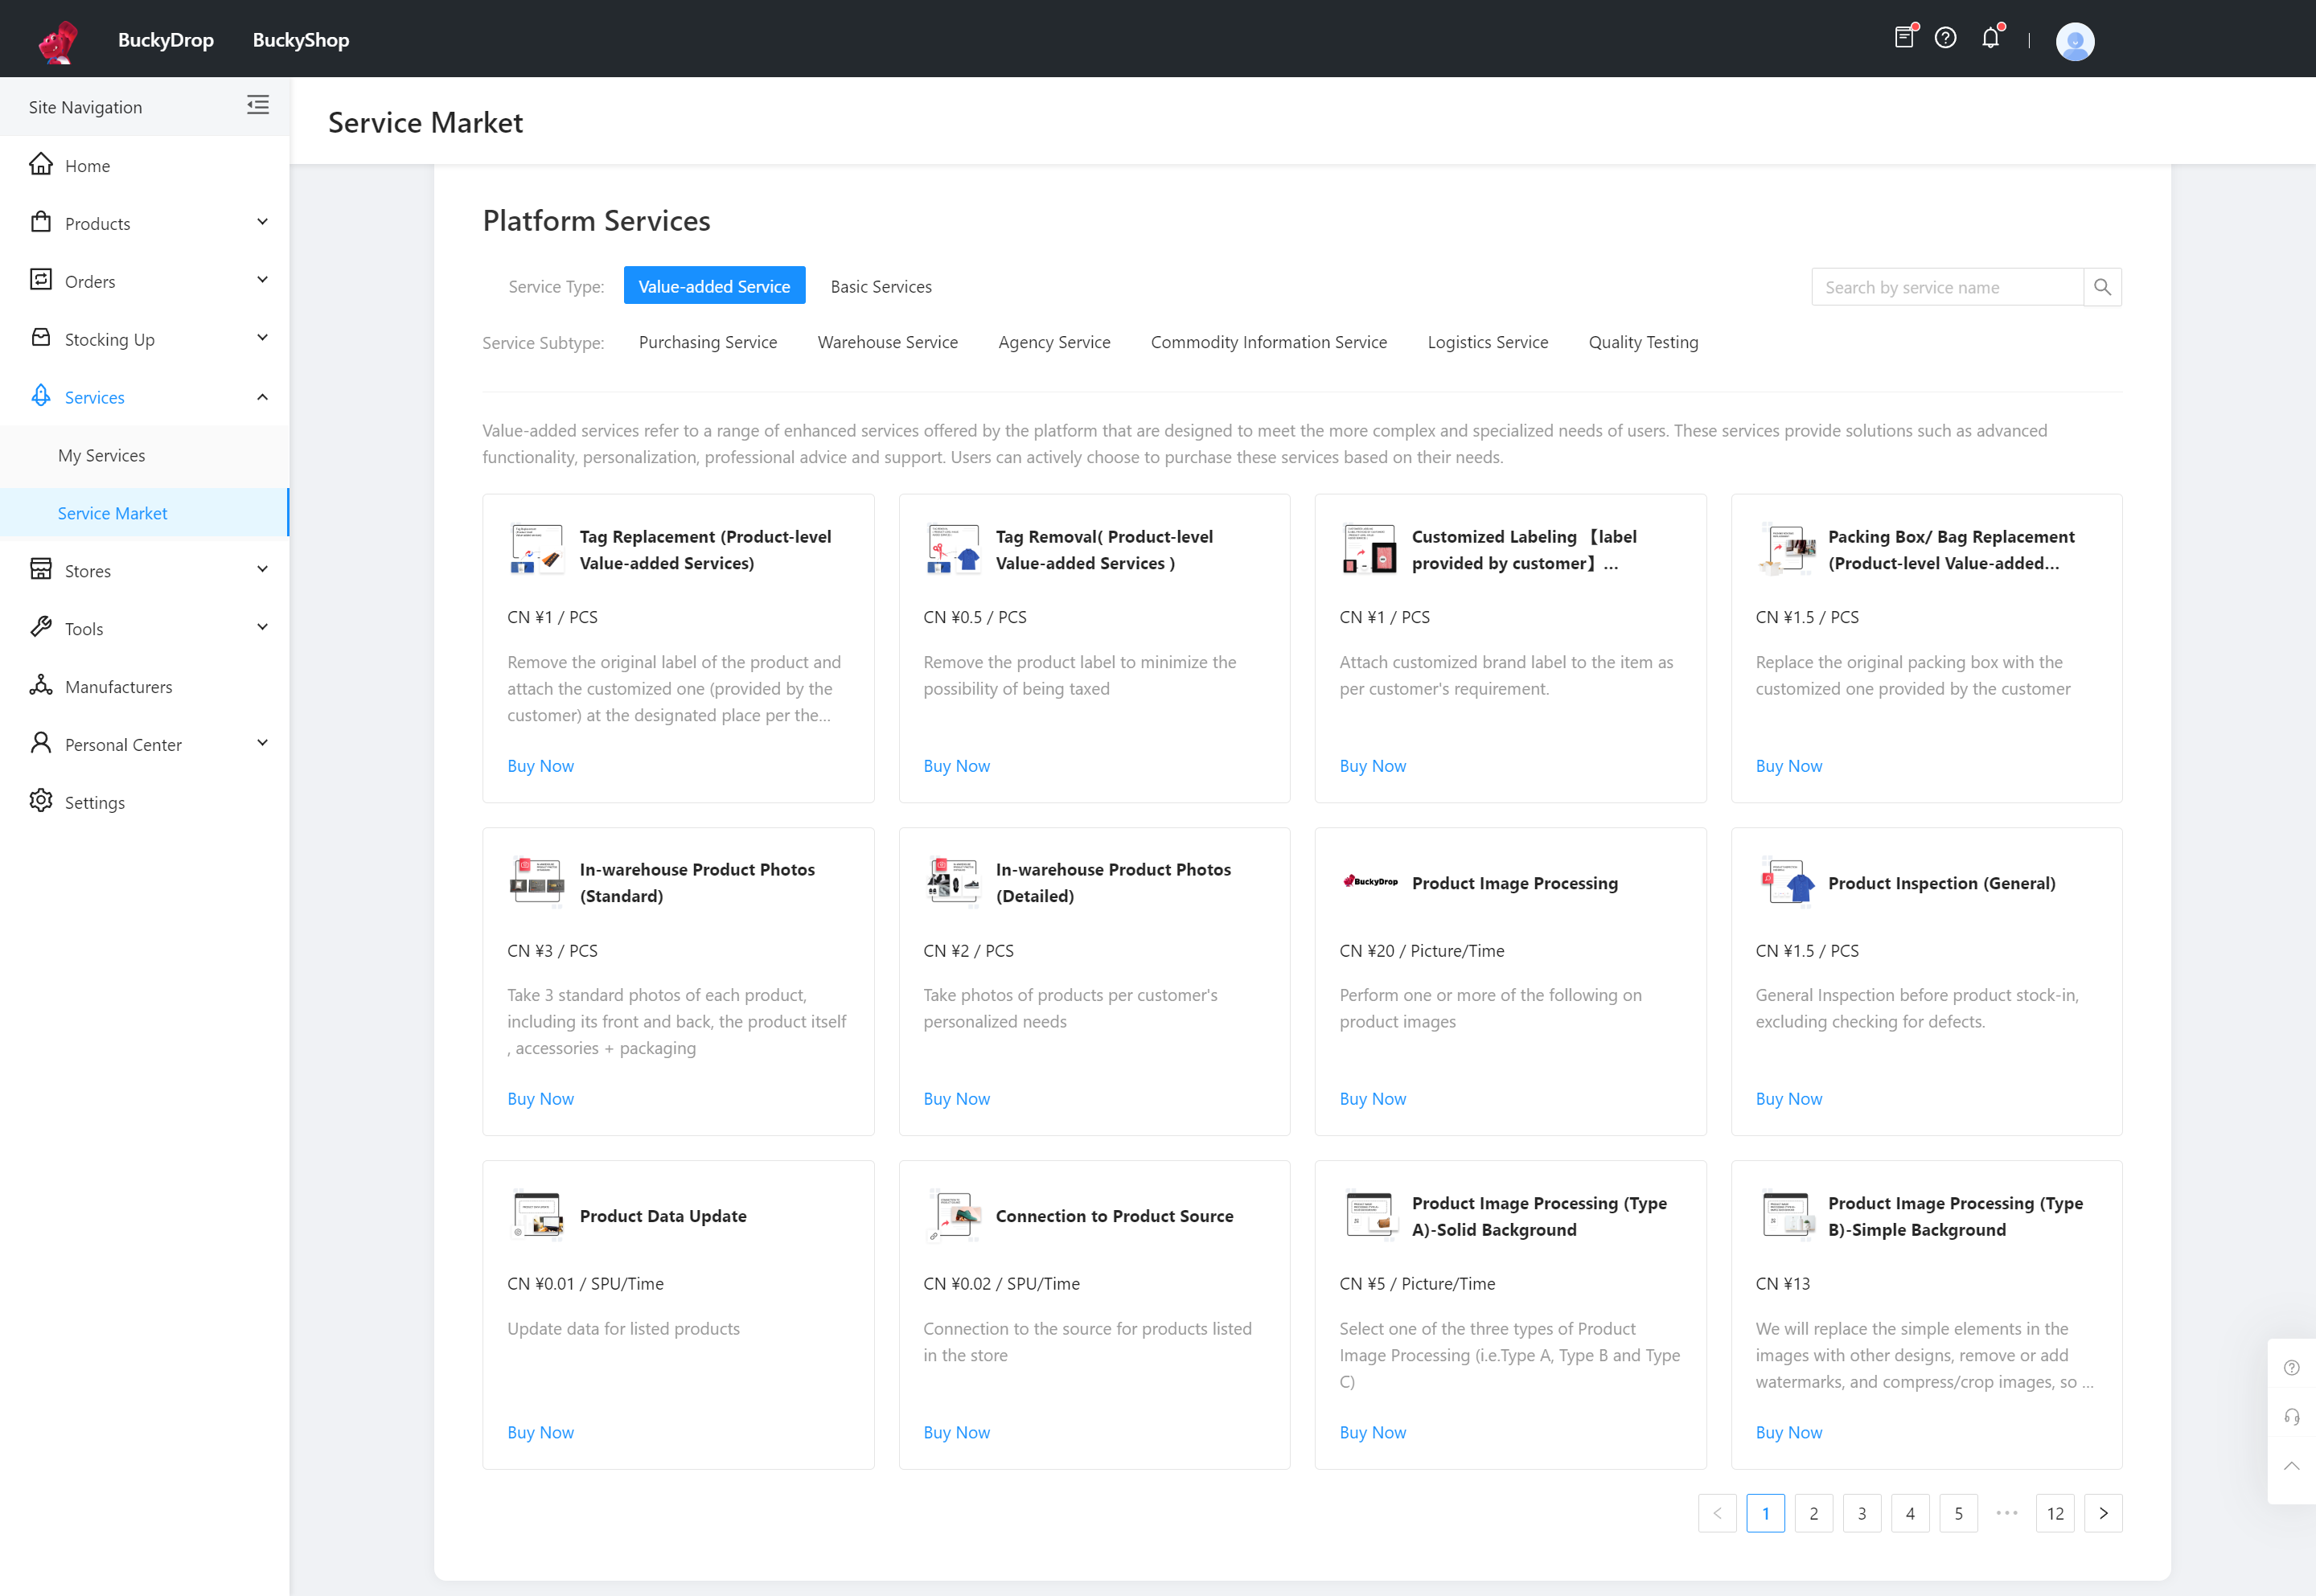
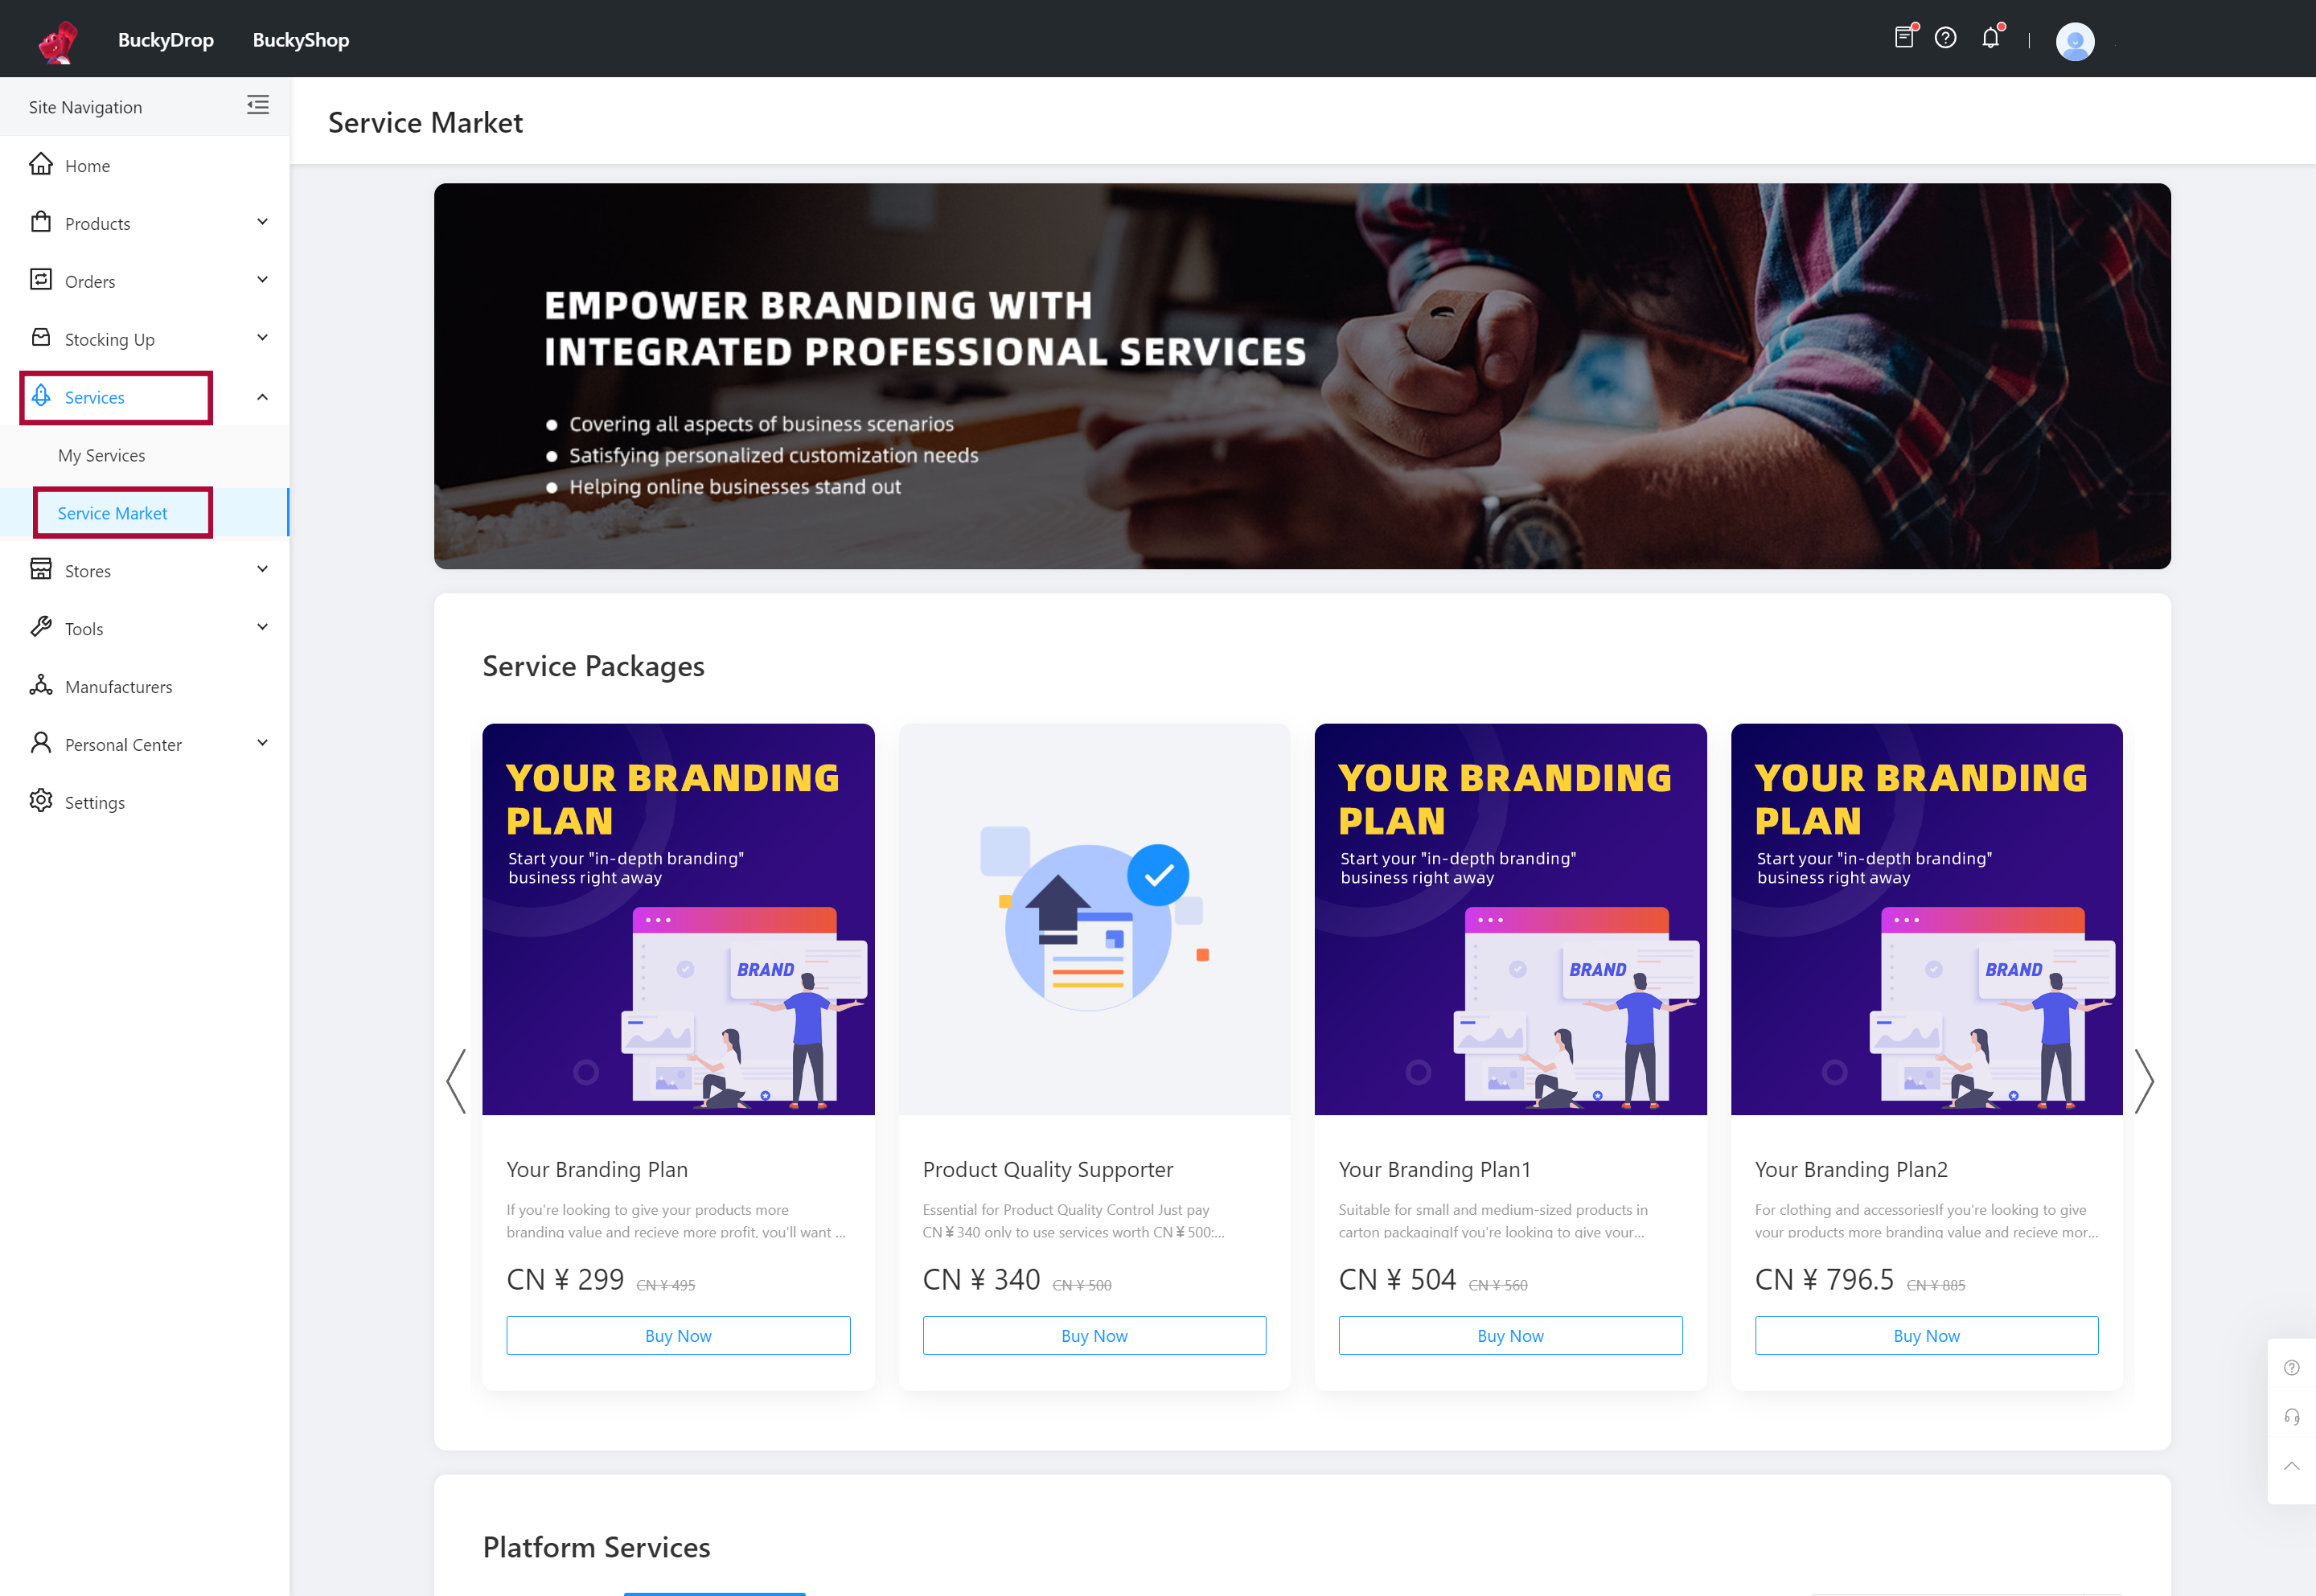
Go to Services > Service Market. Here, you can view and purchase all services and packages.

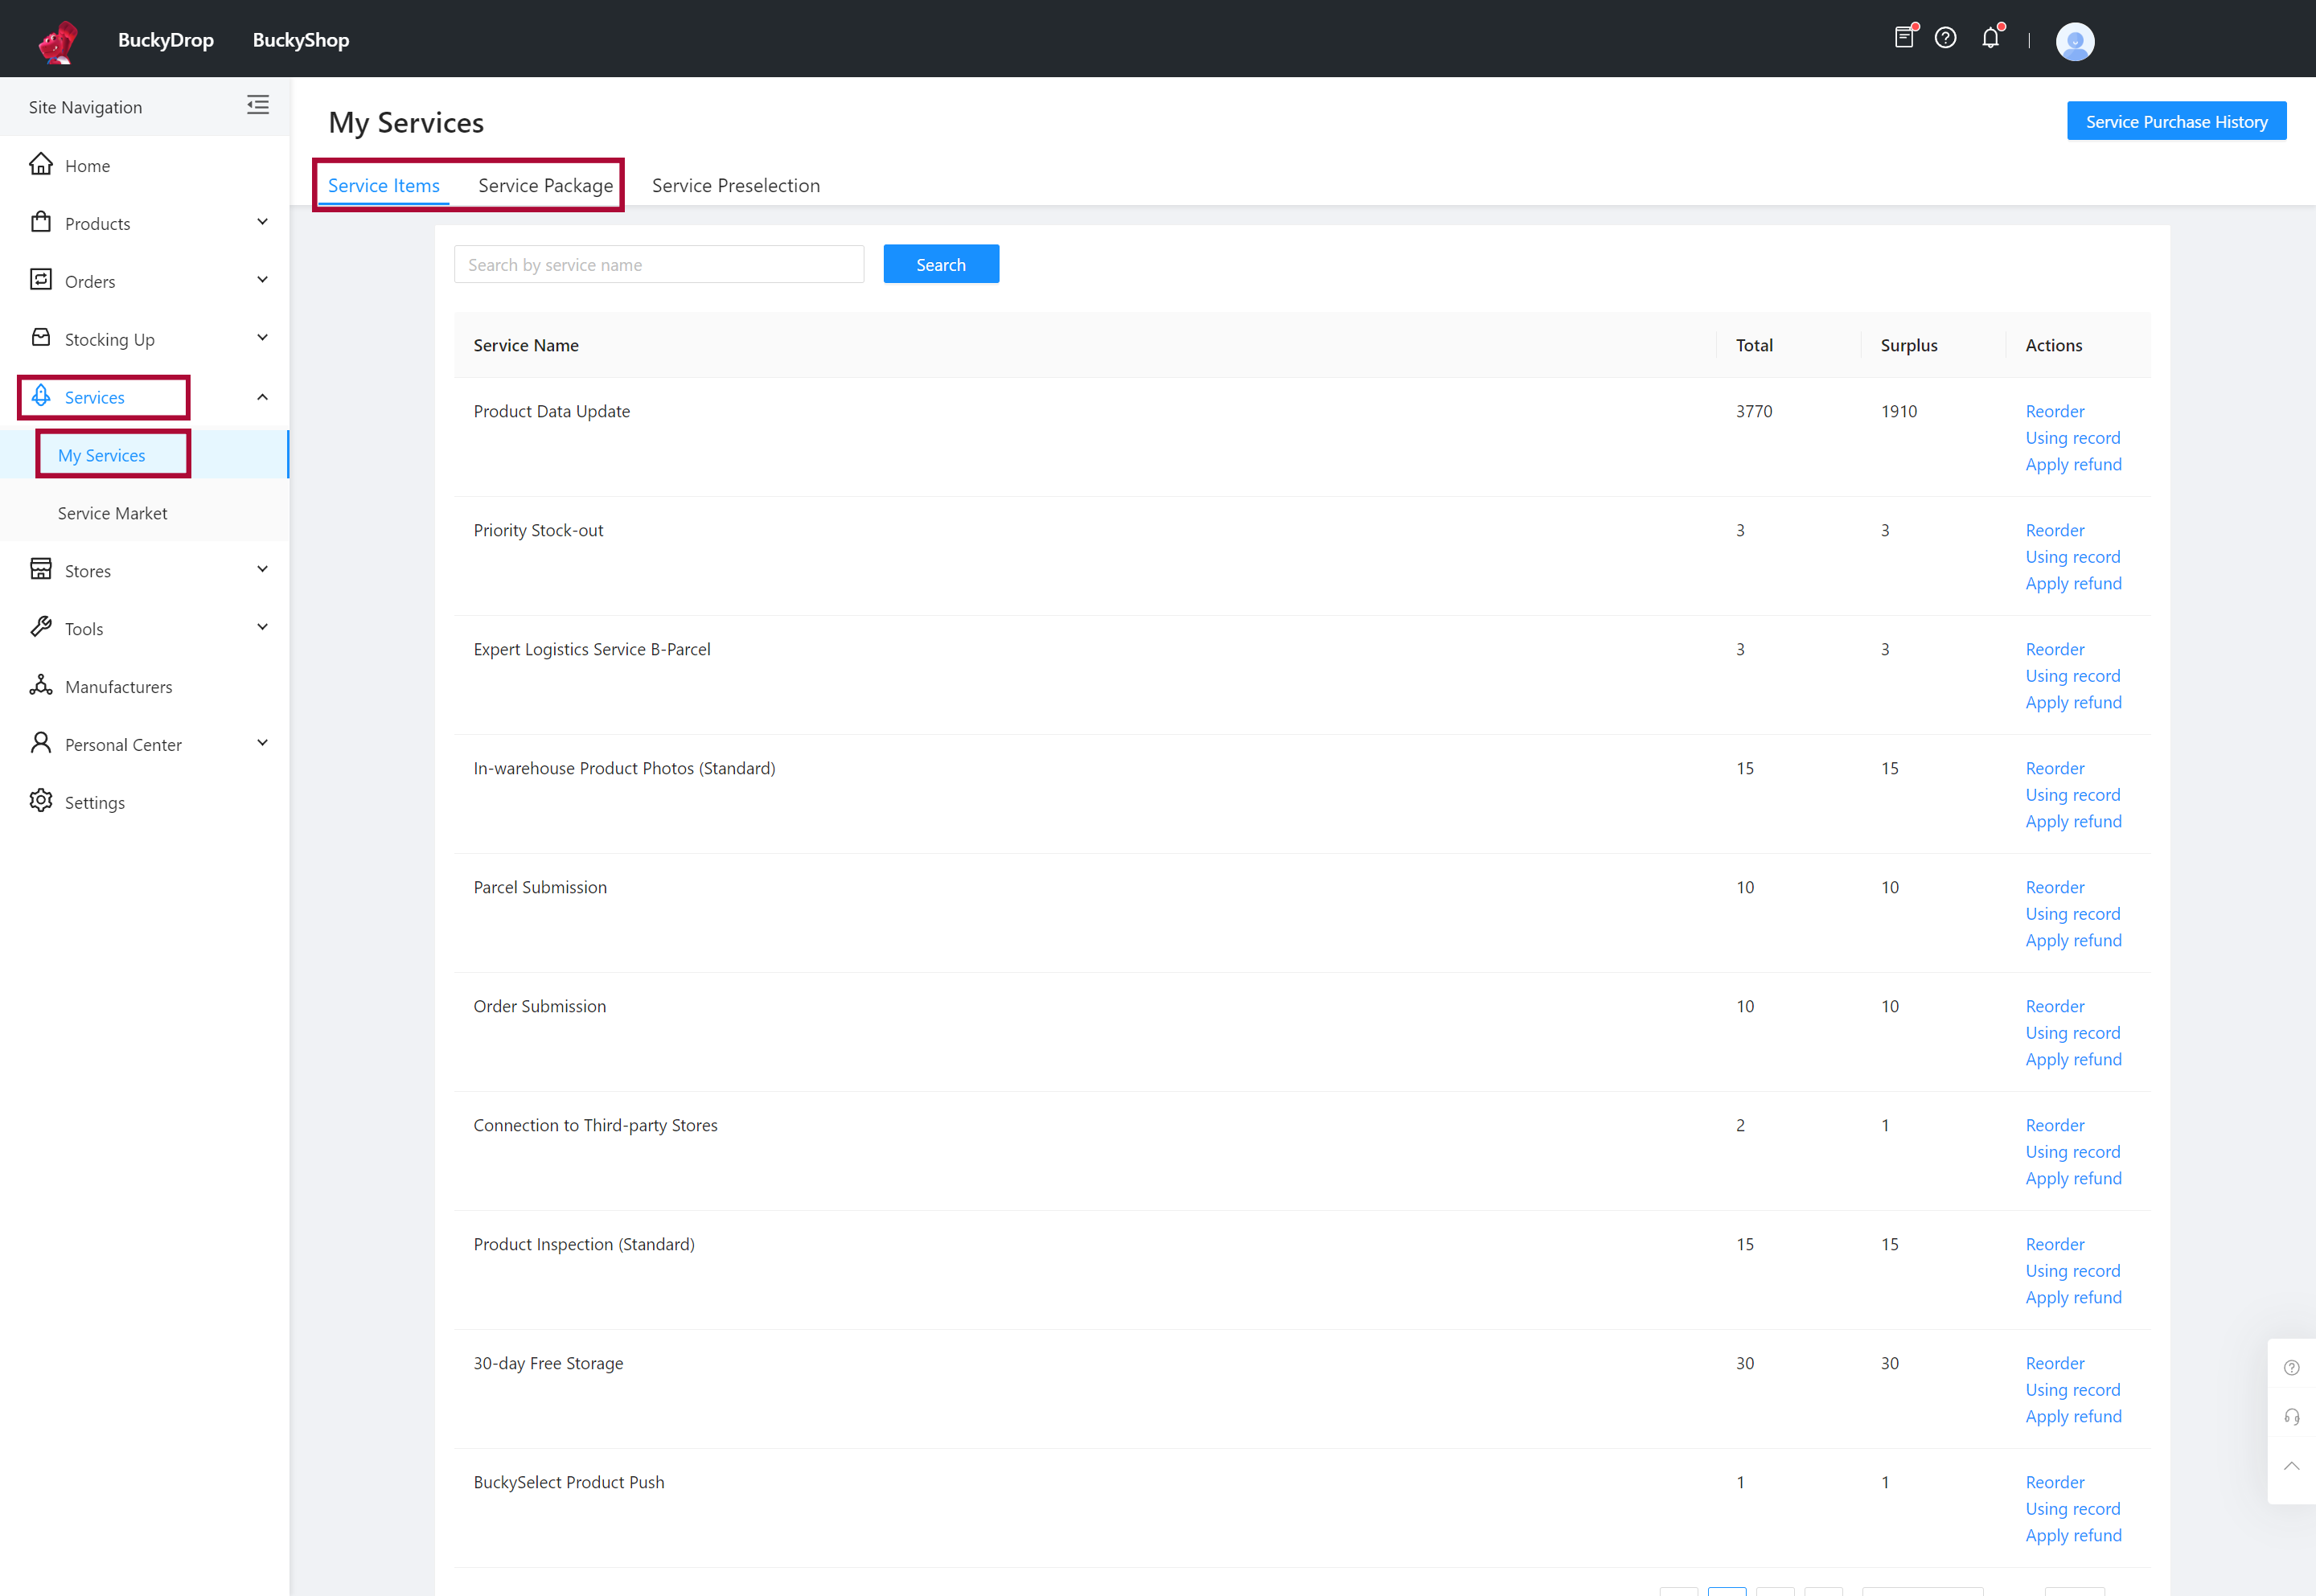
Go to Services > My Services. Here, you can view and manage the services and packages you have purchased.
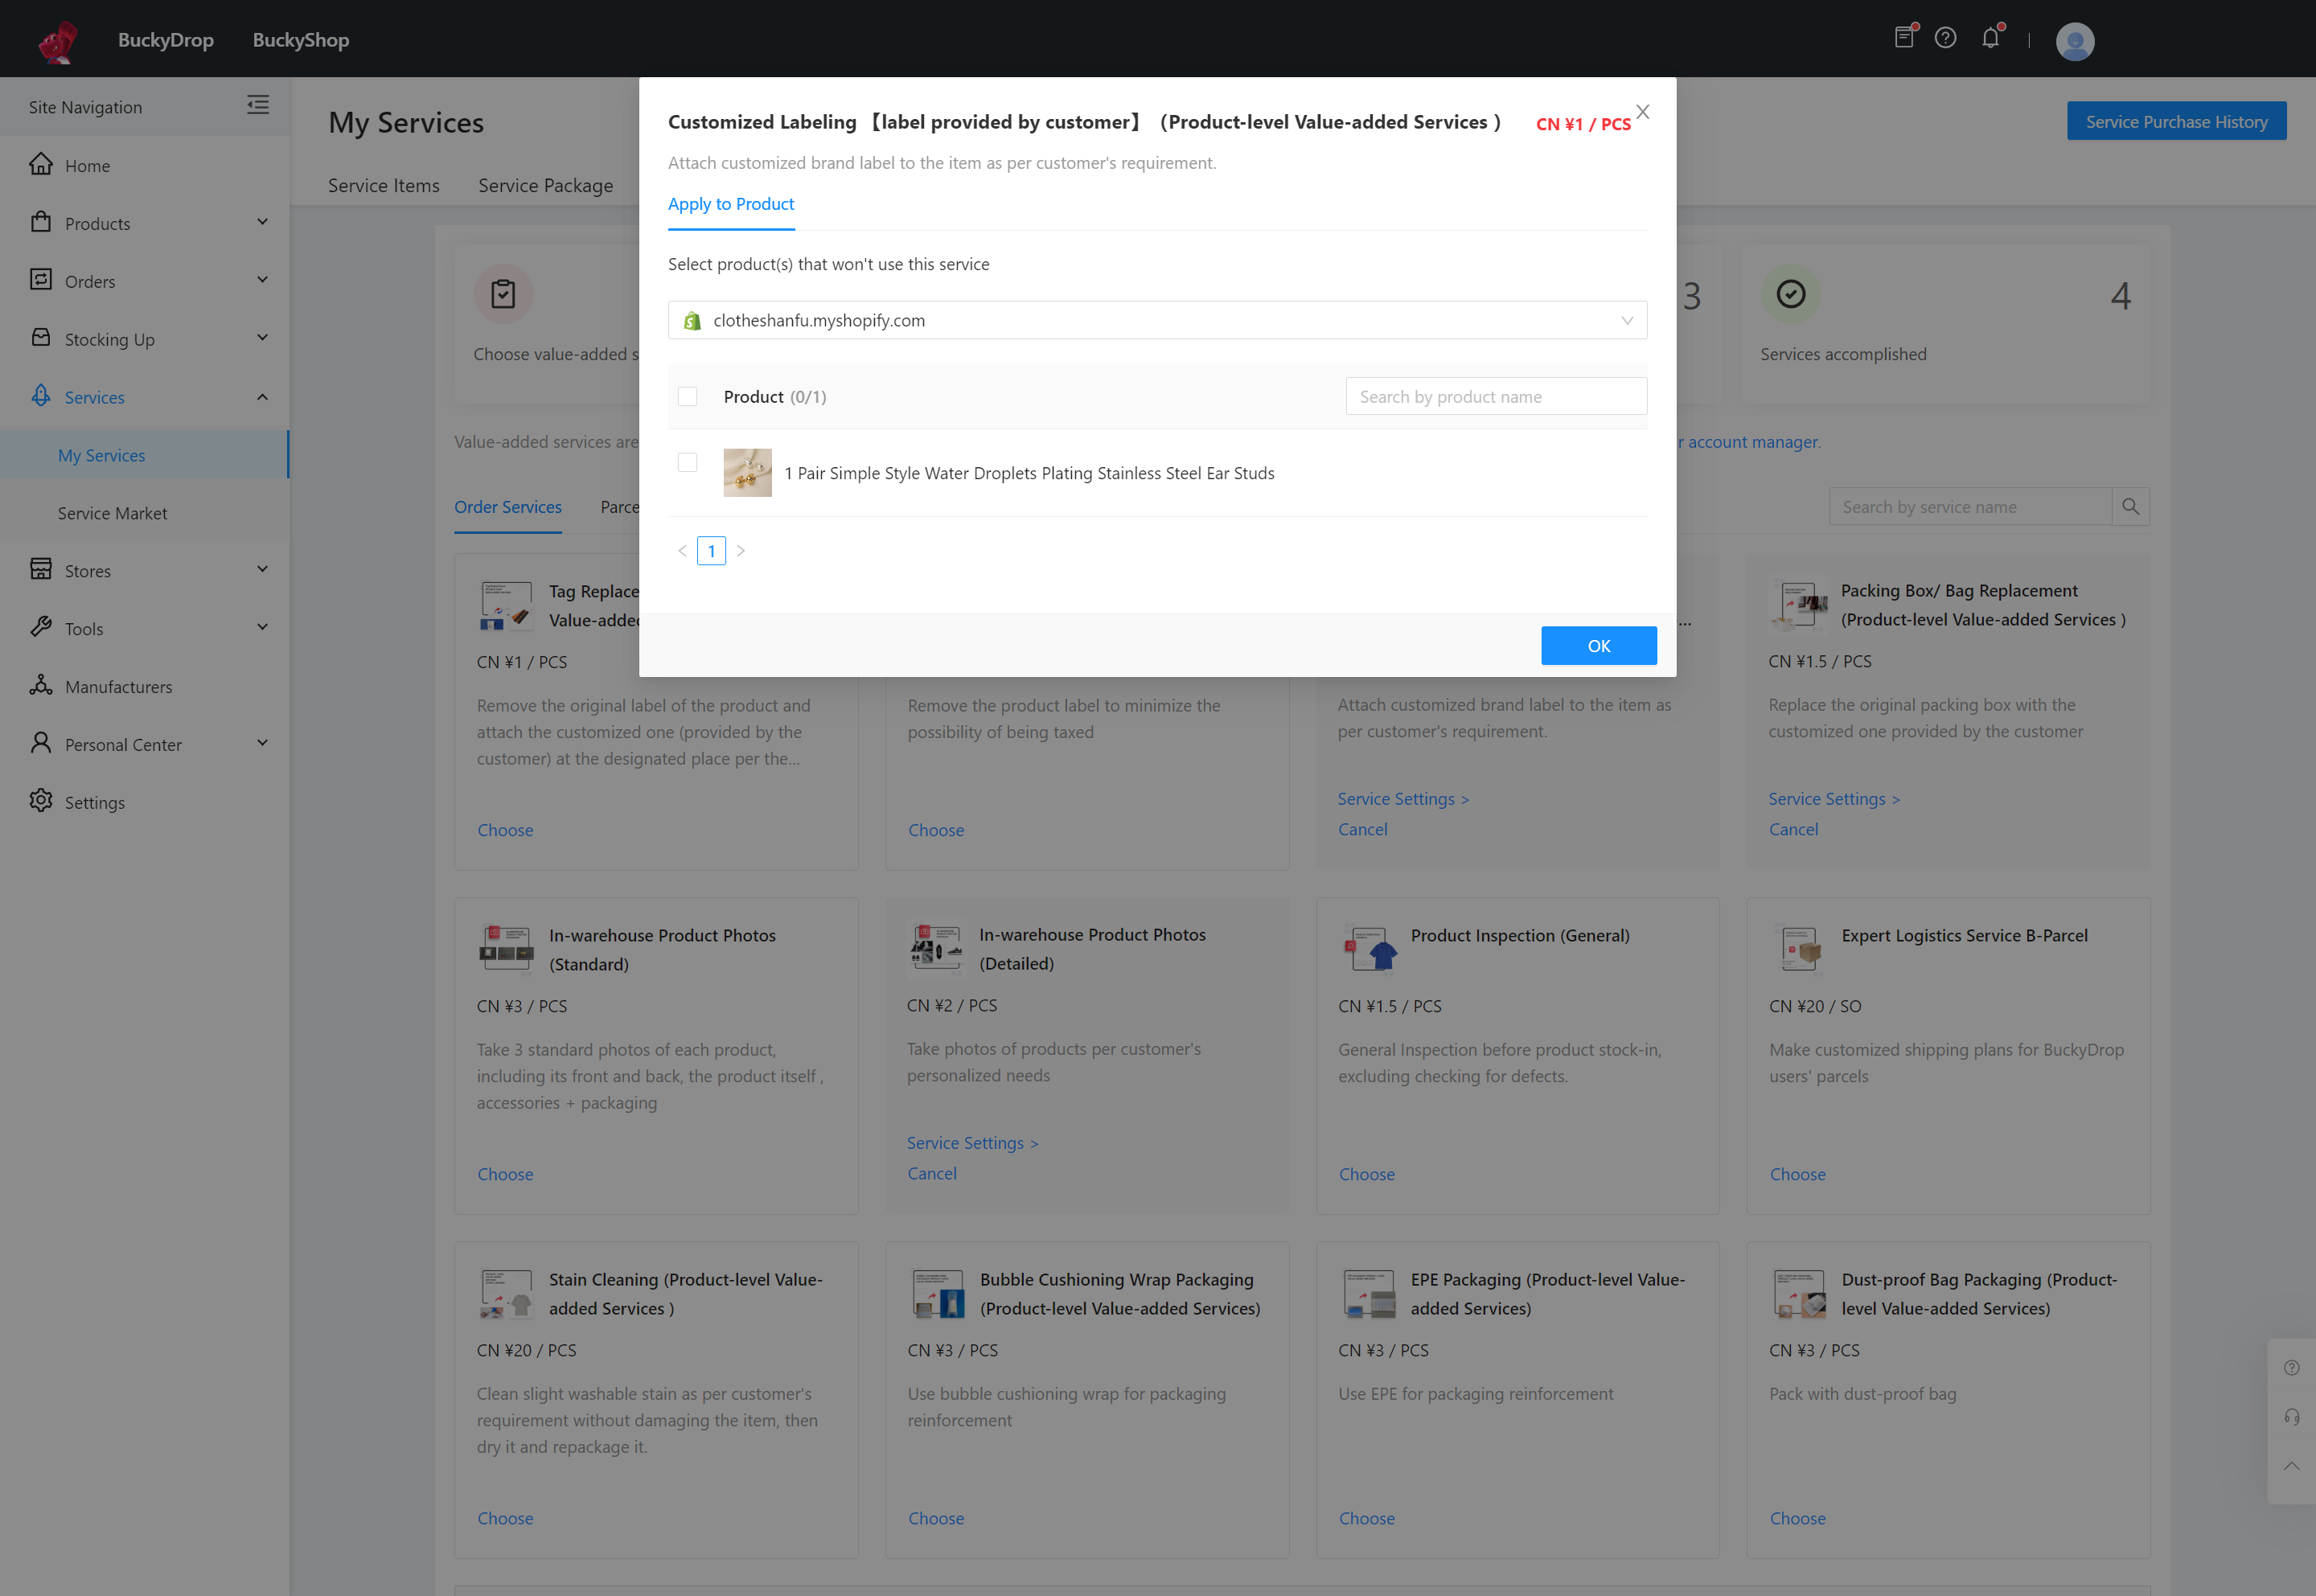
Go to Services > My Services > Service Preselection. Here, you can select services to be automatically applied to purchase orders and packages. You can also set specific stores or products where the service should not be applied.

8. Settings
BuckyDrop supports automation settings, including store rules, order settings, and logistics configurations. You can freely enable and adjust these settings according to your business needs, significantly reducing manual operations, improving operational efficiency, and enhancing resource management. This allows you to manage your business with ease and efficiency.
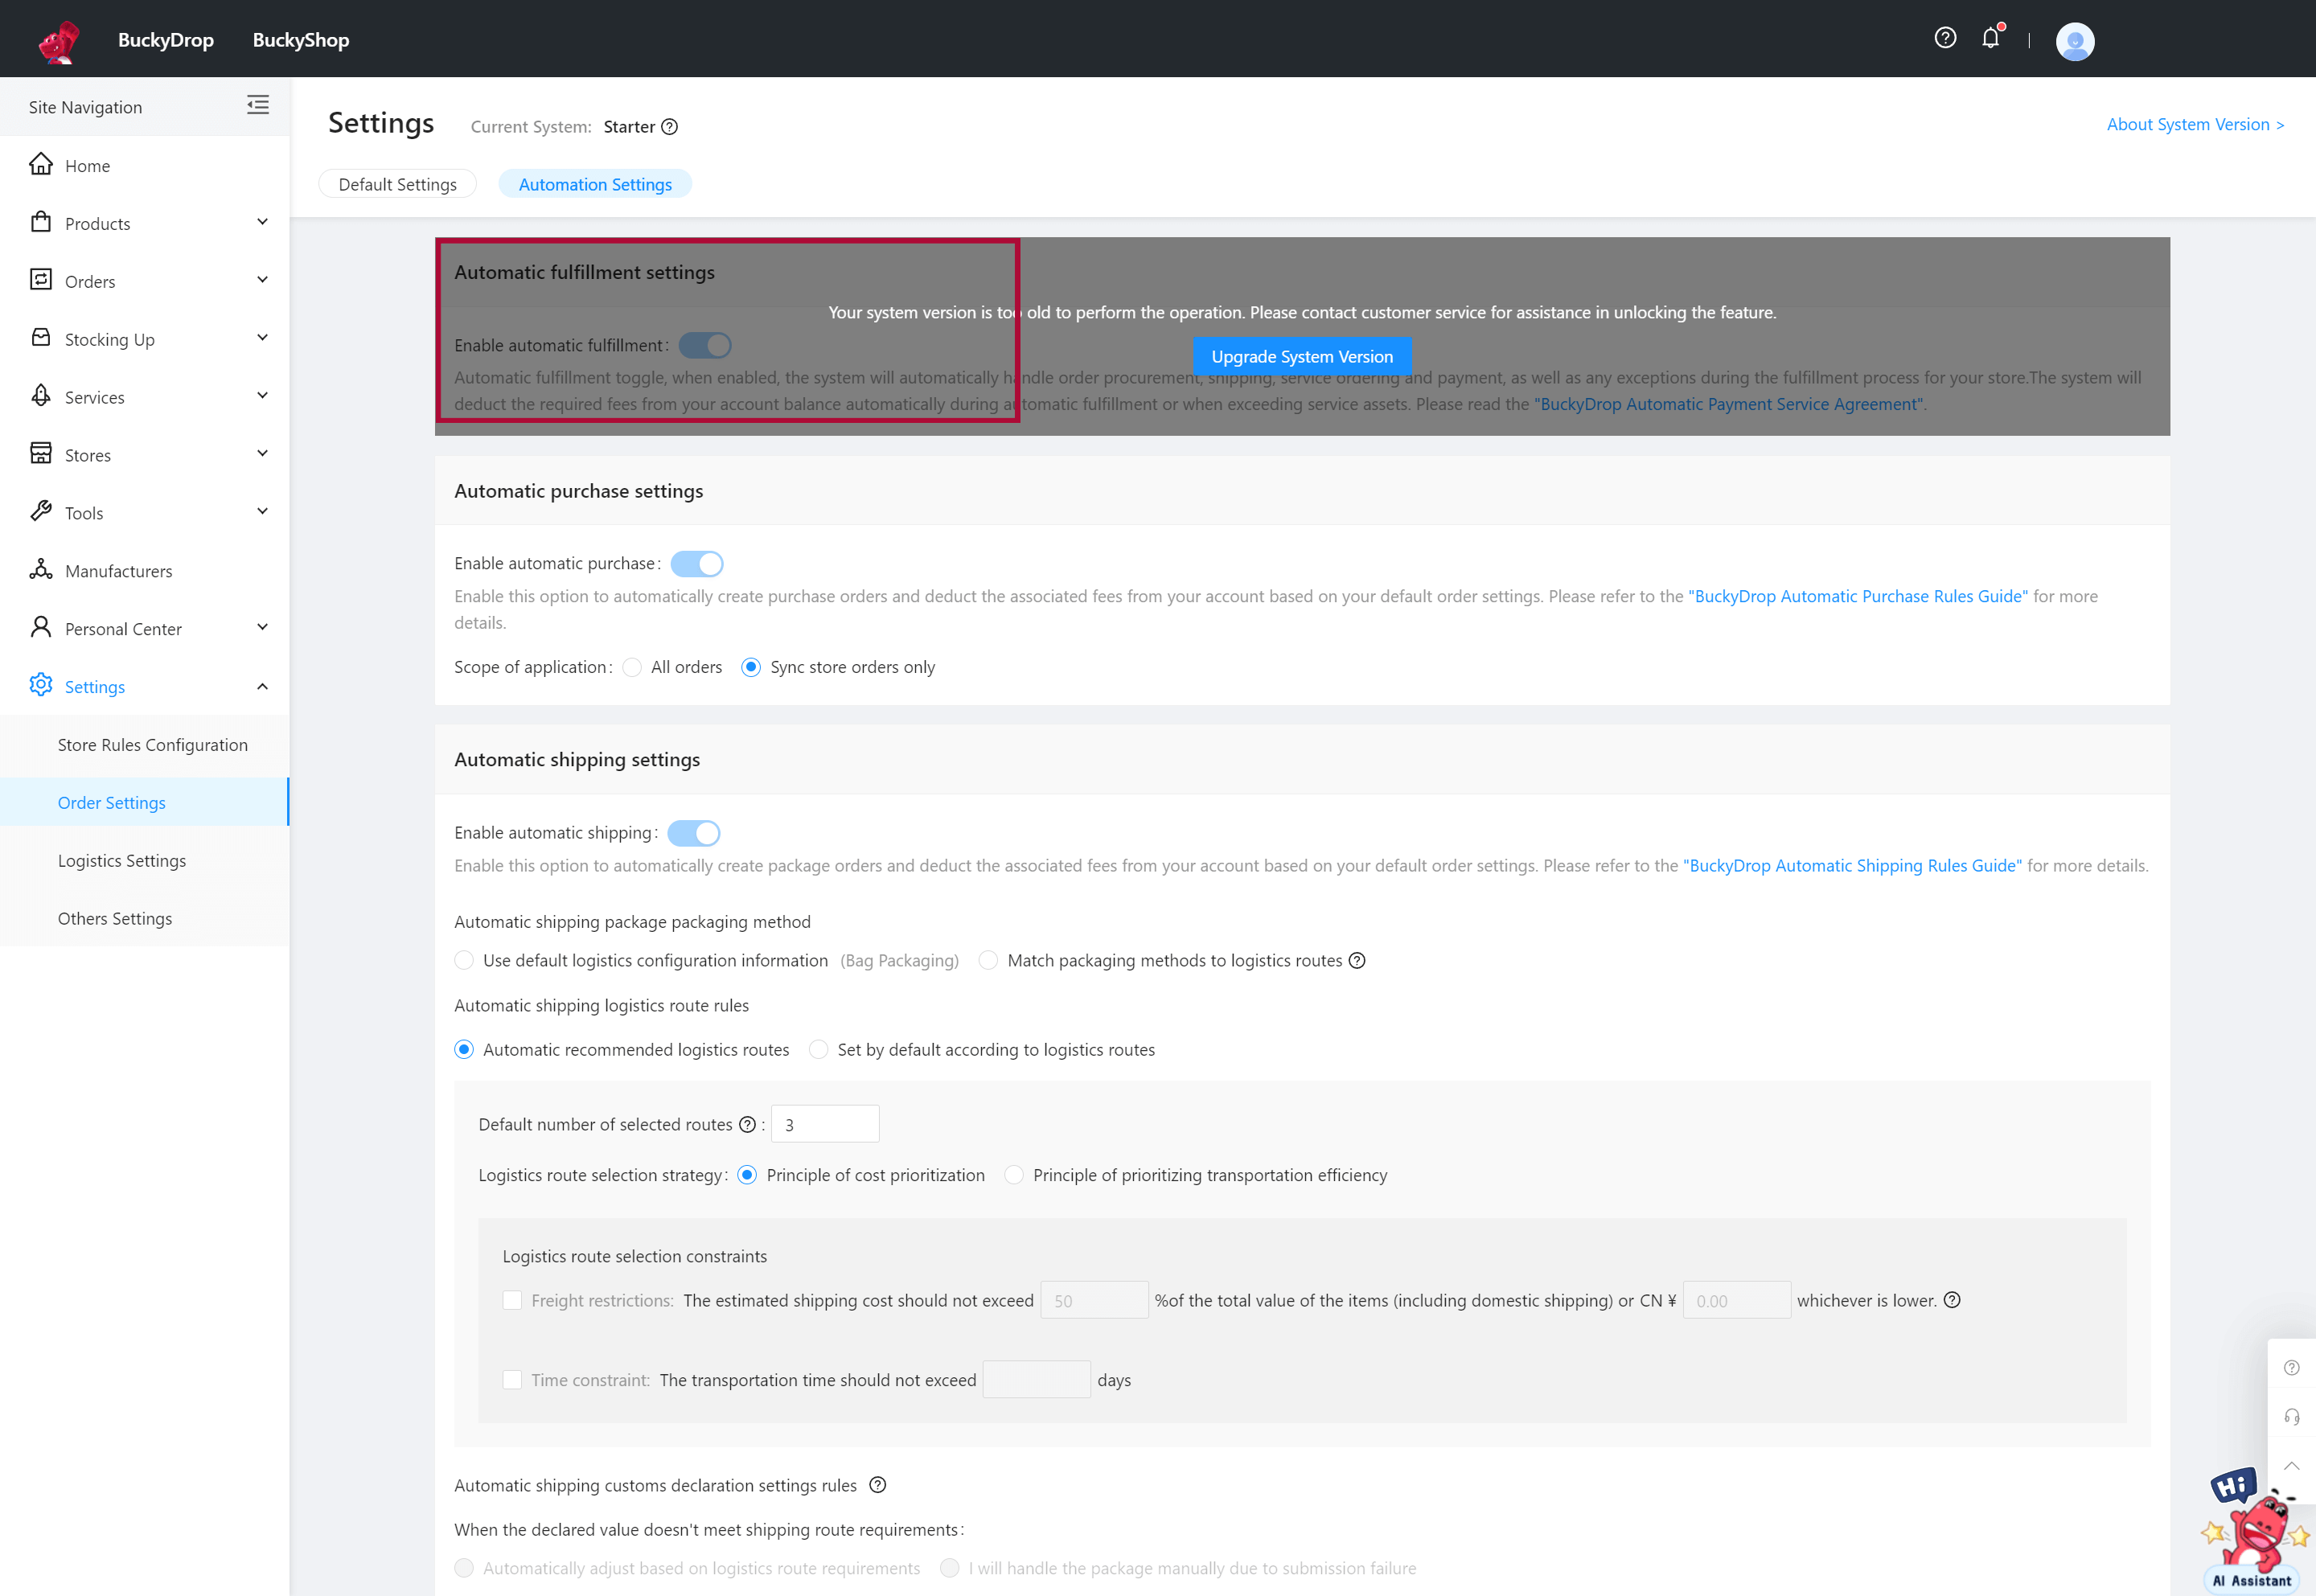
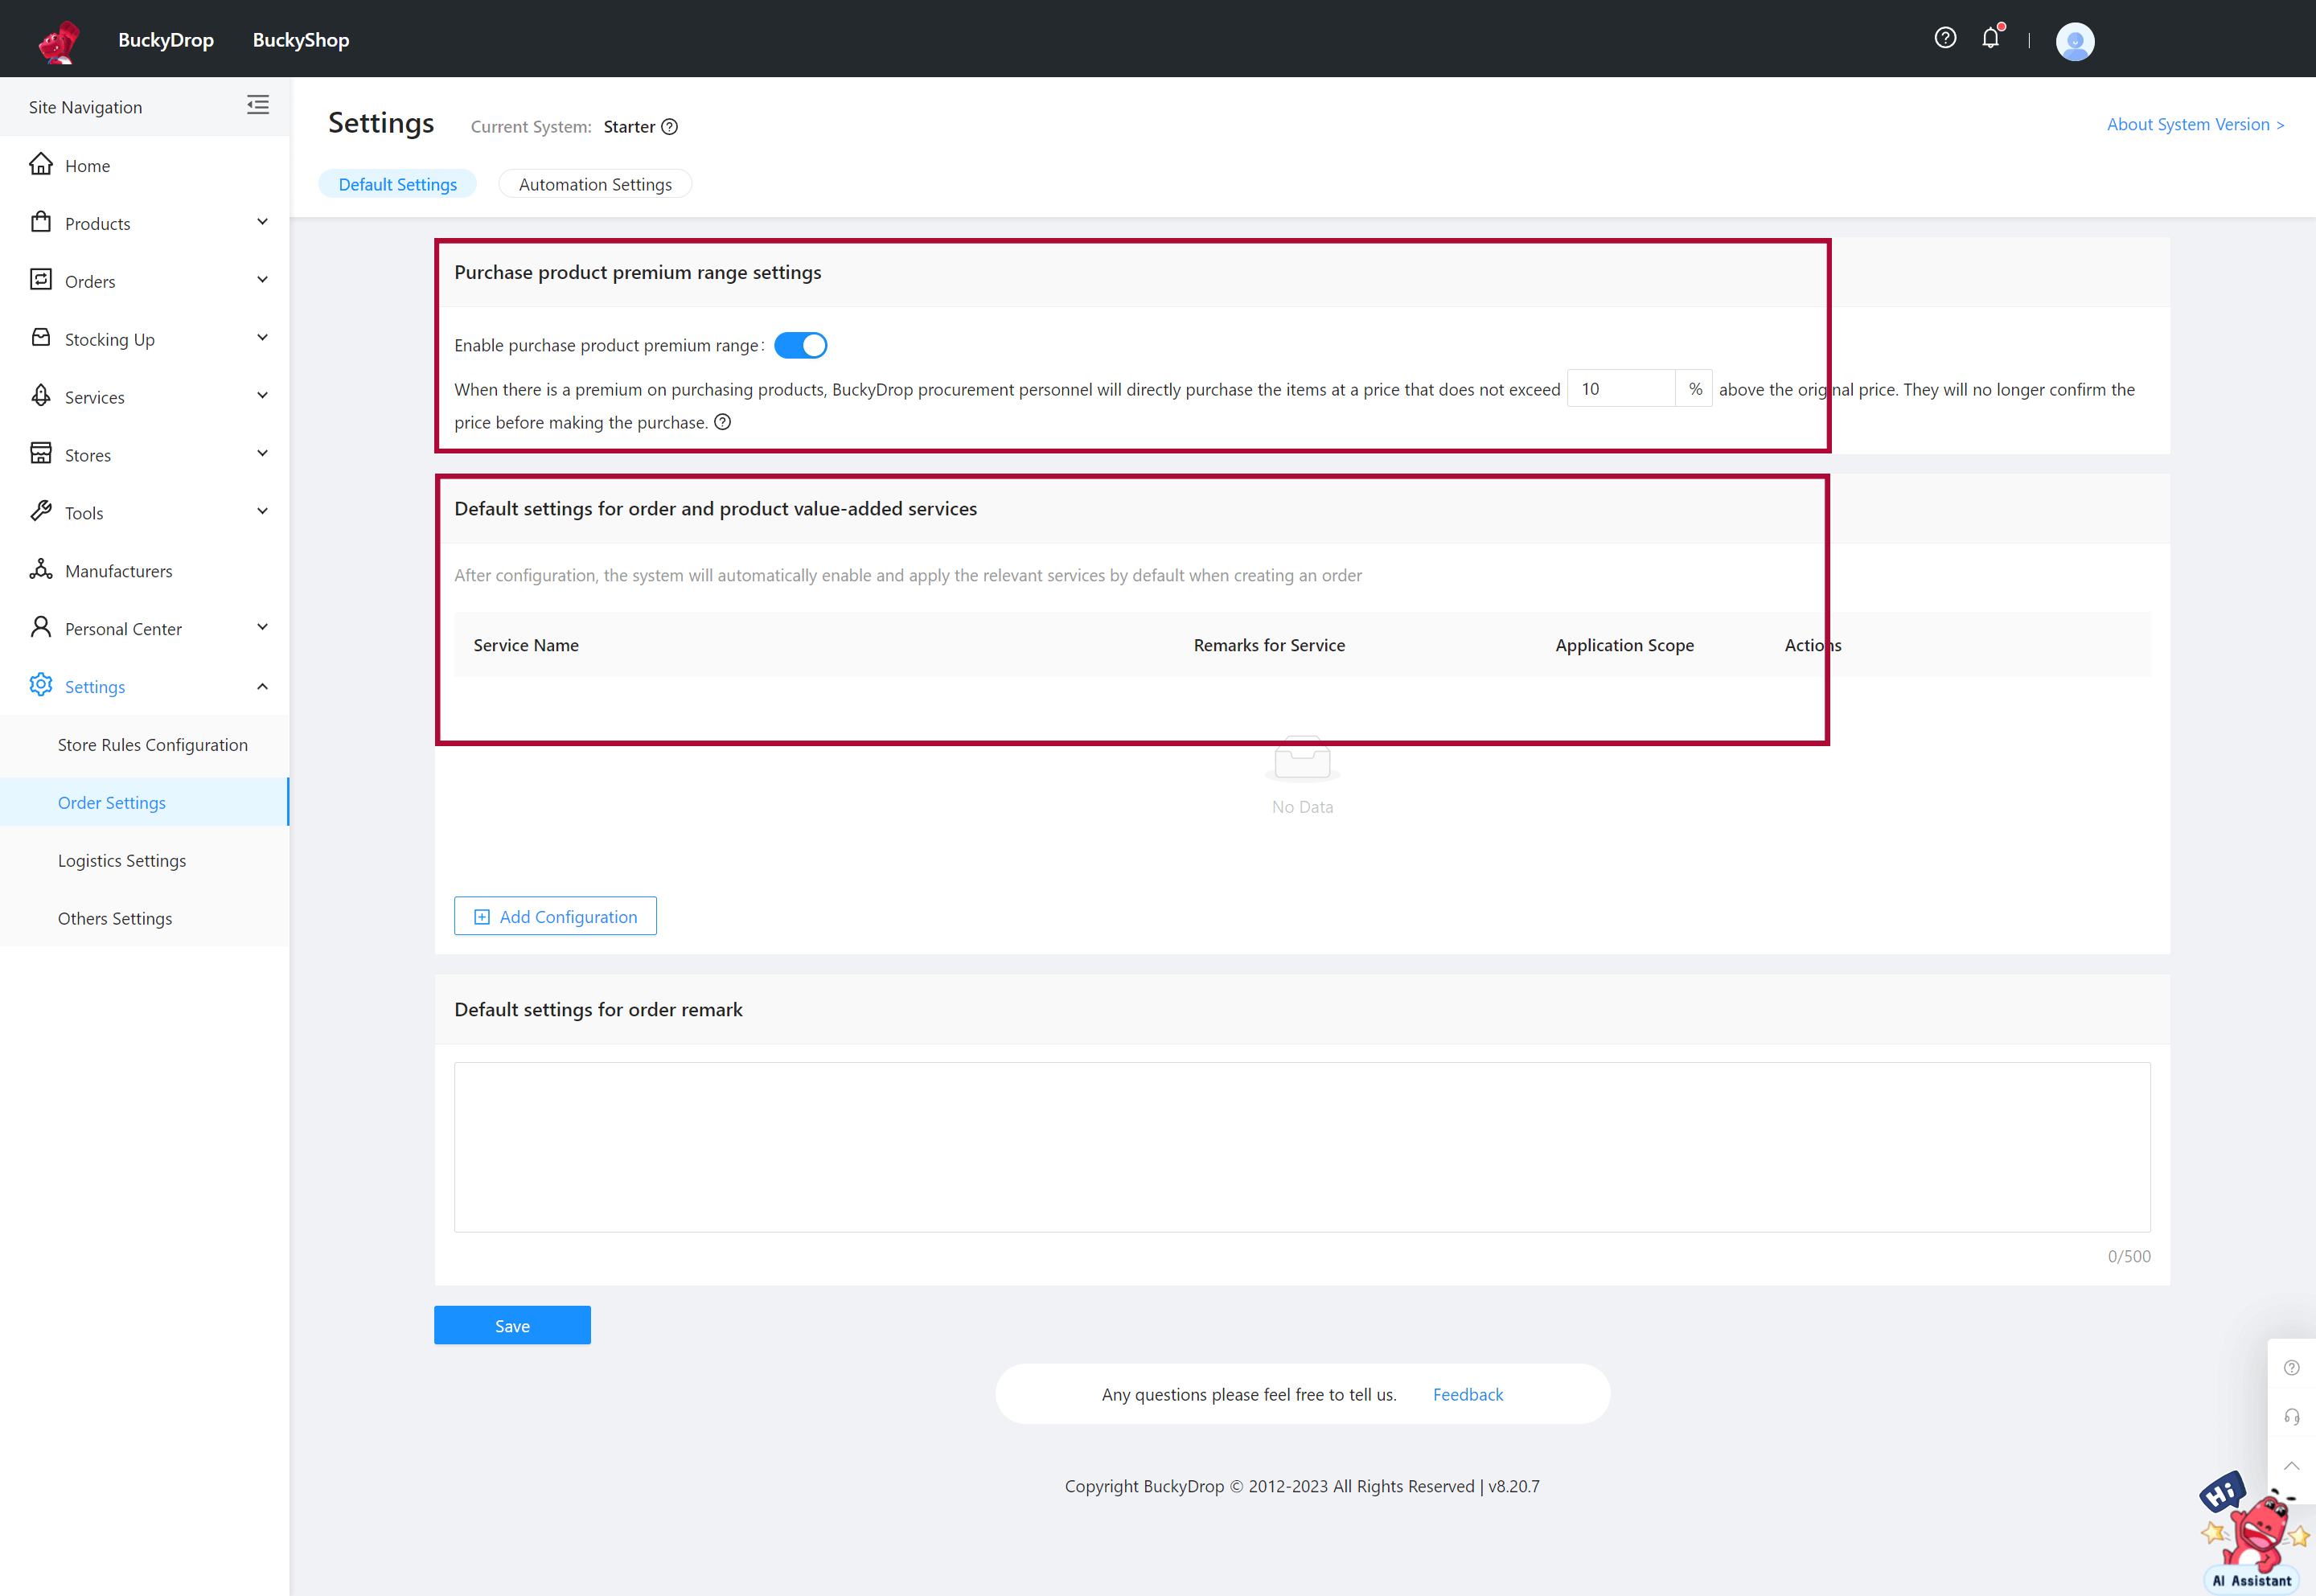
Go to Settings > Order Settings. We have enabled automatic fulfillment and set the default range for purchase product markups. You can also add default order and product value-added services. This ensures that BuckyDrop automatically completes order submission, handles purchase markups, and applies default order and product value-added services.
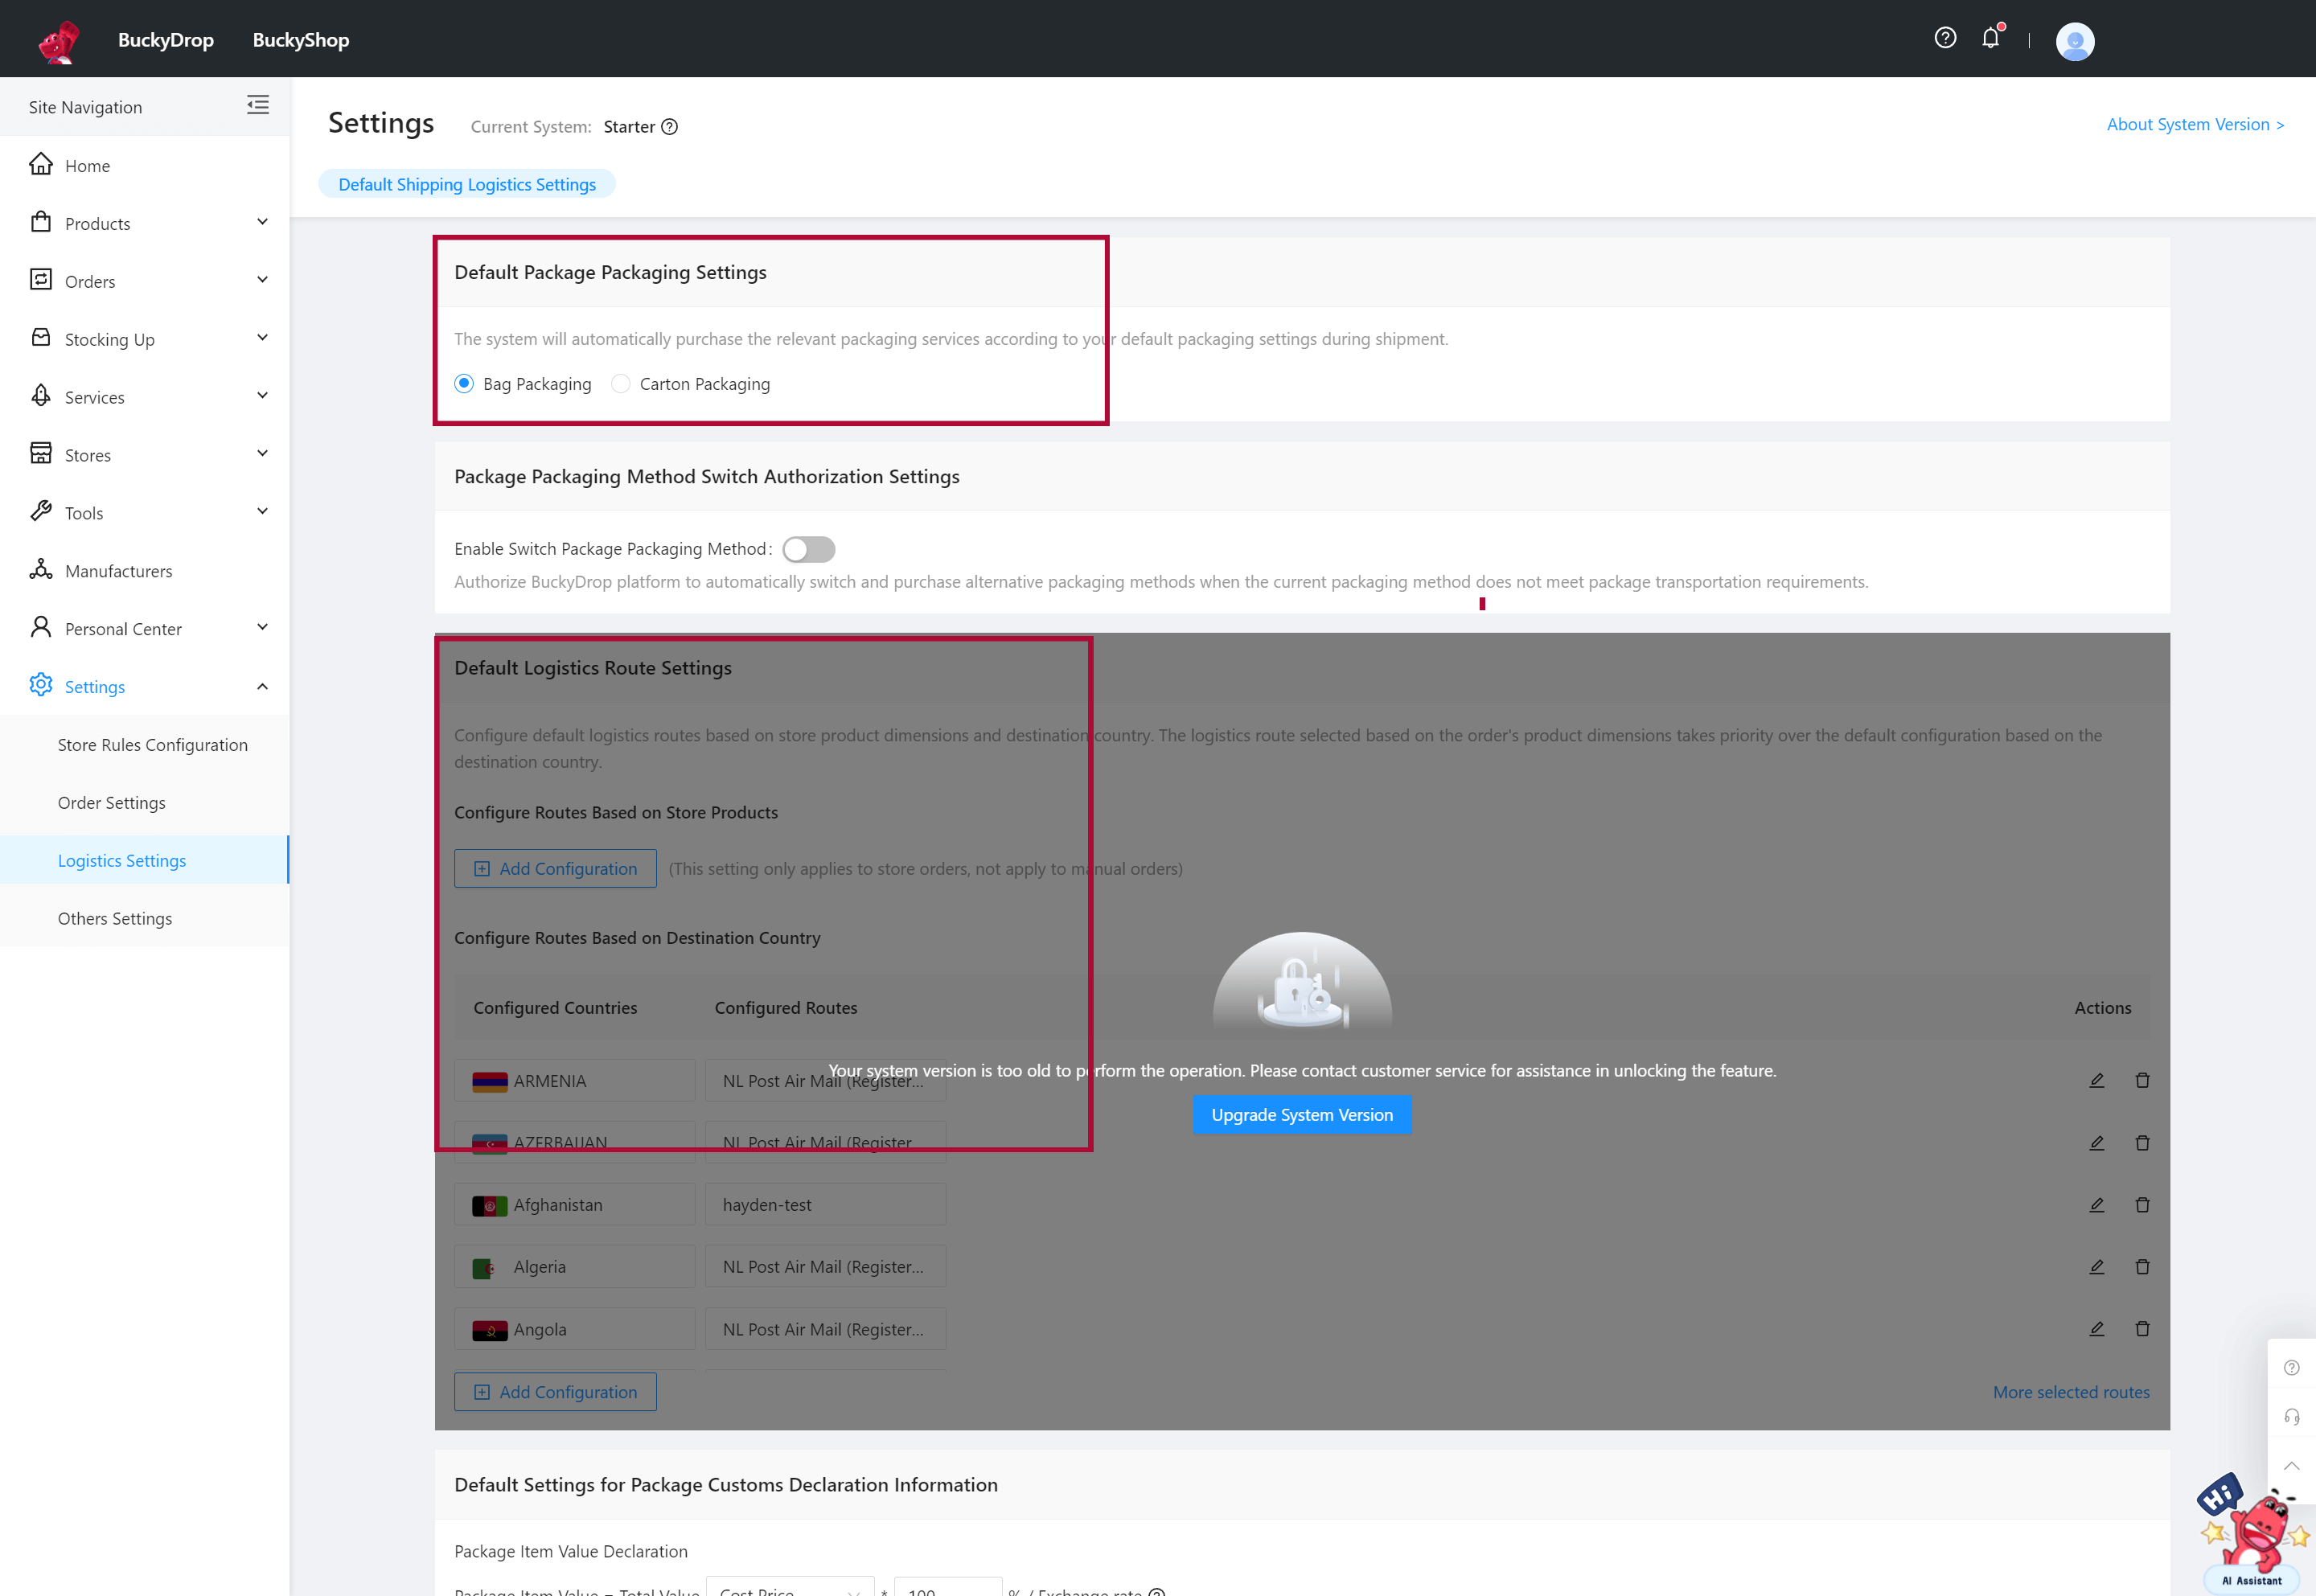
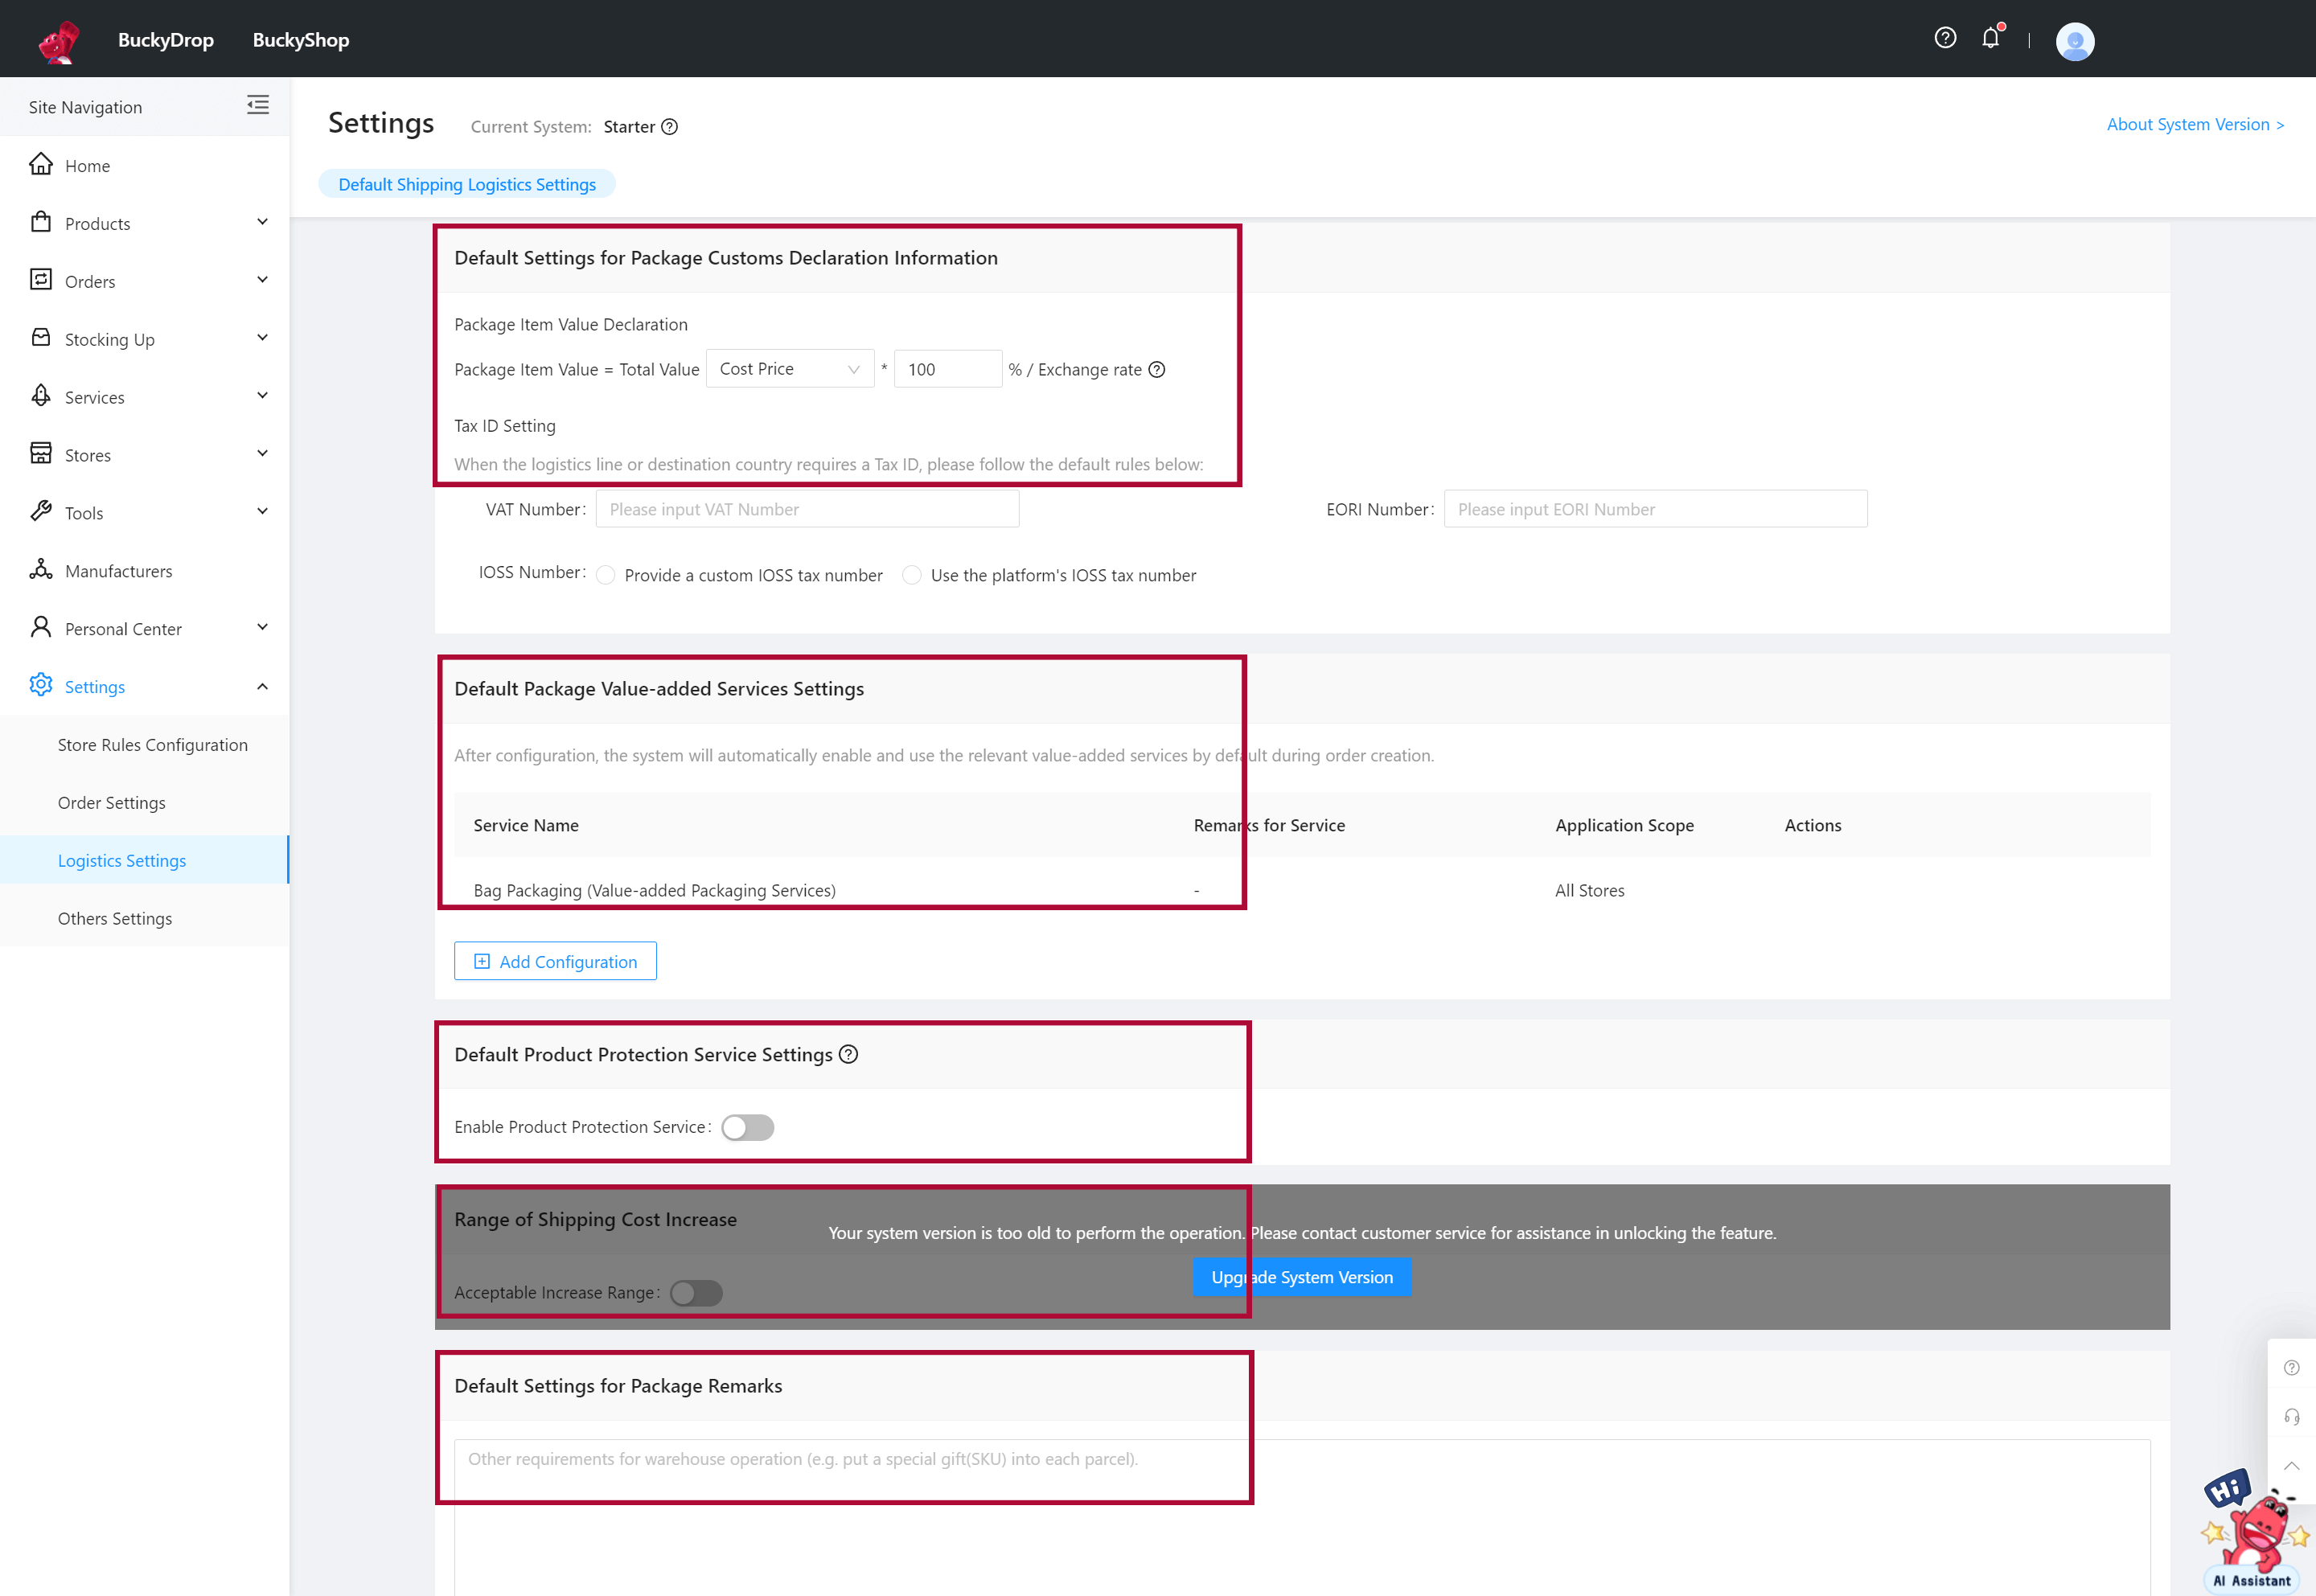
Go to Settings > Logistics Settings. We have already set default rules for selecting shipping routes, package packaging methods, and default package value-added services. BuckyDrop efficiently handles logistics-related matters. Additionally, you can flexibly configure logistics rules based on your needs, such as customs declaration information for packages, product protection services, shipping cost markup ranges, and package notes.
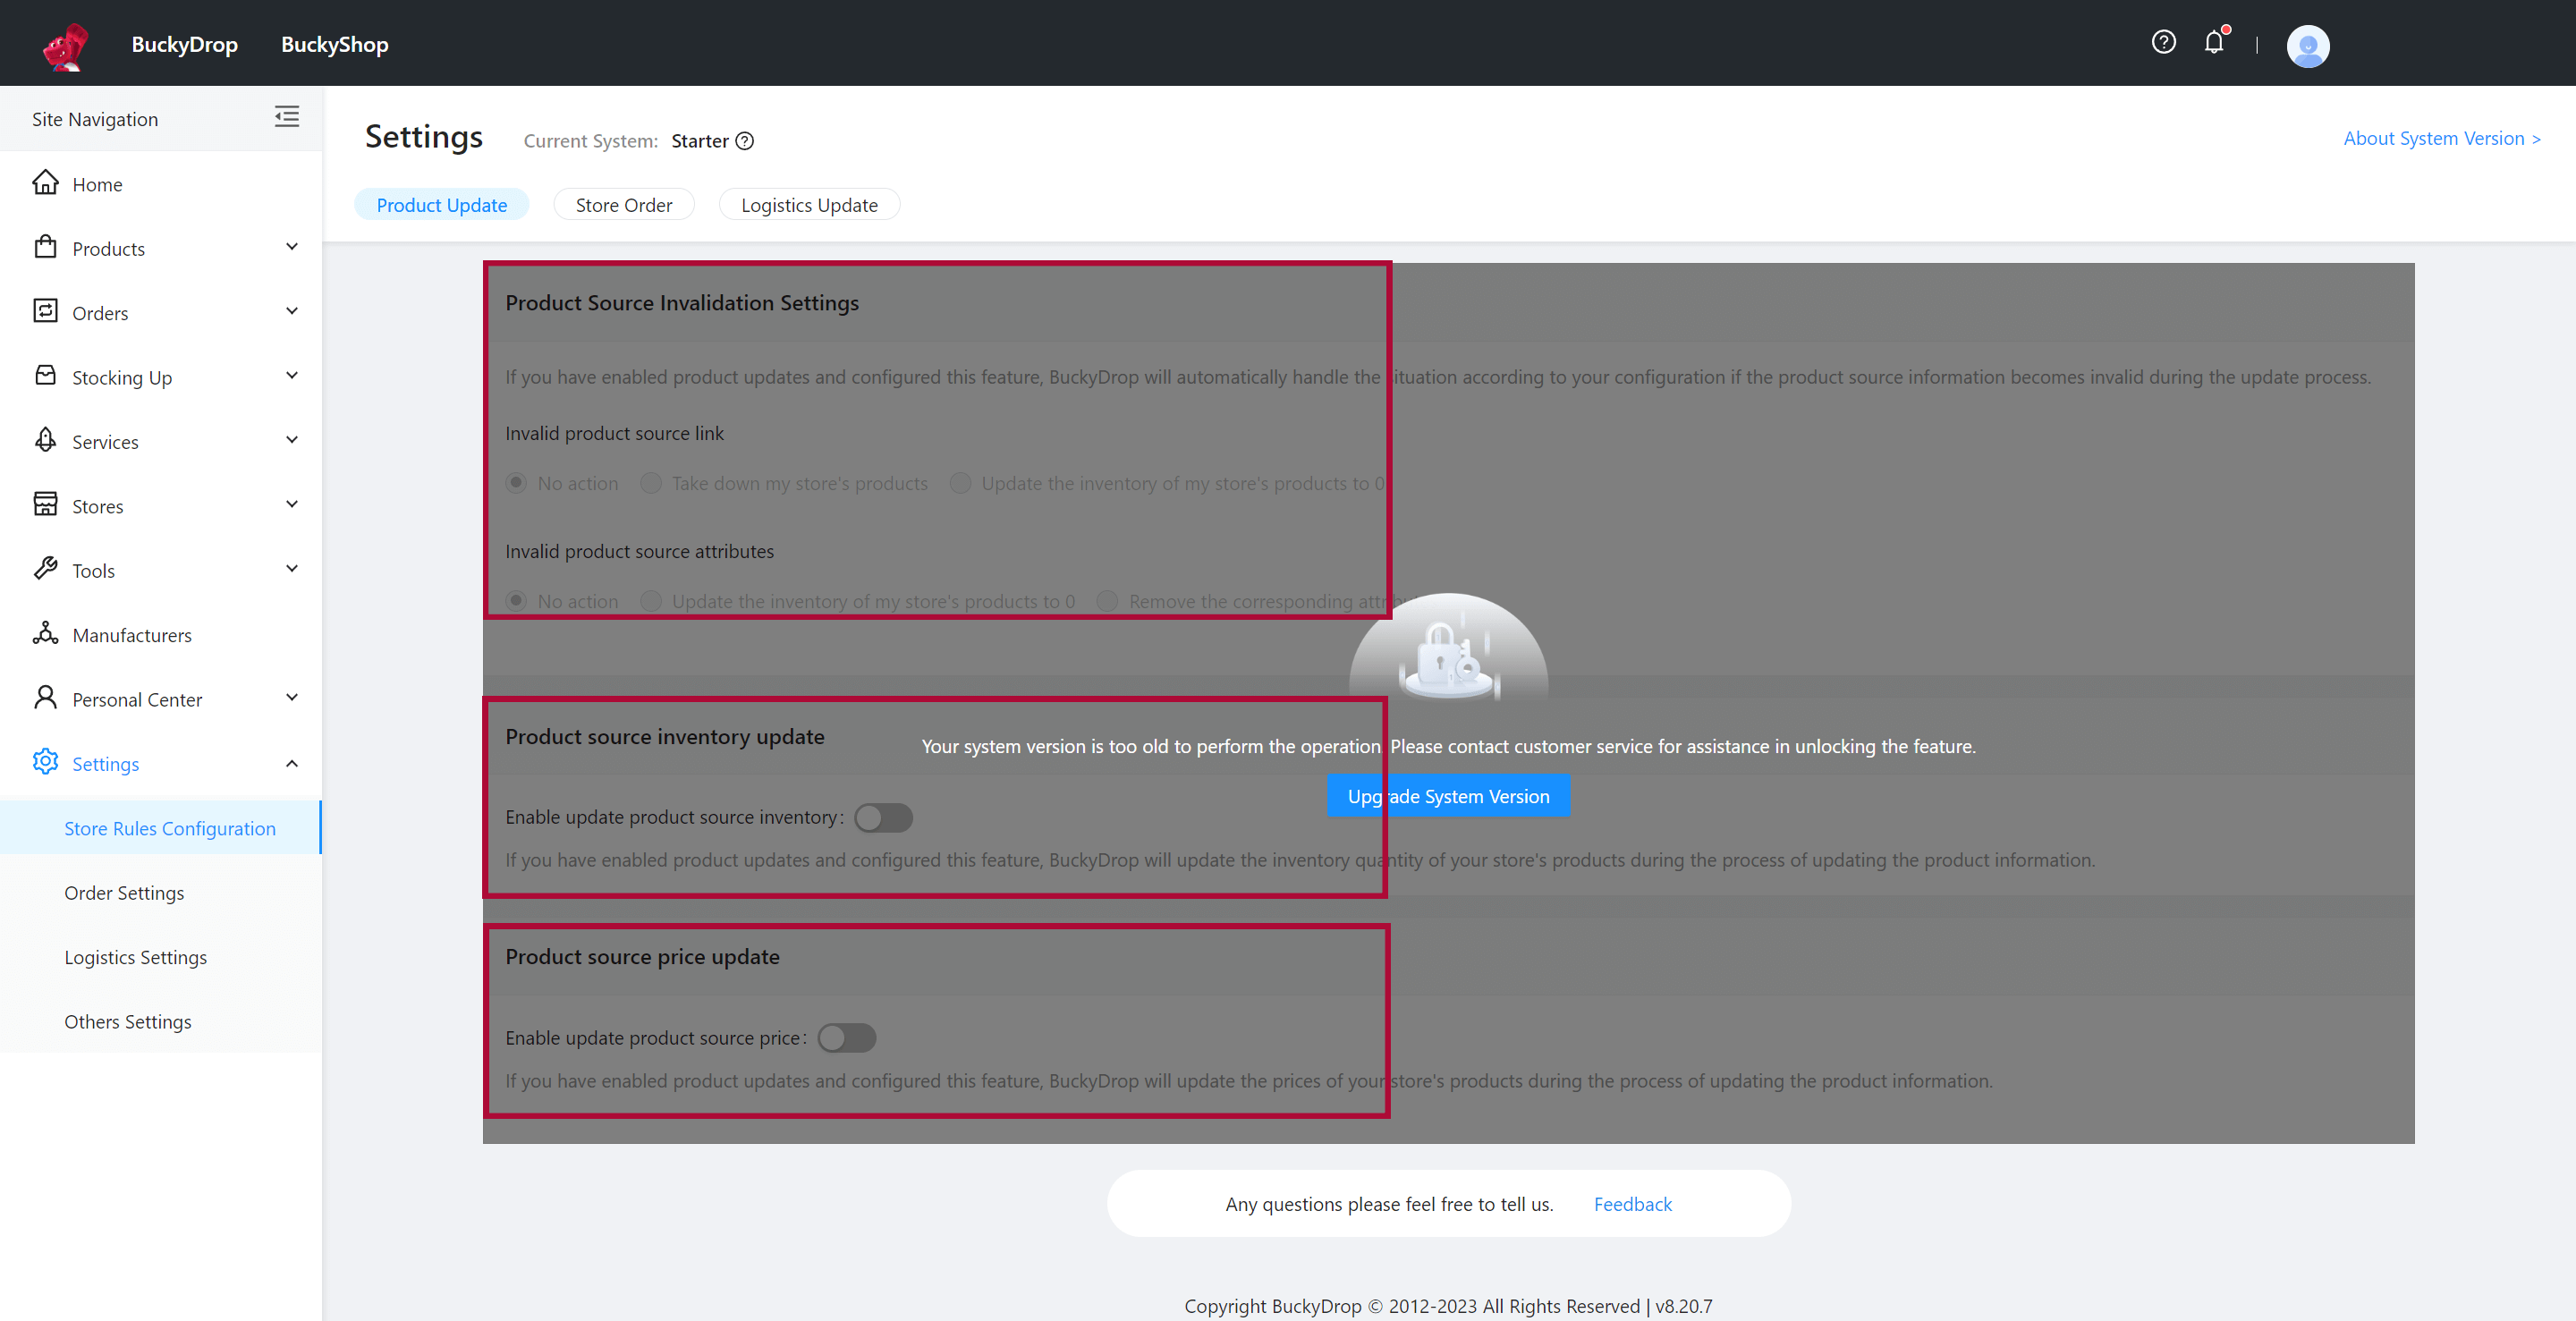
Go to Settings > Store Rules Settings > Product Update, you can configure product update rules to ensure accurate and up-to-date information in your store. This includes setting rules for updating expired product sources, inventory updates, and price updates. Please note that these rules require contacting your account manager to enable.
Go to Settings > Store Rules Settings > Store Order, we have enabled the default store order synchronization feature to ensure timely updates and accurate synchronization of order-related information. Based on the current settings, stores connected with BuckyDrop will automatically synchronize all order information to BuckyDrop, including products, prices, quantities, recipients, and more.

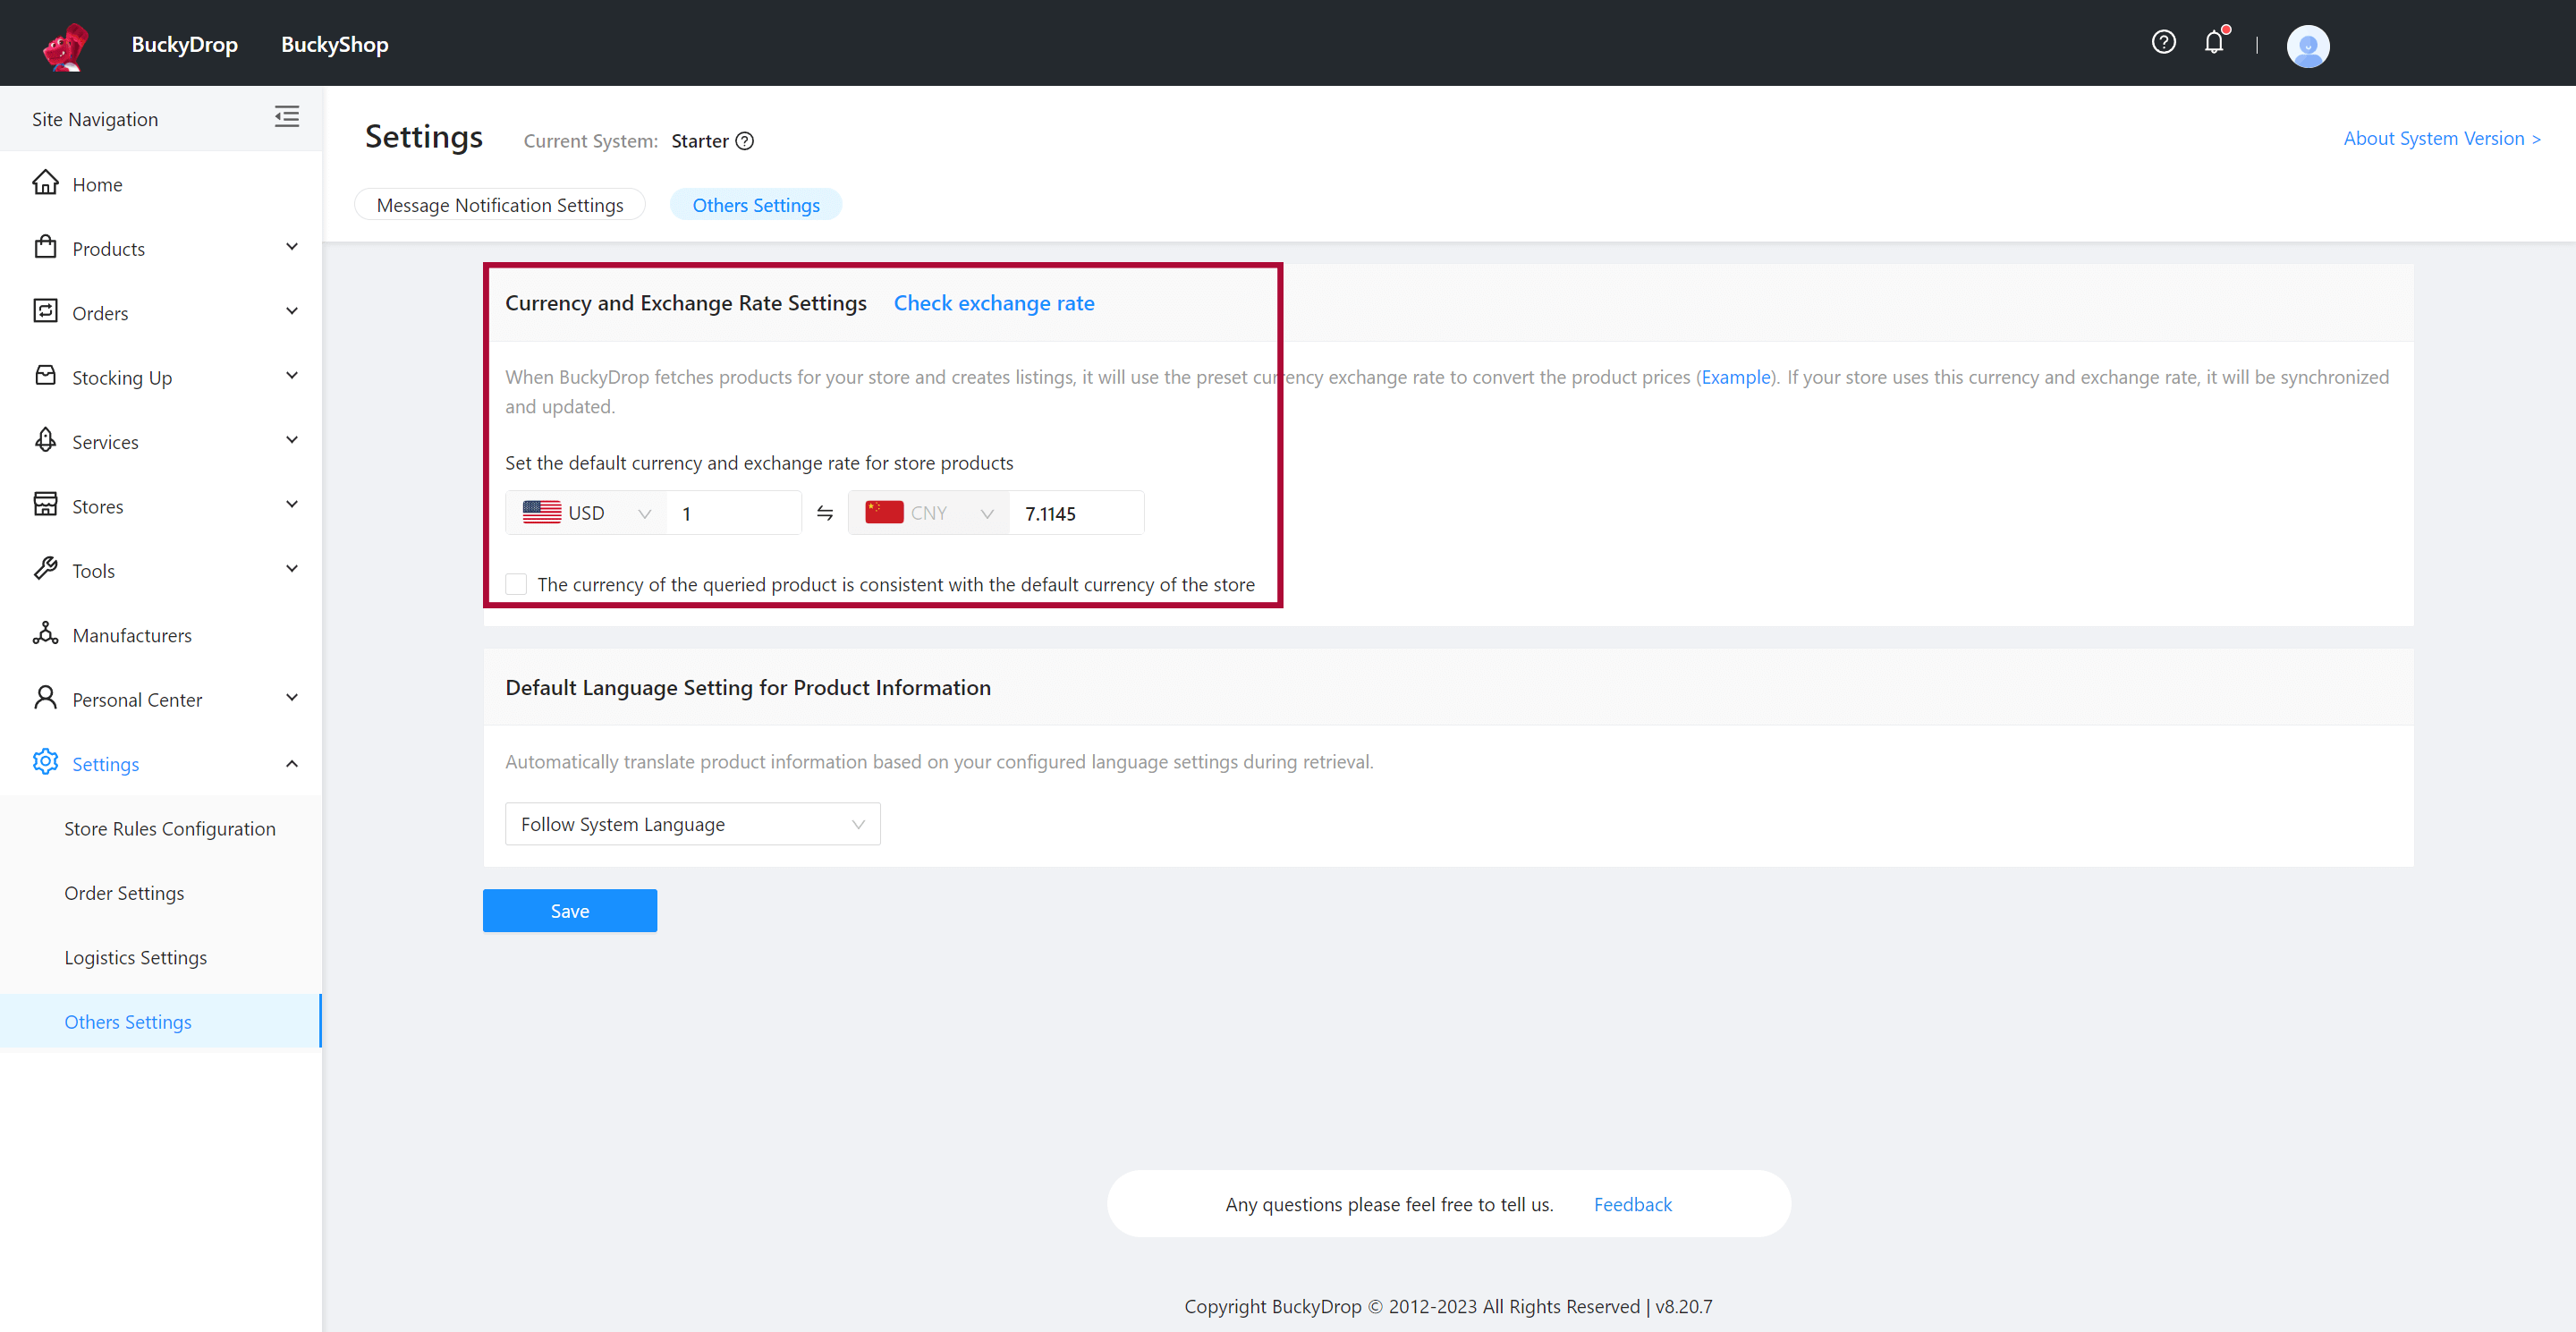
Go to Settings > Others Settings. We have set the default currency for your store as well as the conversion rates used for saving, pushing, and auto-updating products. Currently, the default currency is USD, and we have also pre-set the exchange rate between USD and CNY.